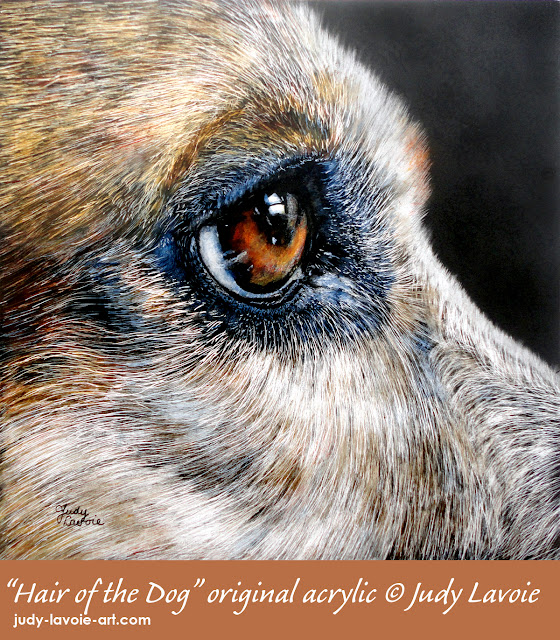
“Hair of the Dog” is done on a different type of clay panel from my recent painting “Just Jasper.” The latter was done on Aquabord®, a panel with a layer of white clay with a slight texture. This time I’ve used a product from the same manufacturer – Ampersand Art – called Scratchbord®. It is a panel of hardboard coated with very smooth white kaolin clay then sprayed with a thin layer of black india ink. India ink can be thinned with water when wet, but is not water-soluble when dry, so this panel’s surface can be painted over with water media. The black surface is etched into with a blade or other abrasive tool to reveal the white clay layer. The panel can be painted also and any area of white will accept the color. Scratching through the painted area will reveal the white again, so different values can be created this way. The board can be re-inked, re-painted, and re-scratched multiple times to build texture, value, and details. The black surface left as the background creates a very dramatic image, since it is so bold and stark. Furry and feathered critters are a natural for this surface, but any subject can be rendered.
 Of course, starting with a solid black surface requires a bit of reverse thinking – negative thinking actually. It’s a subtractive process, where different etching and abrasive materials will reveal the white surface. In traditional watercolor, the paper is left unpainted for the whites in the painting. The transparency of the watercolors also allow the bright white paper to show through and add luminosity to the painted areas. I’ve tried to capture luminosity on white canvas by using acrylic paints transparently also, as with my recent painting “Sunny Side Up.” Using Scratchbord, the black is the undisturbed area and the whites can be revealed at any stage. It’s a whole new ballgame.
I watched videos, read tips and tricks, and reviewed beautiful artwork for my first attempt on this surface. Some scratchboard artists create finished art in black, white and grey tones… doing fine textures like crosshatching and stippling to make a wide range of grey values. Others use paints or colored inks, letting them dry then scratching through the colors to build up textures, tones and contrasts.
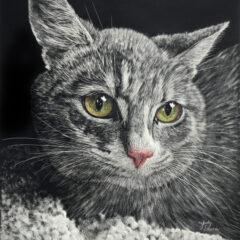
For my subject, I selected with a close-up side-view reference photograph of my dog Maggie Mae’s face. She has beautiful large, captivating eyes. The fur around it goes in different directions and has different hues. I had read that the india ink coating could be removed with rubbing alcohol, and decided this would be ideal for the area of her eyeball, rather than trying to rub off the black layer with steel wool or sandpaper or scratching tools. I also heard one artist used her saliva rubbed into the india ink to create grey tones!
My Scratchbord was a small square, just 6″ x 6″. Making Maggie’s face larger than life, I wanted her eye to be the center of attention To transfer my image to the Scratchbord, I used Saral white carbon transfer paper, to make white marks on the black surface. Then I lightly scratched the transferred white lines with an x-acto #11 blade since the transferred white can wipe off. The x-acto knife is the tool I used most on this painting, along with a wire brush tool sold by Ampersand which has numerous wires in one holder, and a fiberglass brush which creates soft white areas. I also carefully removed the india ink layer from the eye with a small paintbrush dipped in rubbing alcohol, blotting away the black ink carefully as it dissolved. Image #2 shows the first round of scratching, as I tried to mimic the direction of the fur and vary the length, depth, and closeness of my strokes. You might also notice that I accidentally made a light scratch in the top left, the area I wanted to remain solid black – I’d need to figure how to conceal that mistake. After scratching, I wiped the surface with a lint-free dampened soft cloth, to remove any bit of residue from scratching.
After doing my first round of scratching, I decided to use acrylic paints to add color. Once dry, acrylic paints do not dissolve with water, and I knew I’d want to do more than one layer of color. With watercolor pigments on a scratchboard, painting over the surface can re-dissolve the colors previously painted, and I didn’t want this to happen. Sometimes this property of watercolors can be advantageous; areas already painted can be re-wet and removed.
I selected acrylic pigments which are naturally very transparent, like Quinacridone Gold and Nickel Azo Yellow. I thinned my Golden Fluid Acrylics with Golden Glazing Liquid and water to create even more transparency and keep their application thin. By nature, acrylic paints dry as a polymer film. Applied too heavily, they can be difficult (if not impossible) to scratch through. Also, I wanted enough transparency so the under-layers of black and white to show through the colors. I applied more paint than needed so I would be able to scratch away to create fur textures. As always, I was anxious to paint Maggie’s eye, since that always makes an animal portrait come alive. The blue areas around her eye are done with Payne’s Grey, a lovely cool dark blue.
After the first painting stage I wait until the paint is totally dry, since the clay layer softens with the moisture. Once again following the contours of the fur, I scratched through the colored layers. Once again, I followed with paint application. I few last details and Maggie was done. To fix that mark in the black top right corner, I used a rough sponge with black india ink and dabbed the whole black area. My mistake was covered and the black-on-black texture was only slightly noticeable.
After 24 hours of final drying, I sprayed the Scratchbord with Krylon UV clear matte finish, doing 3 separate coats. This protects the surface and allows the artwork to be framed with no protective glass. I was delighted to see that the spray also made my repair job on the black corner even less noticeable.
 My first attempt at scratchboard came out as I hoped, but I realize I am still at “scratchboard 101” level. I’m blown away by scratchboard art I’ve seen on Pinterest and YouTube, with extreme fine detail and realism. I’ll develop my own scratchboard style, striving to improve with each painting. I’d like to try other subjects besides animals, even though that’s one of my favorites. You can click on the photo of my painting to enlarge it, but the photo of the finished art with the dollar bill shows you the actual size of “Hair of the Dog.”
I’ve just purchased a few more Aquabords and Scratchbords, so you’ll be seeing my future attempts. There’s a terrific sale on Ampersand products through the end of this month (Sept ’18) so if you are motivated to try scratchboard check Jerry’s Artarama in Knoxville. I look forward to seeing other new scratchboard art among my readers!
