When I display my scratchboard artwork, these are the most common questions I hear:
- What is Scratchboard?
- How long does it take you to do a scratchboard?
- Do you need a lot of patience?
- How do you add color?
- What if you make a mistake?
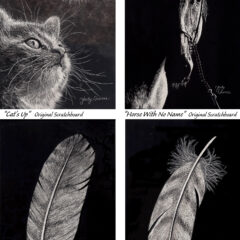
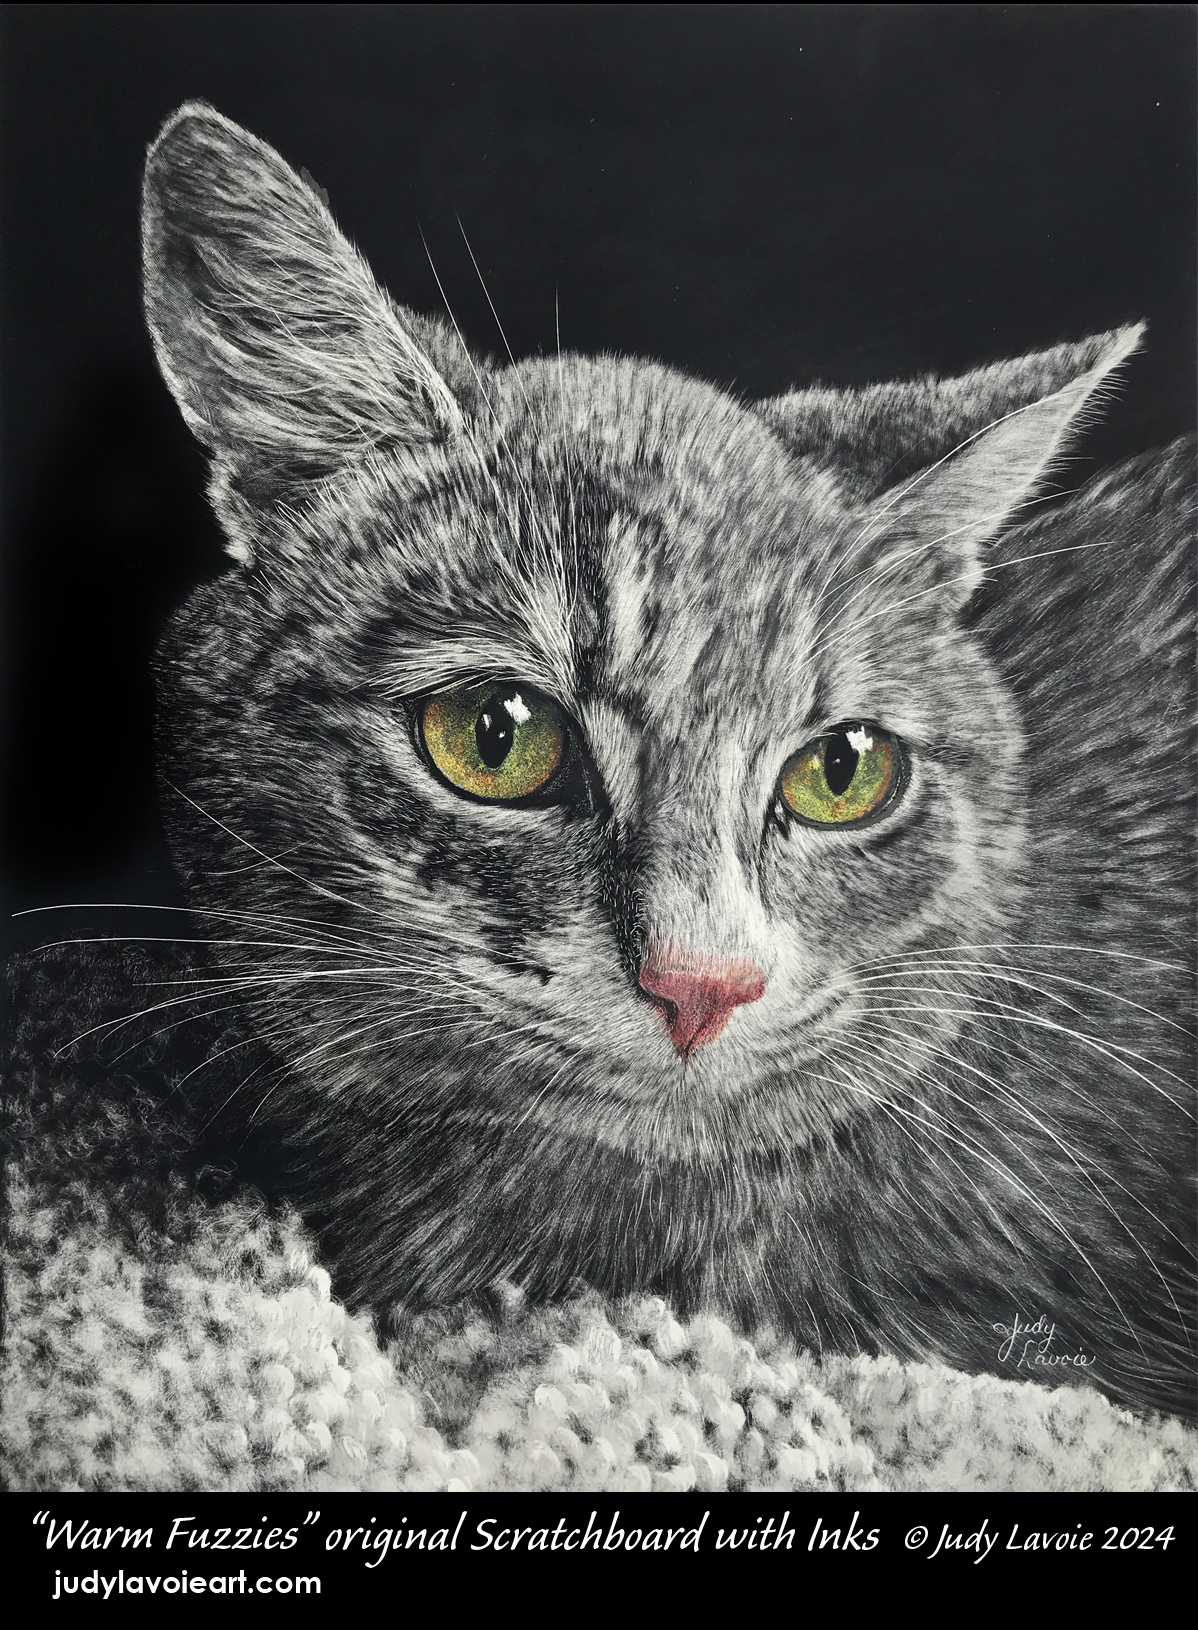
I answer all these questions below. My newest scratchboard “Warm Fuzzies,” which I recently showed in progress for several scratchboard demonstrations, is now finished and posted below, with detailed step-by-step photos and explanations to help illustrate my answers. For a more information and many other examples of my scratchboard art, visit the “What Is Scratchboard?” page on my website.
What is Scratchboard?
Basically, scratchboarding is a form of creating artwork by using sharp and abrasive tools to scratch through a thin dark surface layer (usually black) of a specially prepared art paper or board, revealing a white or colored layer below the surface. Think of it as reverse drawing - instead of making dark marks on a white paper, you create light marks on a dark surface to create an image. My favorite scratchboarding surface is the professional museum-grade panel called Scratchbord™, manufactured with conservator-quality materials by Ampersand Art in Buda Texas.
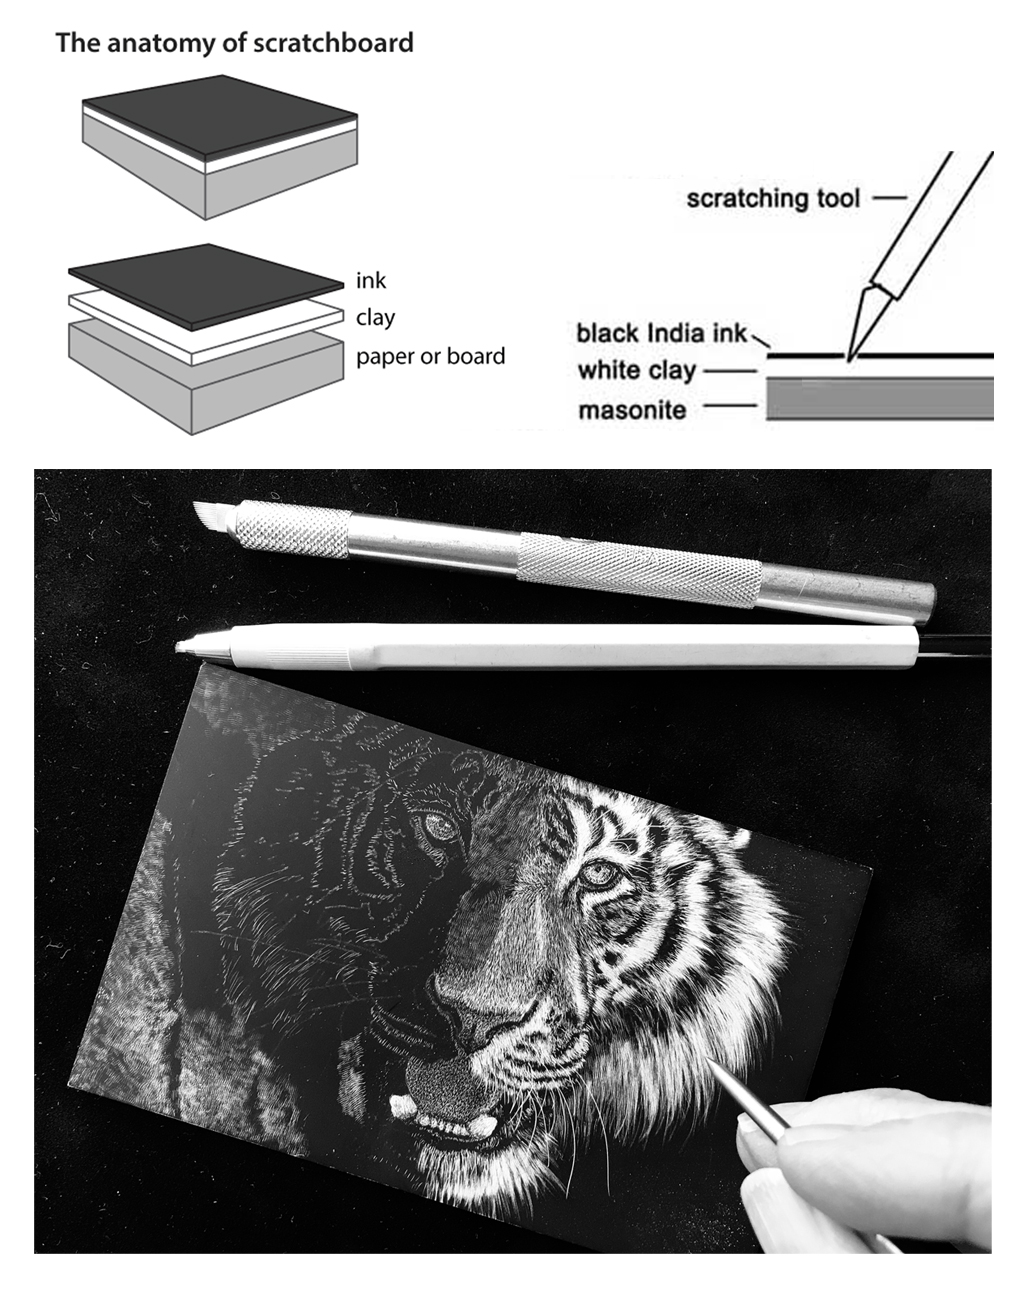
Scratchbord is a rigid panel made of sealed hardboard, so it won’t bend, warp or tear. The panel gets a smooth coat of absorbent white kaolin clay, topped by a thin layer of black India ink. A hobby knife or x-acto type tool is commonly used for scratching, and it just takes light pressure with the sharp blade to make to draw lines which scratch through the black surface. Values of grey are created not by how hard a person scratches with a tool, but by varying the type of scratches (lines, dots, squiggles), the closeness of the marks, overlapped scratches, and the type of tool used. Scratchboard art is characterized by sharp details, precise lifework, and highly textured images. Whether left in black and white or with added transparent color, scratchboard artworks have a unique appearance which attracts much interest, often due to the fine detail and dramatic lighting effects.
How long does it take you to do a scratchboard?
I like this answer, by renowned watercolor artist Mary Whyte: “All my life.” She explains: “Trying to quantify how long any work might have taken to create diminishes all that was sacrificed and required for the artist to get to this level of accomplishment. How do you add up all the years of study and practice…?”
The scratchboarding process is slow compared with many other forms of creating 2-dimensional art. Most of the marks made on the scratchboard surface are small and fine, as compared to painting with a big brush loaded with paint and applied to a canvas. Personally, I don’t record my time spent on creating scratchboard art, since it is my passion not my ‘job!’ But I admit to spending many many hours, even on a very small scratchboard. To me the process is a relaxing sort of zen experience. I like working on scratchboards because I can scratch for just a short block of time if that’s all I have, without worrying about squeezing out paint that will dry out if I don’t spend time using it all or other limitations with different media. Scratchboarding is also portable; I often take a panel and a few scratching tools out to a table on my porch. I even set myself up to work on a scratchboard for several hours in my car back during covid-19 when I couldn’t accompany my husband into a building for his cataract surgery!
Do you need a lot of patience?
Yes, patience is a definite advantage if you work in my scratchboard style of capturing intricate detail and rich textures.
How do you add color?
My favorite way to add color is with Claybord/Scratchbord Inks, manufactured by Ampersand Art specifically for their panels. These are water-soluble and they are easy to lighten by diluting, and they contain shellac, so they dry permanent. The ink set comes with six colors: red, yellow, blue, green, sepia and black. The inks are very concentrated so it only takes a drop or two at a time. I mix them to get the colors I want and most often paint them on with a small brush. The colors are very vibrant also, so I sometimes ‘dull’ the hue by adding a tiny bit of the color’s complement (ex: mix a bit of green into red). One color can be painted over another after the first is dry. The colors only show up on the places where you have scratched, as Ampersand has formulated these inks to magically disappear from the black unscratched areas when the final piece is sprayed with a clear sealer. Other types of inks and transparent watercolors can leave a light film on the black areas, but these media can be used for adding colors, as can colored pencils.
What if you make a mistake?
I’ve heard it said that “Scratchboarding is difficult because you can’t make a mistake” and “Scratchboards are very unforgiving.” Fortunately this is not true, since I have made my share of mistakes! Claybord/Scratchbord Ink sets include a bottle called “Black Repair,” which matches the surface put on Scratchbords during manufacturing. This can be painted on undiluted to cover unwanted marks and scratches. The black ink can also be diluted with water and used to darken the values, adding a light grey tone to places where you might have scratched too much and made too light.
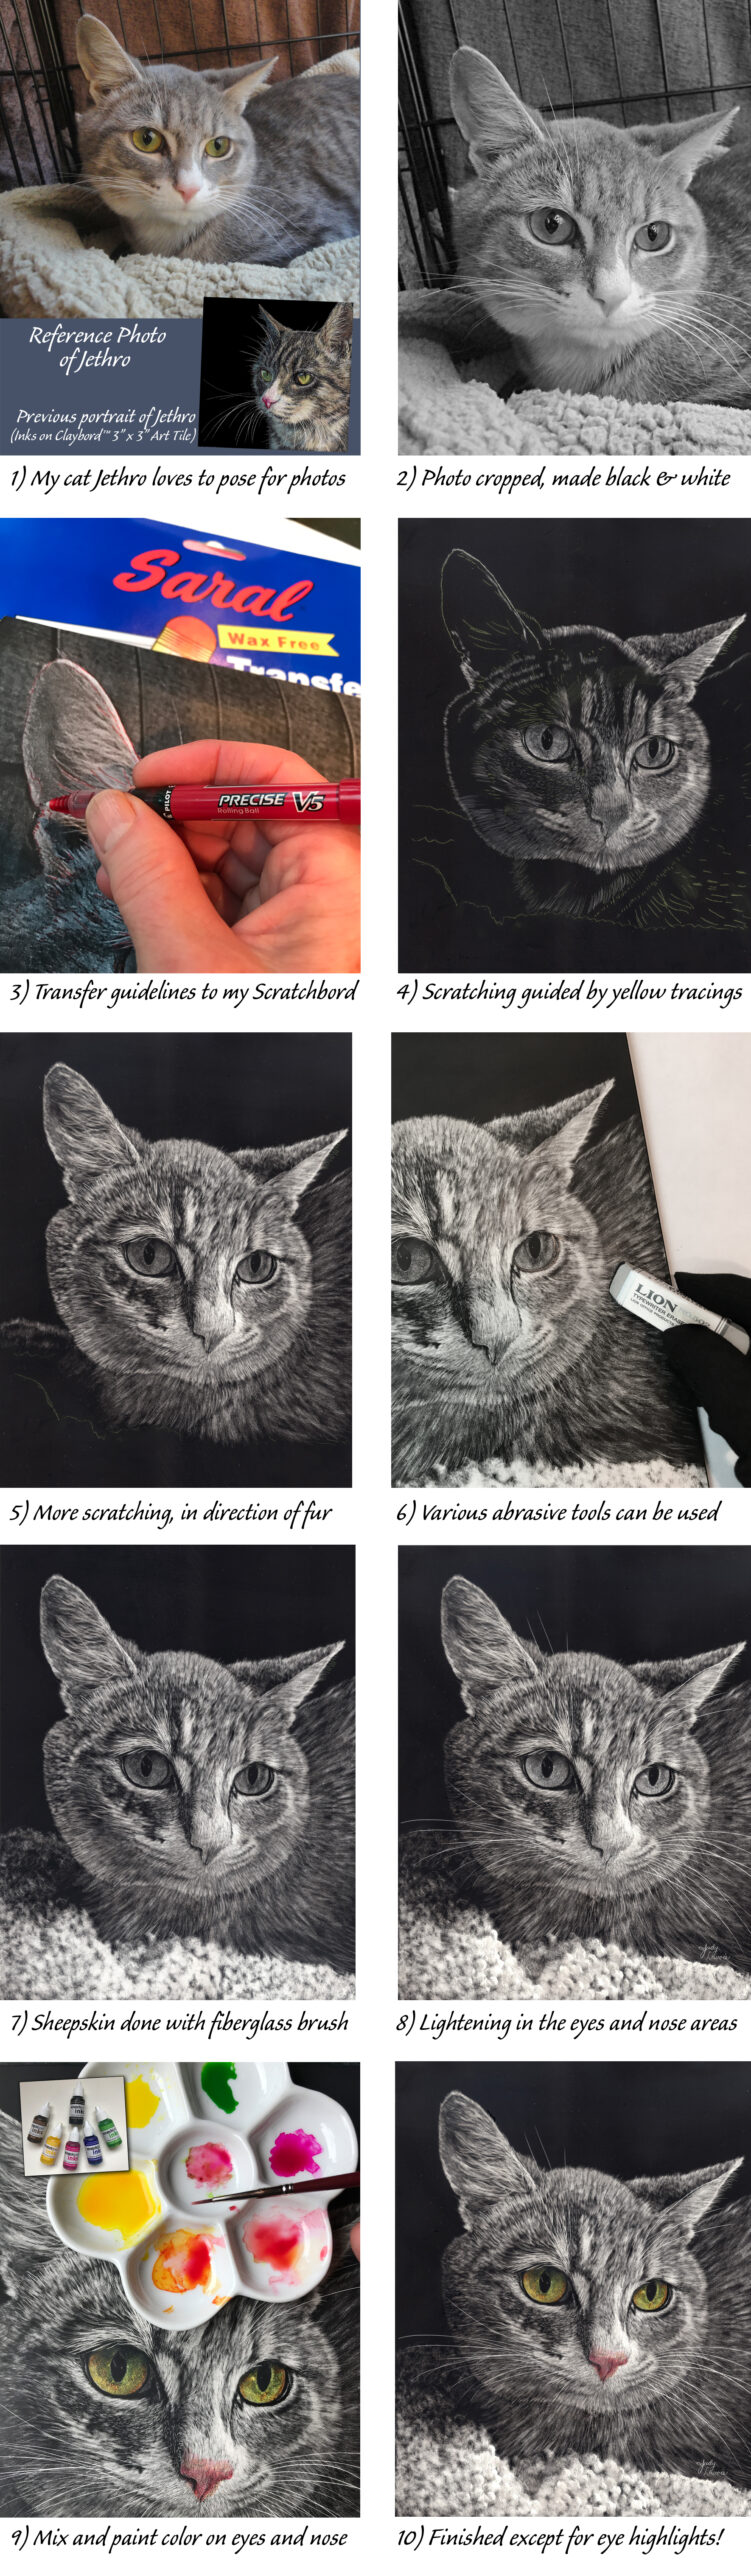
SO…… “Warm Fuzzies” is more complicated than a beginner scratchboard, but I present it here as an example of my scratchboarding process, Here is a quick run-through of my steps, referring to the photo collage:
1) I most often use my own photos as reference, looking for one with a wide range of grey tones along with whites and blacks. I also select a subject with great texture; animals are a natural and popular category. Finally, I want to be able to crop or alter my reference photo to make an interesting composition.
2) I convert my photo to black and white, to help me see the grey tones I will be depicting with my scratch marks.
3) I use Saral transfer paper, sort of like old-fashioned carbon paper for typewriters, to trace guidelines from my photo printout onto my black surface. This product is made for art, and I like using the yellow, red or blue versions onto the scratchboard. I trace just enough to help me position the main features, not every hair or whisker.
4) At the bottom of this photo you can see some of my yellow guidelines. These marks mostly get scratched away but can be rubbed off. Here I have started scratching, using a variety of tools, like knife blades, pointed etching scriber, tattoo needles, and scratching nibs - whatever makes the type of mark I am looking to create.
5) On fur, the scratching is made in the direction the fur grows. Some hairs are short, others are long. Additional scratches over already scratched areas makes a lighter shade. In the eyes and on the tip of the nose I often use the point of a #11 blade or a pointed scriber to make lots of close little dots, a technique called stippling.
6) This eraser has a grit to it, so stroking it on the surface mades a wider soft mark. Sandpaper and steel wool are other scratching materials. Note my black cotton glove - it keeps oils from my skin from transferring onto the surface and keeps the fine black dust from getting on me.
7) I have an extra-thin and a wide fiberglass stick tool in my arsenal, and they make lovely soft mark. I used the bigger one and made circle motions to create the look of sheepskin cloth.
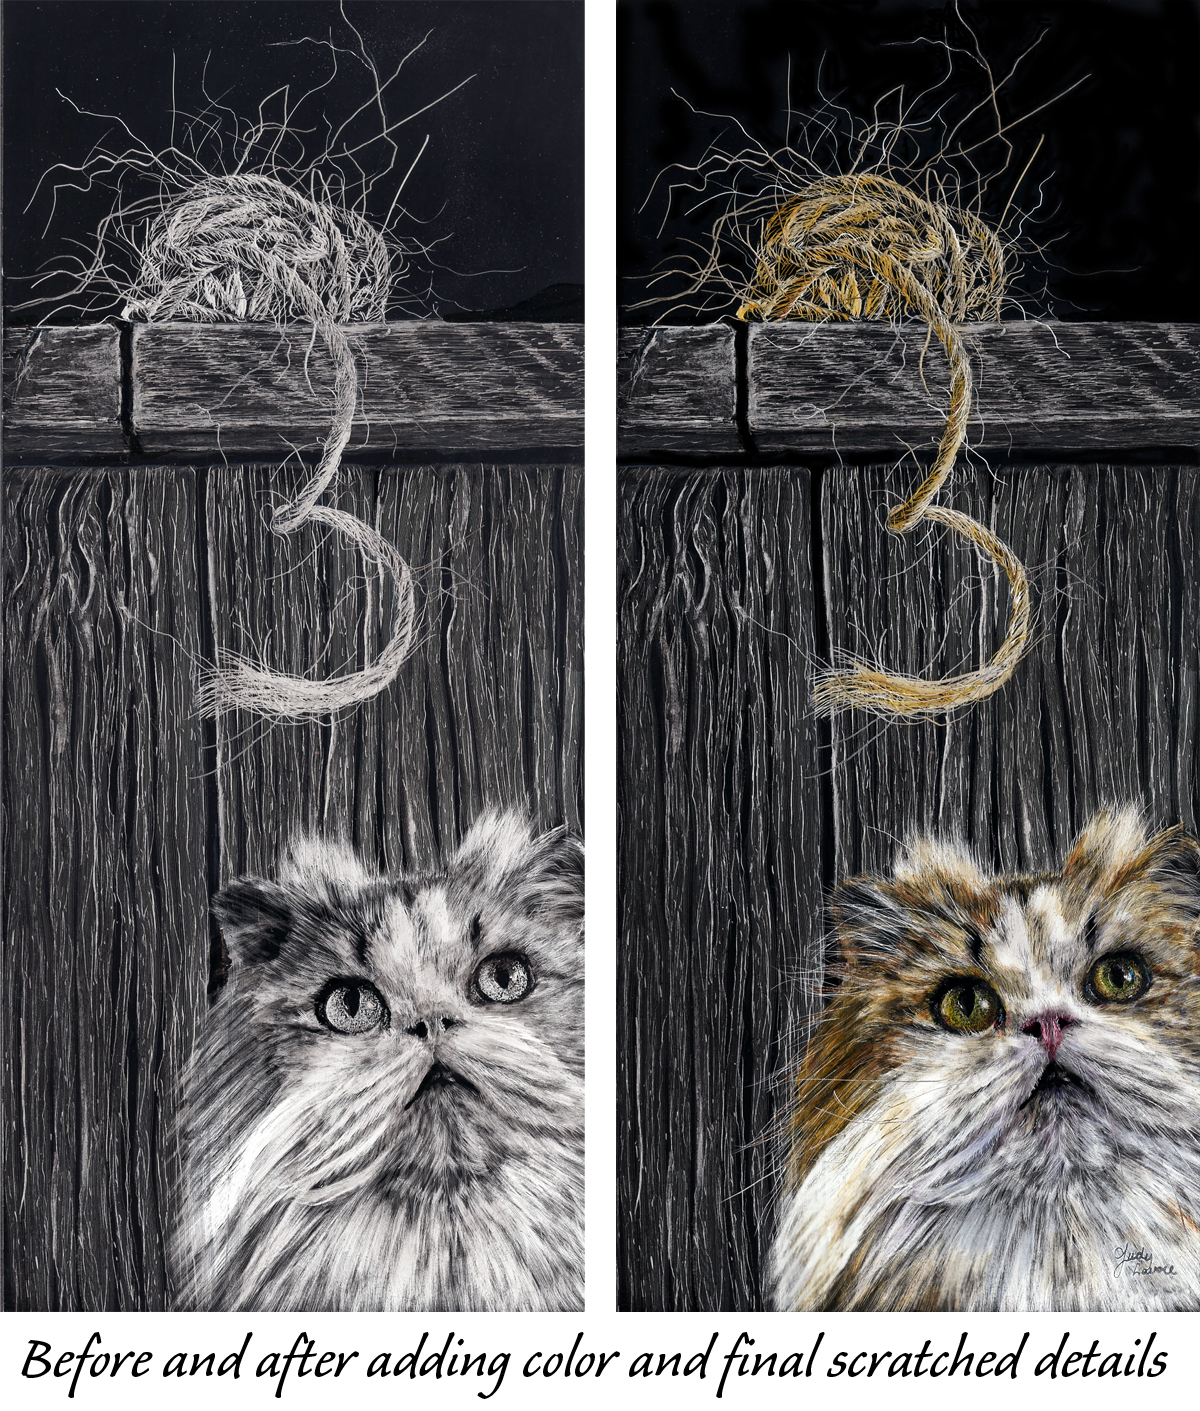
8) The art could be left in black and white, but I like the added drama of adding touches of color for emphasis on certain areas - especially in this case, where the eyes are so dominant. When I plan to add color to a scratchboard, I purposely lighten those places more than I might otherwise, since the black will show through the colored inks and visually make them darker than I if I paint them on a more scratched area.
9) I mix very small amounts of colored ink at a time, in a porcelain palette, since they tend to dry quickly. For this artwork I only used the red, yellow, and green, mixing the shades I wanted and diluting with a small amount of water. I let color dry before layering to create depth. It is possible to scratch through the dry color areas too. When I color fur I often scratch, color, scratch, color, and scratch… this really makes the fur look thick and 3-dimensional.
10) Warm Fuzzies is complete except for the final touch - adding the white highlights to Jethro’s eyes. I save the whiskers and highlights to the end, since I want them to be pure and stark white. If done too soon, the black dust which comes from scratching can dull them.
I hope this better explains the scratchboarding process and makes you appreciate what goes into creating scratchboard art!