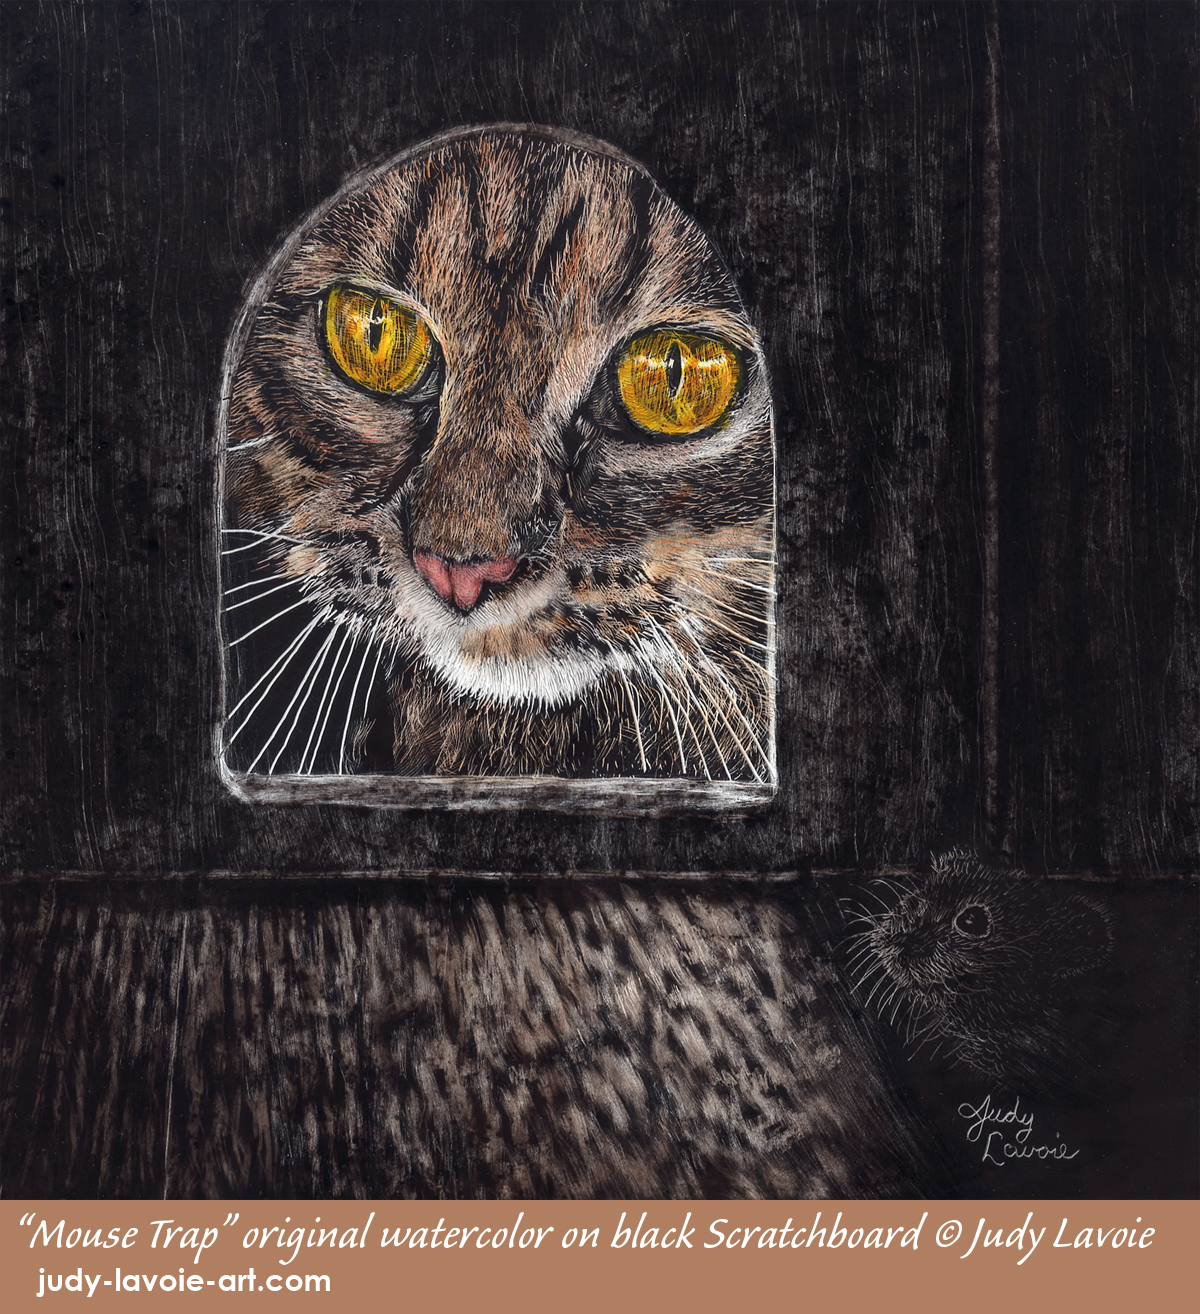
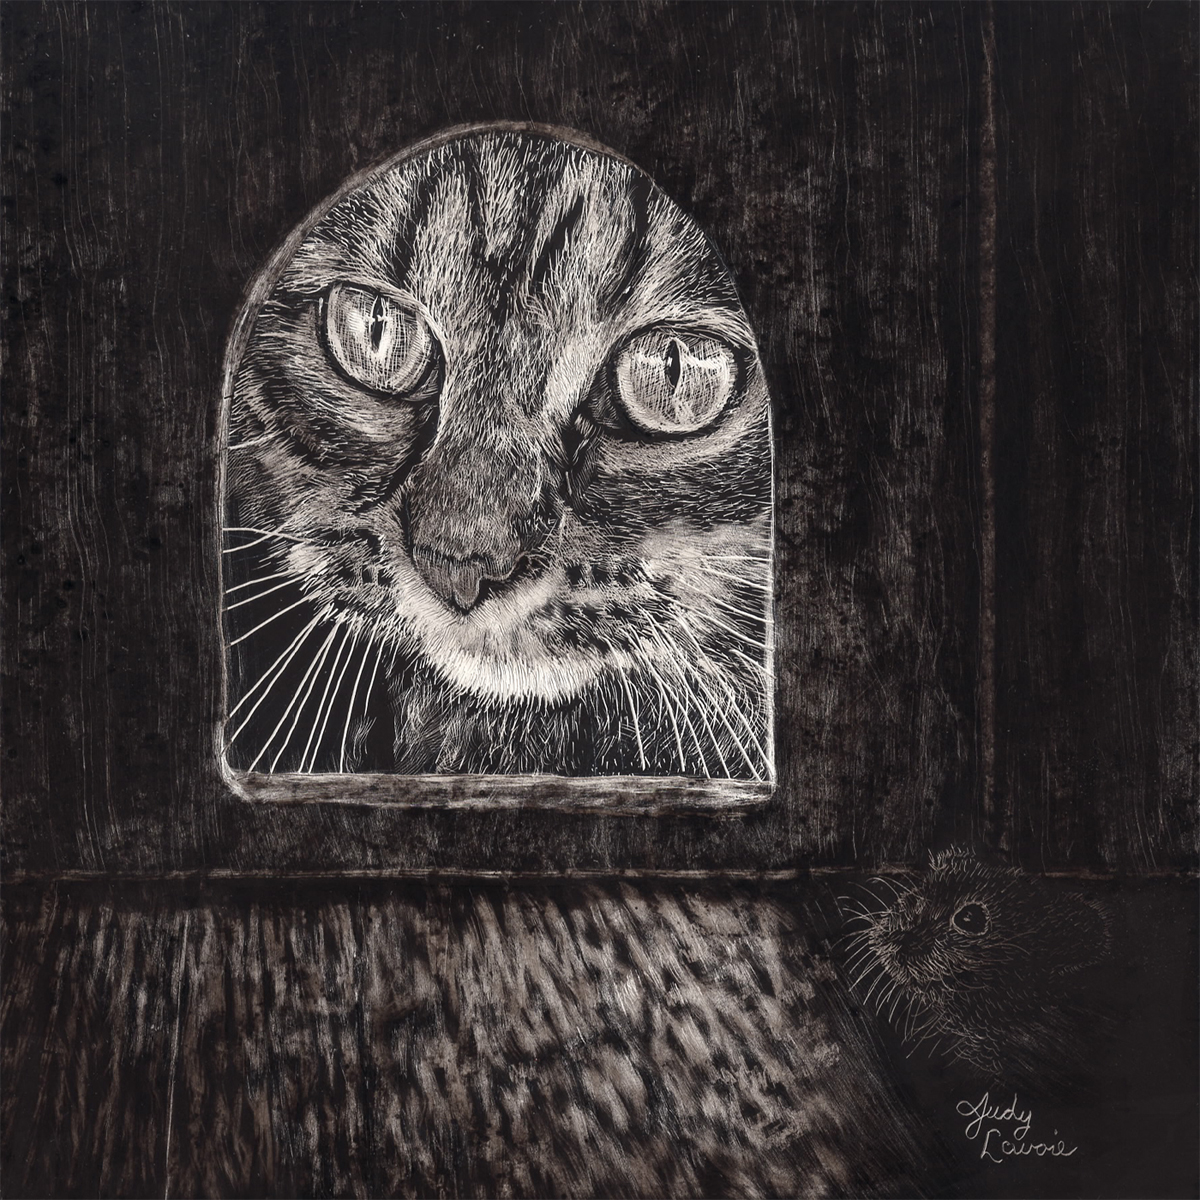
The intense eyes of a money-cat which I photographed at our local animal shelter inspired this new scratchboard, just for fun. Our two outdoor cats have a wooden ‘cat house’ on our porch with a lid which opens like a toy box. Rick made an opening in a mouse-hole shape at one end so the cats fit into the box but our dogs do not… and hopefully no raccoons or skunks can enter as well! So for this painting, I opened the lid and photographed the round top opening from inside the box, to see how the light filtered through. Using these photo references, along with some mouse images I found online, I put together my vision of a mouse hiding in the darkness from a curious feline peering in through a little mouse-hole.
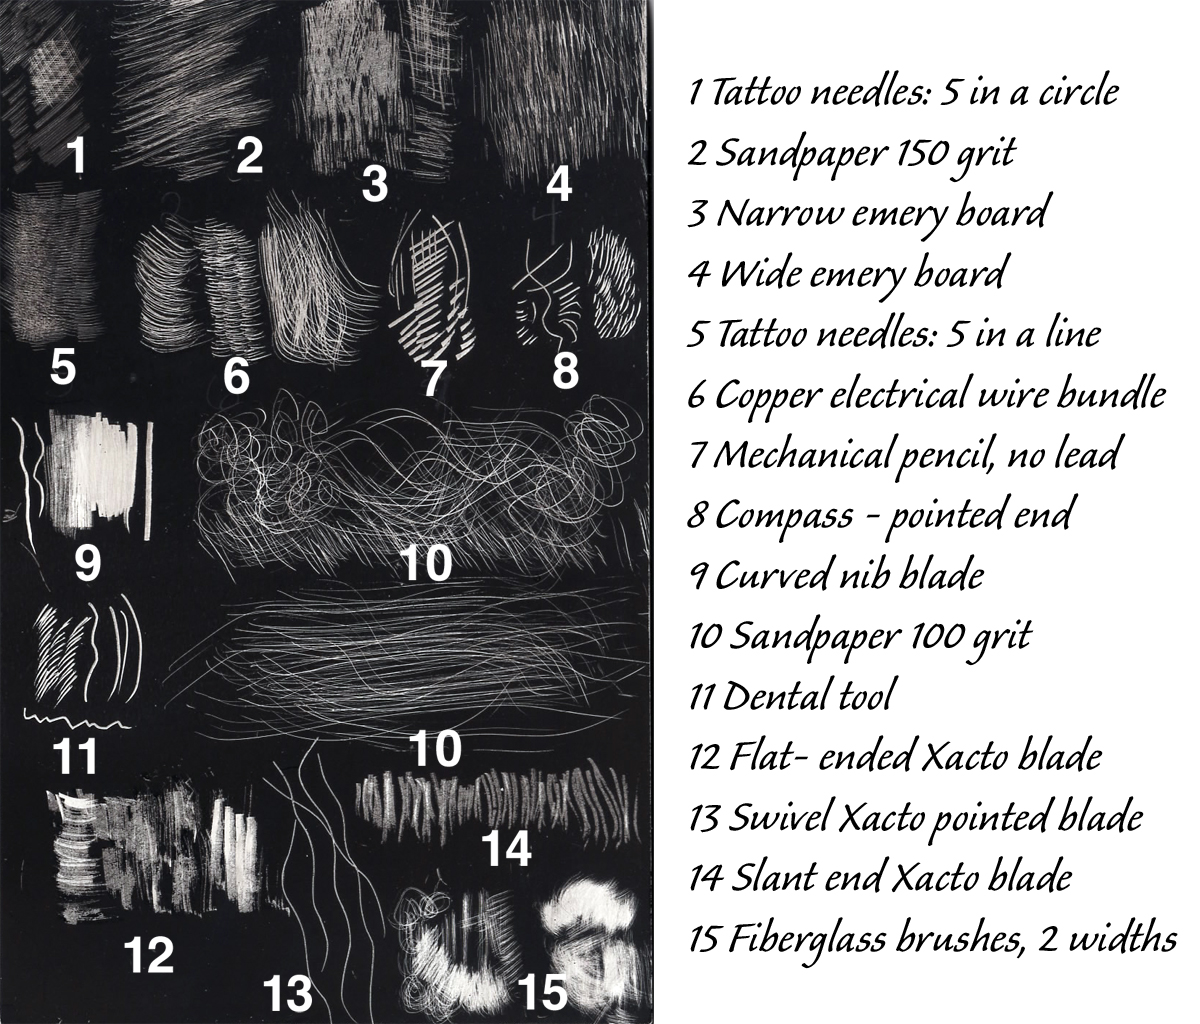
“Mouse Trap” also was a test of some new methods of scratching and using ink washes which I wanted to try. I’ve amassed a collection of tools which can be us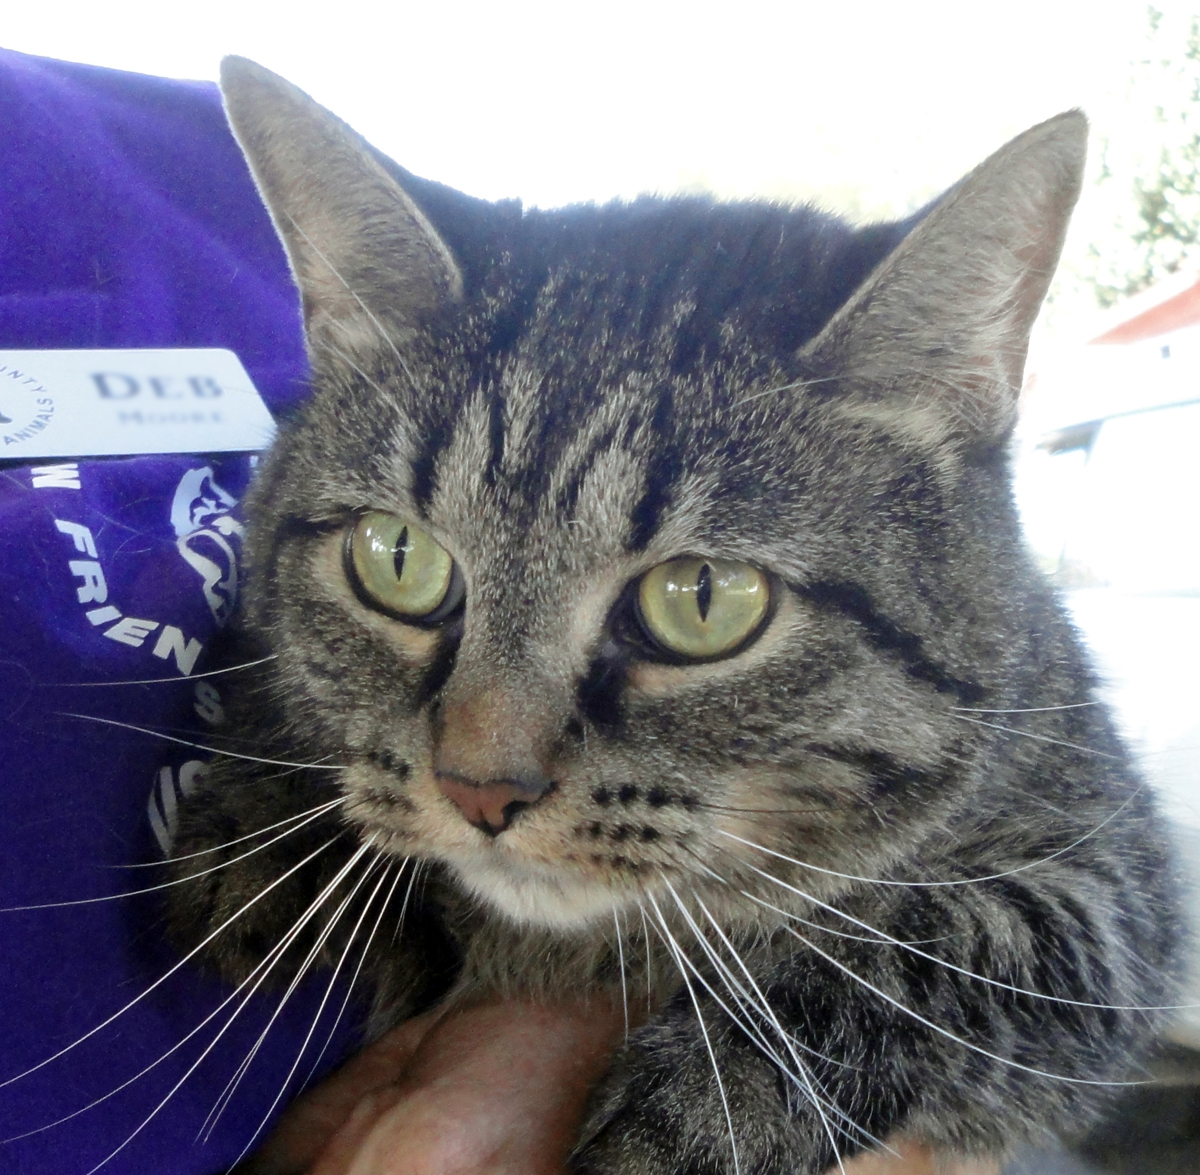 ed to uncover the black india ink face of black Ampersand Scratchbord™ to reveal the white clay layer below. I took a little 3″x5″ sample piece and tried a bunch of these different abrasive materials, to see what might help me on this new 6″ x 6″ artwork. My sample is labeled with the tools I used, showing the variety of effects, from fine and sharp to broad and soft.
 After creating my off-center composition, I transferred the design to the black scratchboard surface by tracing it over a piece of white transfer paper. I often begin by making tiny scratch marks along these white guidelines, since they can rub off easily. My initial scratching was done with a #11 Xacto knife blade, one of the most popular scratching tools. Note in #2 of my photo collage how much residue the scratching creates! The black india ink layer is waterproof, so when I’ve scratched enough that I don’t need the white guidelines anymore (and I haven’t applied any water-soluble pigments) I literally run water over the board and wash the residue and white lines away. Let the surface dry thoroughly before continuing with any scratching, since the water can soften the clay surface a bit.
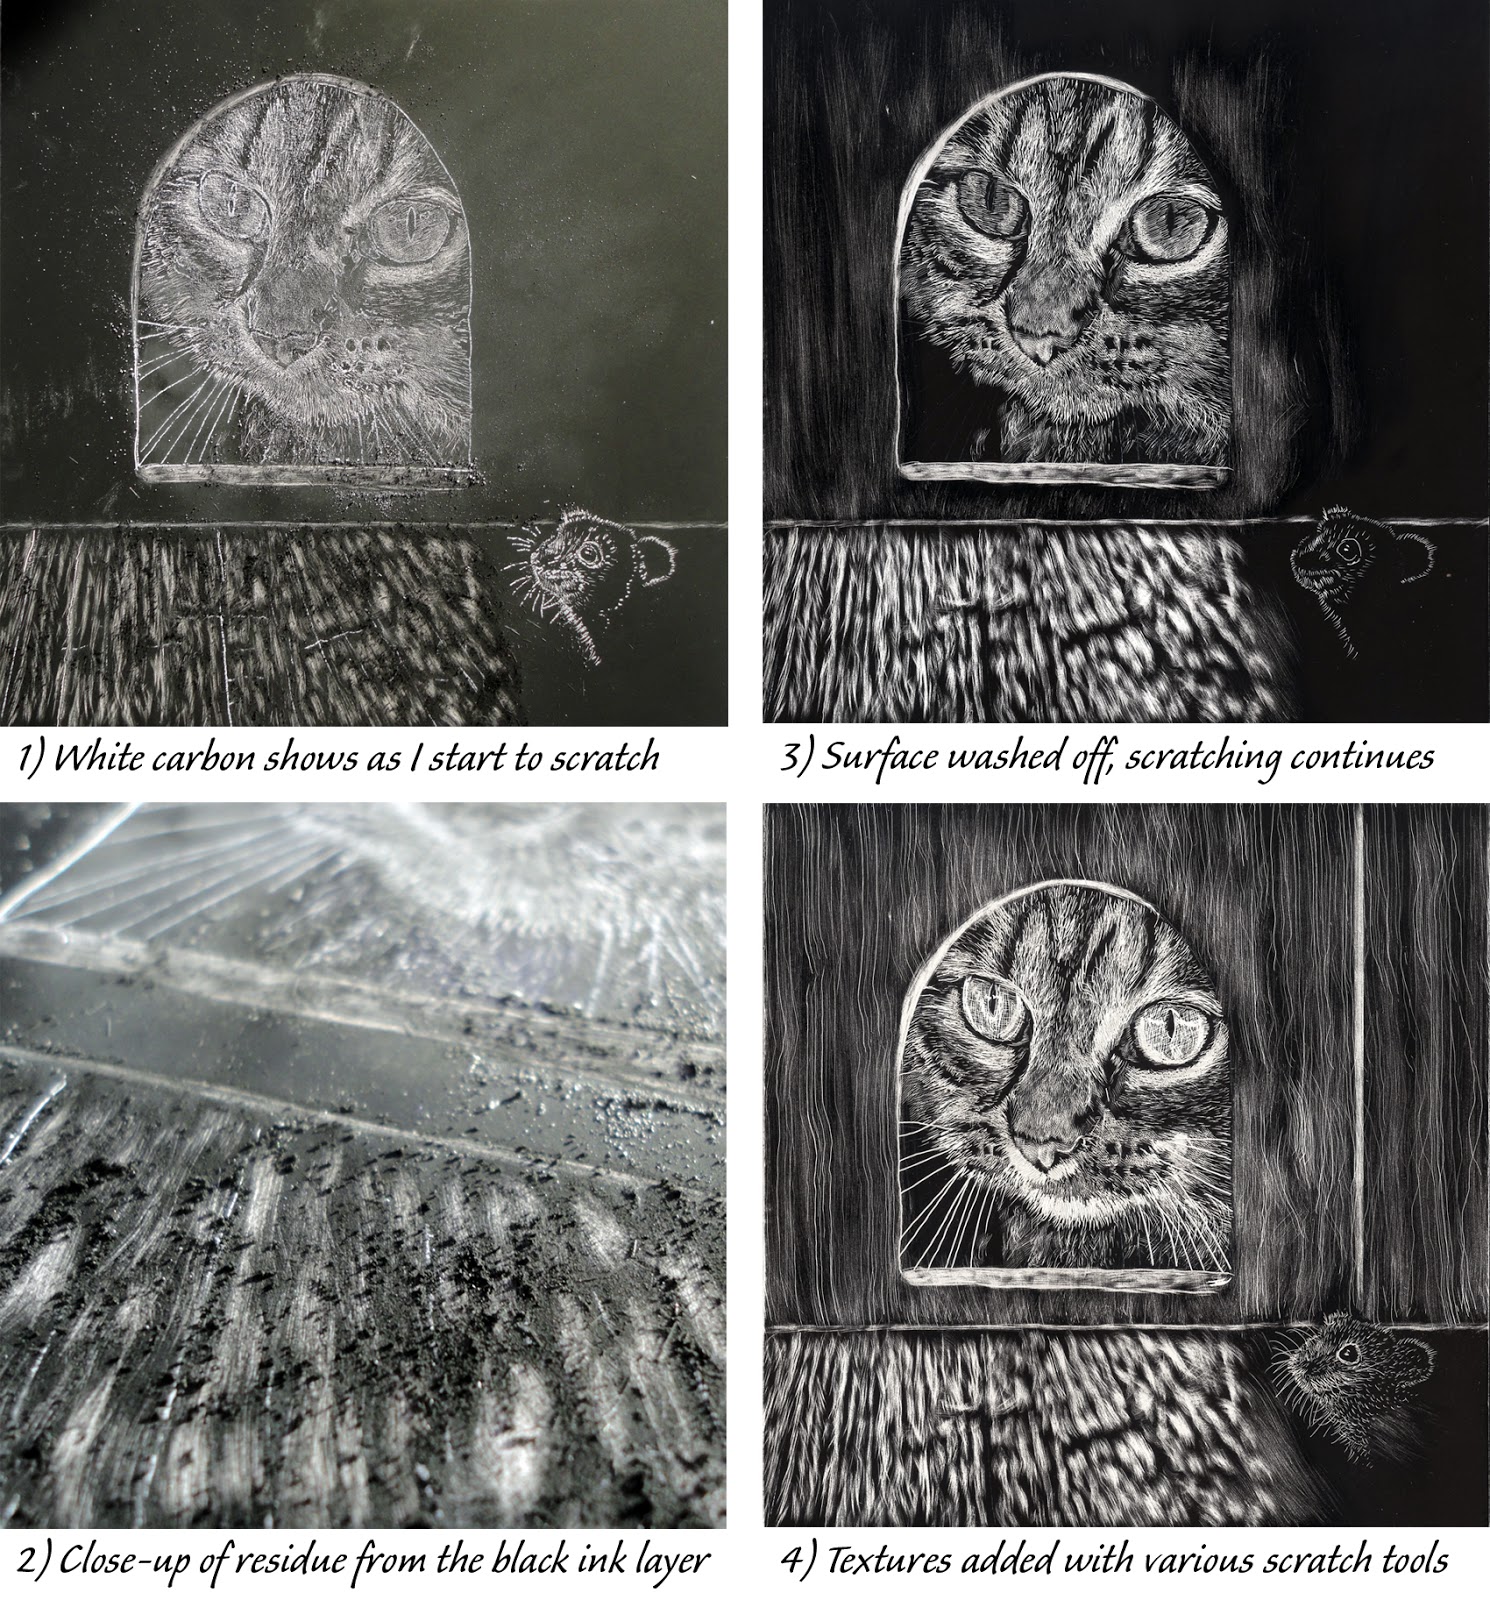
In Step 3 of my step-by-step photos, the white scratches indicating the wood floor surface were made with fiberglass brushes. These are actually sticks of fiberglass which go into a mechanical pencil type of holder much like a piece of lead goes in. I use one that’s about 1/16″ diameter and a second one about 3/16″ diameter. Rubbing with a motion as you’d use with a pencil eraser softly reveals the white clay layer. To add texture on the wood wall shown in Step 4, I rubbed a small piece of 150 grit sandpaper in vertical strokes. At this stage I’d revealed more white than I wanted in the final stage, because I planned to create some gray values by painting over with diluted india ink. This would push the mouse into the shadows and better depict limited light filtering in through the mouse-hole opening. I wanted the wood wall to have only enough texture so it would read as a wood surface, without distracting attention from my main focal point, Miss Cat. I used Higgins Black Magic ink for my washes, which dilutes to warm gray tones. The final large black and white image below shows the artwork after the gray washes, and before any color was added. I like the effect of minimal color on a black scratchboard, so I used Golden QoR® watercolors for the kitty’s face, nose and big eyes. Hopefully the little mouse retreated out of danger!


Weaning off Prednisone with no plan...
Fenominal!!! Play on word! You are so look amazing!!!!