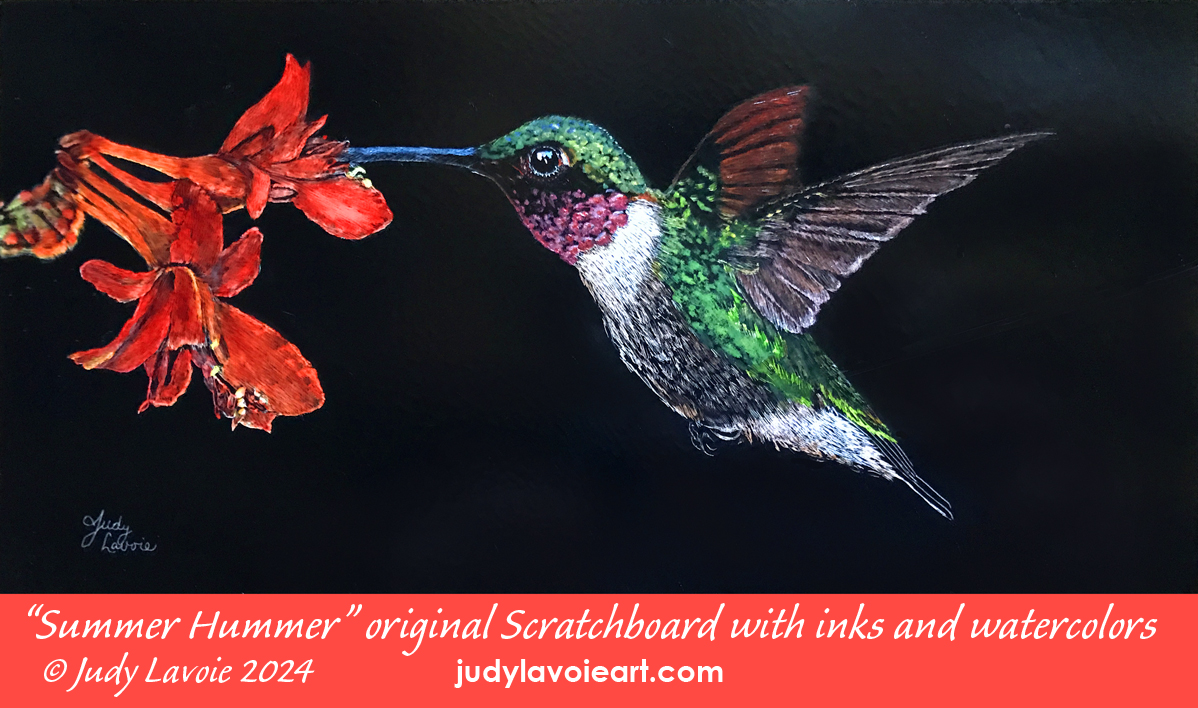
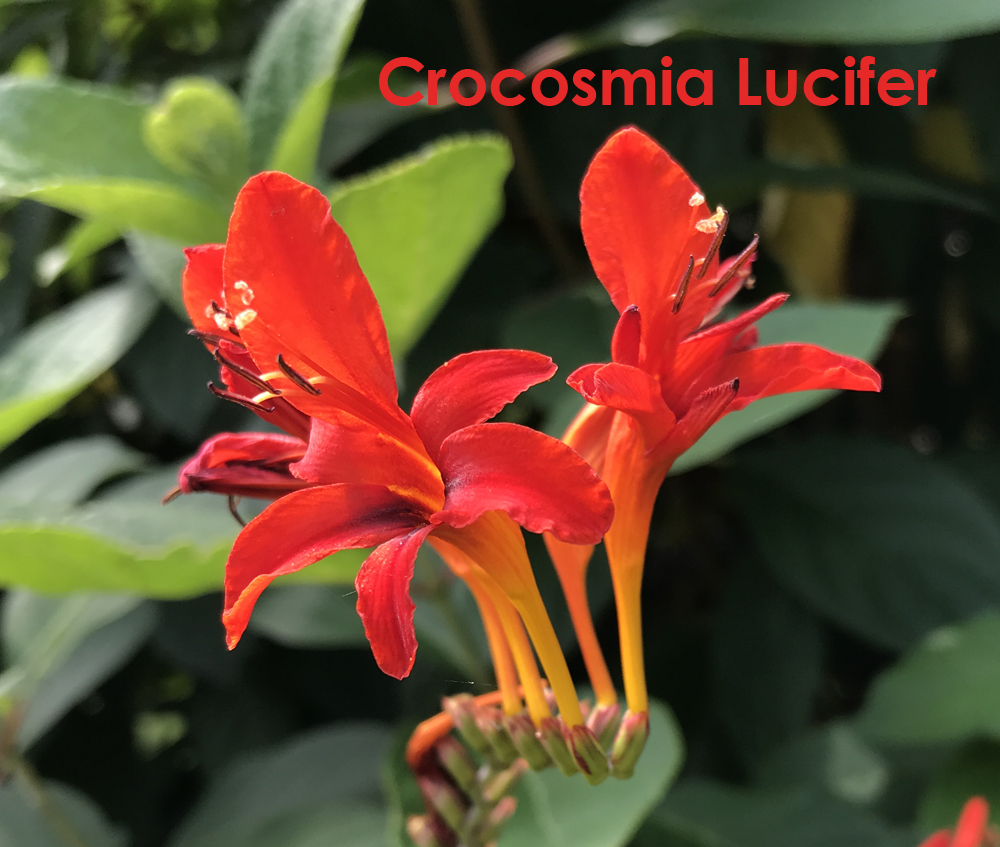
A walk through my friend Lil’s gorgeous gardens inspired my newest scratchboard “Summer Hummer.” I had been pondering a suitable painting subject to use some new metallic watercolors. A male ruby-throated hummingbird seemed perfect, with his sparkling emerald crown and red throat. I could paint our summer visitor as if he were hovering in front of a flower to sip nectar; Lil’s brilliant red tubular flowers of “Crocosmia Lucifer” (native to South Africa) gave me the ideal floral reference. A reference photo of a hummingbird in flight by Rick Beldegreen (from Wildlife Reference Photos for Artists) provided a gorgeous bird reference.
My artist friend Vicki, one of my scratchboarding students, had experimented with cutting the manufactured Scratchbord™ panels to create rectangular sizes in addition to the premanufactured sizes. I envisioned my hummer and flower in a horizontal format, so I selected an 8” x 4” panel from those Vicky had cut from an 8”x8”.
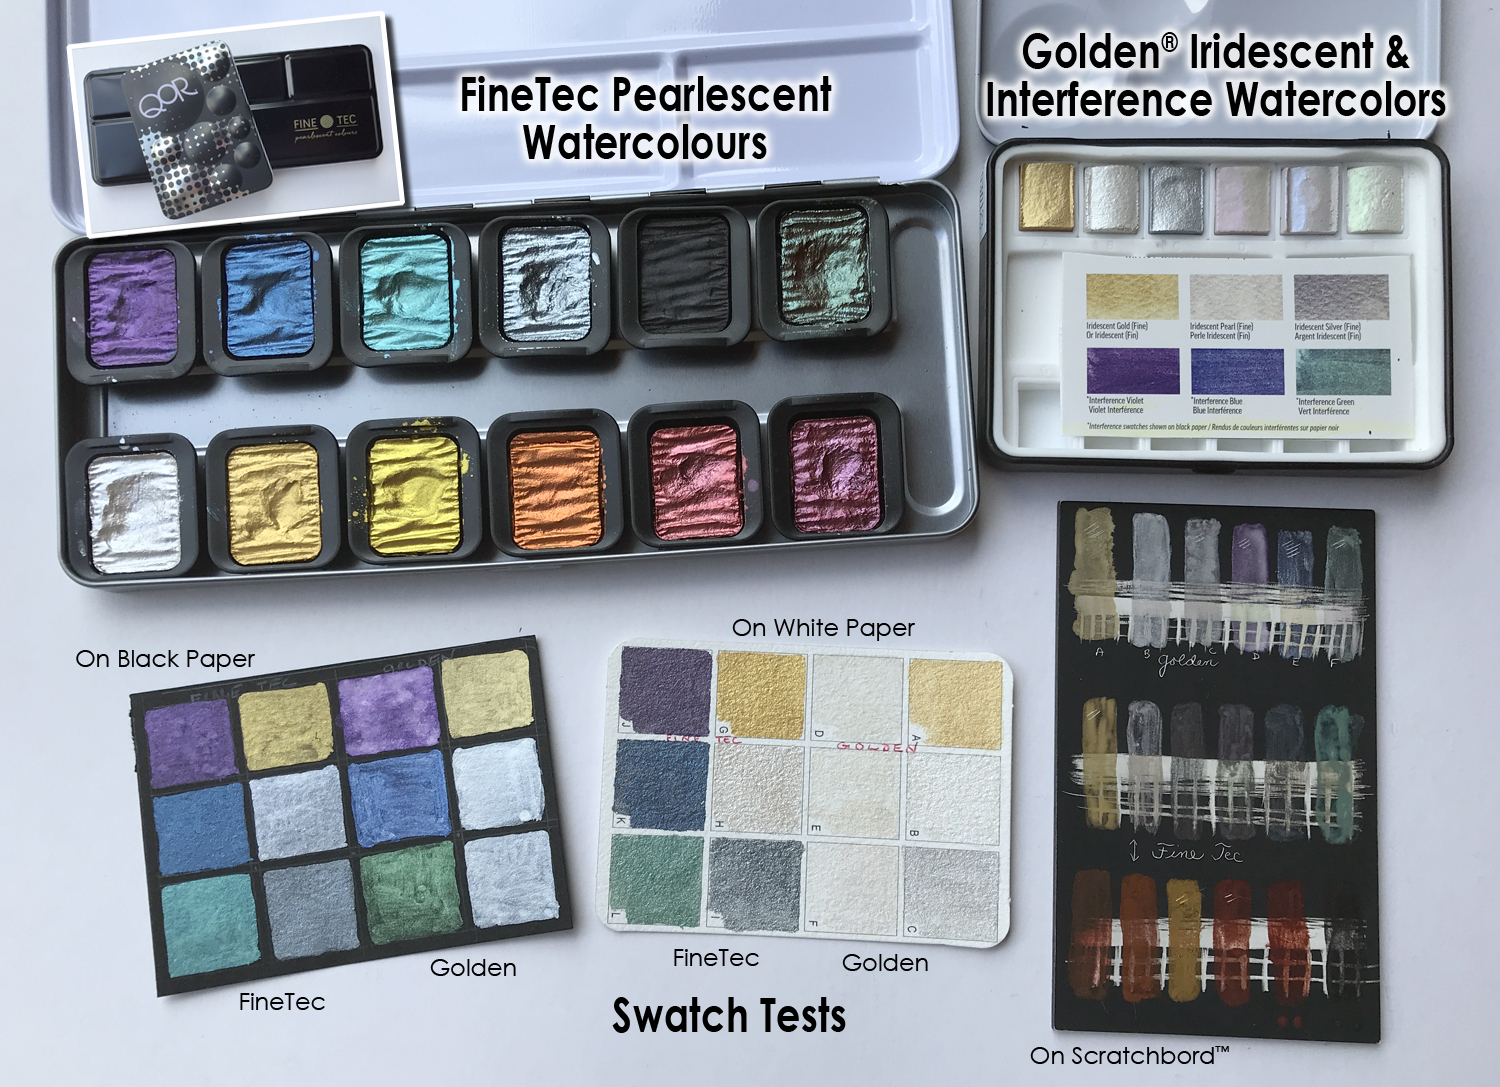
I’m often asked how color is added to a black scratchboard. Most often, I use transparent watercolors or Claybord/Scratchbord™ Inks, which are specially formulated by Ampersand, the maker of Scratchbords. A while back I purchased a 12-pan set of Finetec pearlescent watercolours and a 6-set of Golden watercolors with 3 iridescent and 3 interference colors. I experimented with each of these on black and white papers as well as on a small sample black Scratchbord panel. It is difficult to capture the true appearance in a photo, but WOW, what a dramatic effect these pigments have, particularly on a black surface! The interference colors have minute particles of mica which make the painted area “flip” when viewed from different angles of light. In one instance you see a bright opalescent color, then a little turn and you see its complement. The FineTec colors are particularly brilliant on black, and can be used quite opaquely. NOTE: Unlike transparent watercolors and inks which color the scratched-away white areas on a scratchboard, I would paint these directly on unscratched black sections. I couldn’t wait to begin this new project.
In composing the layout, I rotated the red blossoms to face the hummingbird. I used yellow artist transfer paper to copy my guidelines onto the black Scratchbord surface. I began scratching with my favorite pointed etching tool, making short hatching lines in the direction of the hummingbird’s feathers. I don’t usually add color to a scratchboard until my scratching is near completion, but I had good reason to paint the FineTec colors early in the process. Notice how I didn’t scratch the top of his head or his throat - as my sample swatches show, the FineTec pearlescent colors can be used opaquely directly on the black surface. The only challenge I had with these pigments is that the colors don’t mix well. The red for his throat was not exactly what I wanted and the green out of the box was too blue. With some experimenting, I got closer to the shades I wanted by mixing the FineTec colors with traditional watercolors. This probably makes the effect less metallic but I sacrificed that quality to more life-like hues.
The photo collage shows my next scratching steps, still primarily done with the etching tool. As a rule, I scratch away more of the black to reveal more white when I am adding transparent colors than if there were no colors added. I wanted the flower petals to be bright red, so the less black, the brighter they will appear. The inks I use are transparent, so they look most brilliant if reflected light shines through from the white layer it is painted over.
I leave many scratchboards black and white, with no added colors. But you can see what a difference color can make, comparing photos 4 and 5. After more scratching on the hummer’s body, I used diluted black ink to add some shading, like on the distant wing to make it appear further back. I mixed ink colors to a purple-brown for some feather areas and used diluted blue ink on the top of the beak and eye highlight, reflecting the sky.
Lots of residue accumulates on the scratchboard surface from scratching through the black layer, so I brush the surface carefully with a soft make-up brush as I work. I use a tack cloth just before applying the protective clear spray finish. I often prefer a satin finish on my artwork, but the gloss finish helps enhance the reflective look of the pearlescent paints, so that was my choice here.
'Seems my experiment was a success. I liked working with the shimmering watercolors, they created the effect I aimed for, and I am happy with my newest little hummer.