As her students in Scratchboards Fine-Tuned, Judy has posted the instructional and reference files on this page for you to access and copy. You have permission to copy, print, and use these images for your scratchboard creations. NOTE: Sources for reference photos should always be noted if you present your artwork based upon them publically.
Good Working Habits for Scratchboarding
WORK AREA
- clean hands and work area (oils can cause the board not to scrape well)
- work on a rigid surface, flat or slightly tilted - whatever is most comfortable for you
- rotate your board as you work
- good lighting
- raised table height, or elevate your panel with book(s) under it, especial for fine work
- reading glasses or magnifier if needed
- have scratchboarding tools readily nearby
- ability to wipe black dust off your panel as you work
- take breaks to stretch
- focus your eyes away from your work, looking in the distance, then back at your work
- squint your eyes to see your values better
THE REFERENCE PHOTO
- use your own photos as reference or use fair use / free online photos to avoid copyright issues (record the name of your source)
- choose a subject which interests you, with a variety of values and textures
- look for a unique image, unusual angles, dramatic lighting and shadows; crop your reference photo to make a better composition
- look for your subject’s “imperfections” and capture them - this adds life to your subject
- work from both a color reference and a black and white version to help you see the values (most smart phones will convert a color photo to b/w)
- if you struggle to see what areas to scratch or leave black, it may help to make a negative or inverted version of your reference image
CREATING THE ARTWORK
- No outlines!
- Start your scratching in a dark value area, where your marks are not critical, rather than in the center of focus. Warm up first!
- Save the whitest areas to near the end of the art, so they won’t pick up black dust.
- Less is best; you can always go lighter; it is better to not remove too much black, although there are ‘fixes’ for over-scratched areas, like Repair Black, Pitt pens. Some artists fix white mistakes with a white gel pen or white acrylic paint.
- Small strokes are easiest to control.
- On difficult images, turn your panel and your reference and work upside down. This helps you think about and see shapes and values more objectively (rather than a 'nose' or 'lips').
- Hold your work in front of a mirror to help check for flaws or areas which don’t look quite right.
- Use a variety of scratch marks for added interest (ex. some fur is thick hairs, some is fine). Fleshly areas vs. fur on an animal (such as the nose) might be better done with stippling or scumbling.
- If you plan to colorize, scratch those areas lighter than if you were leaving the art in black and white only.
- Add color when the majority of your scratching is done, and also re-scratch colored areas and re-color to create dimension (as with animal fur, which is often many layers thick).

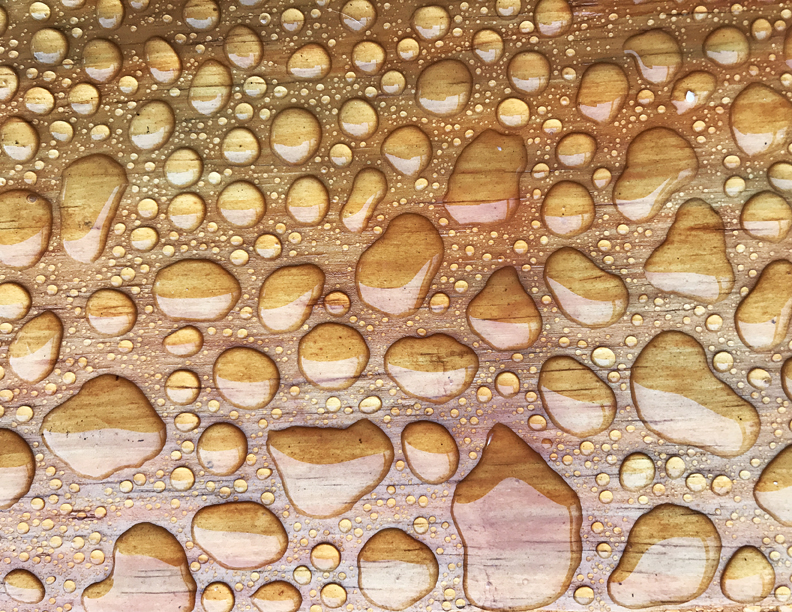
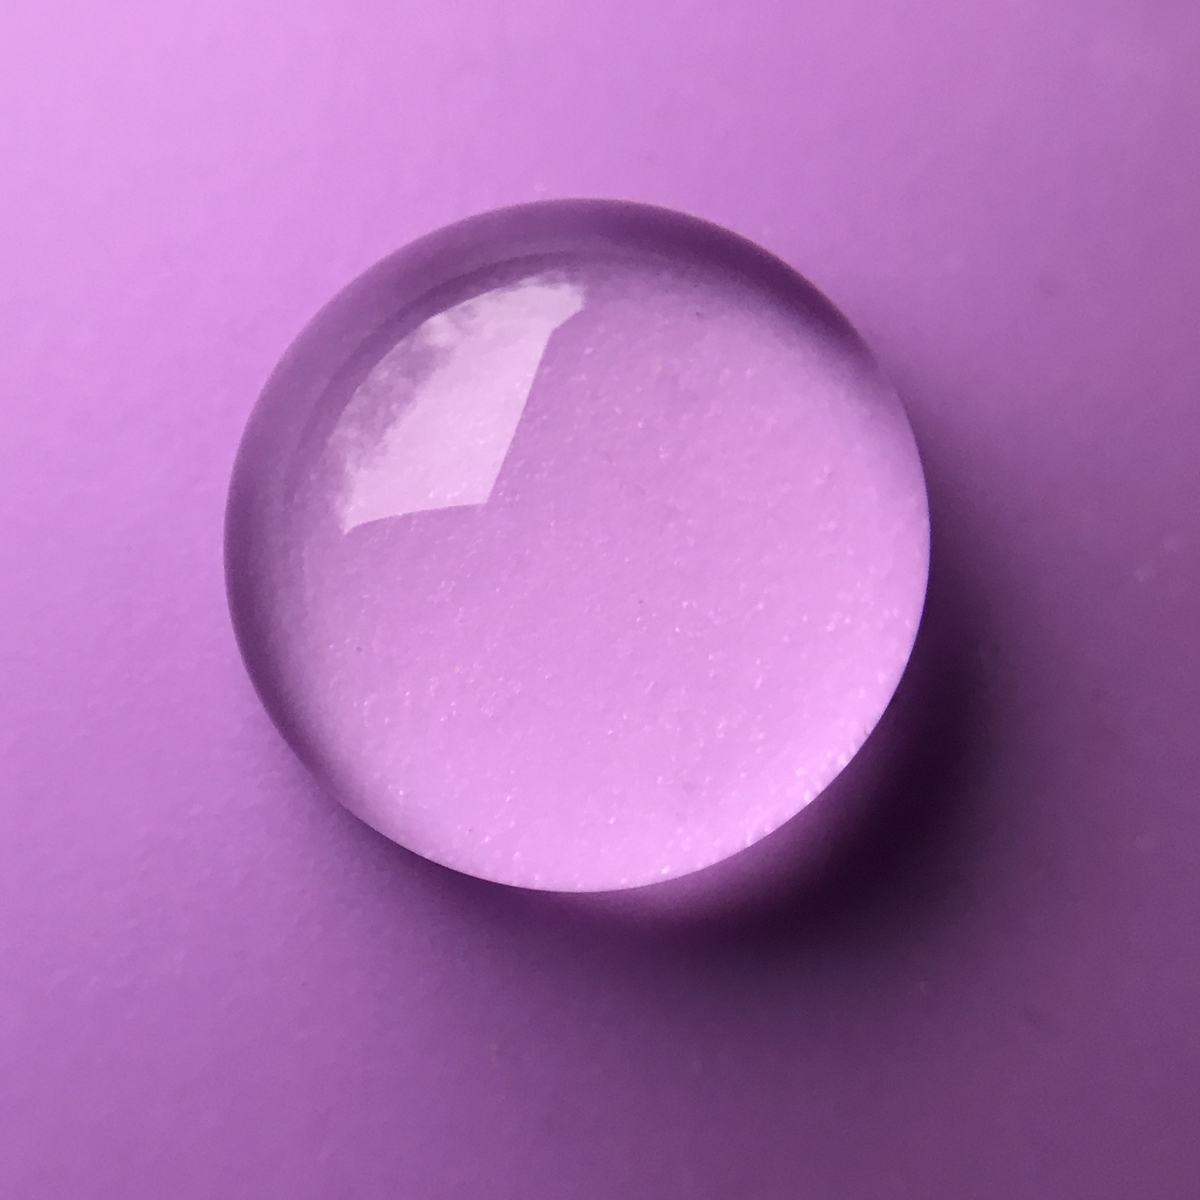
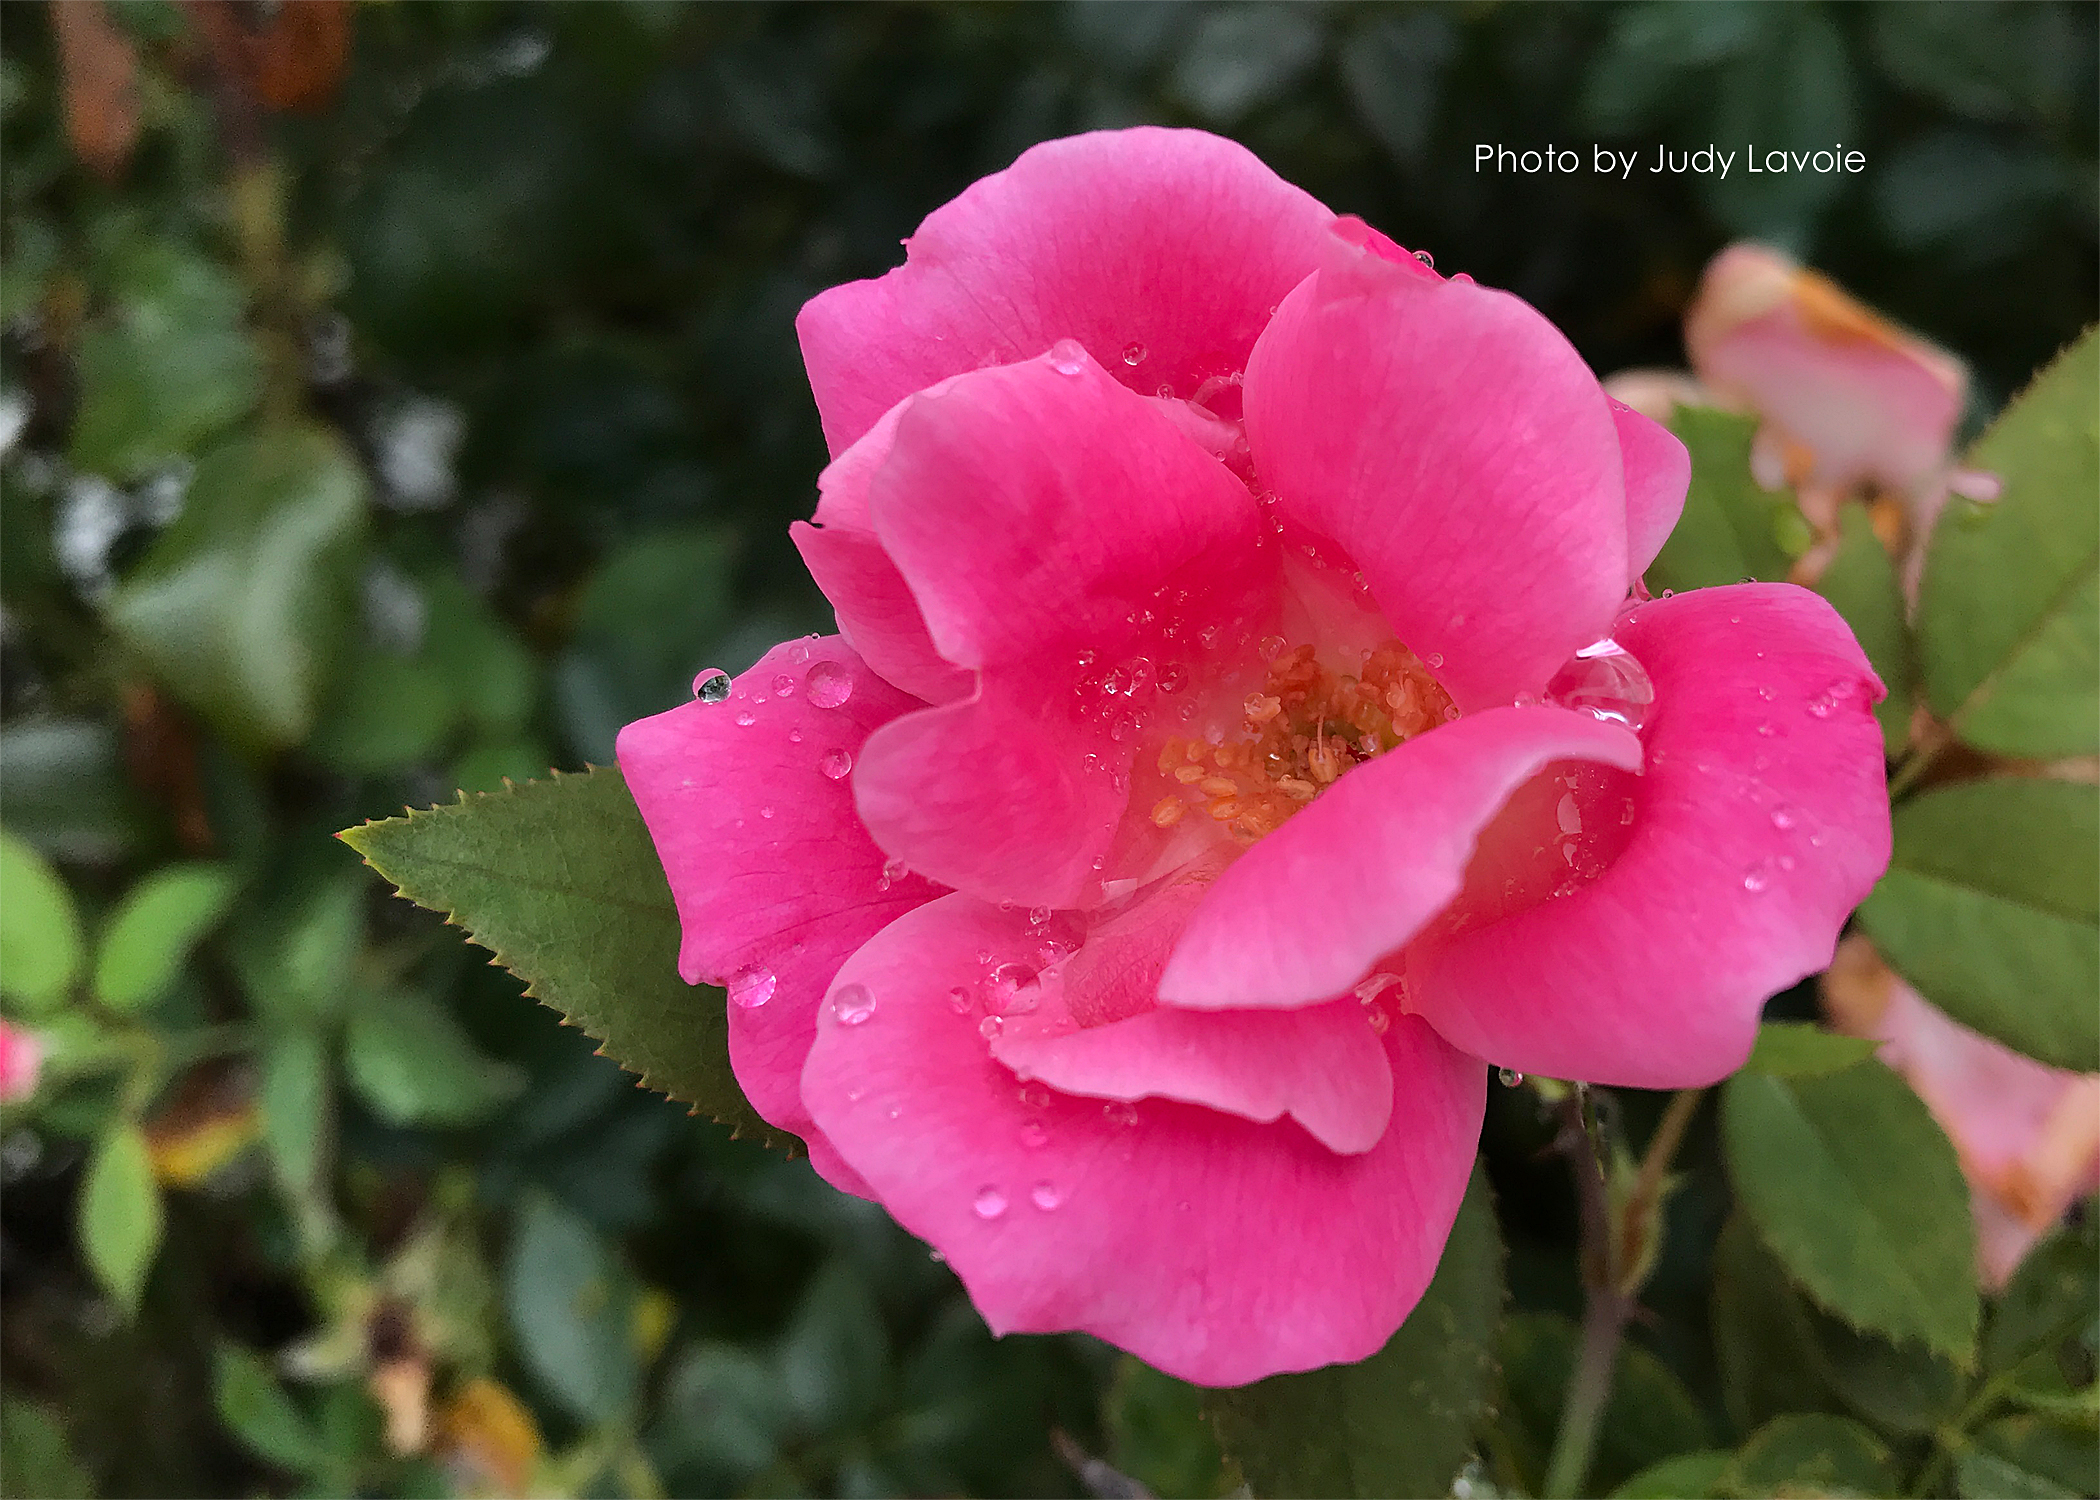
Below are color photos Judy took of raindrops on a wood step and a single water drop on a purple surface.
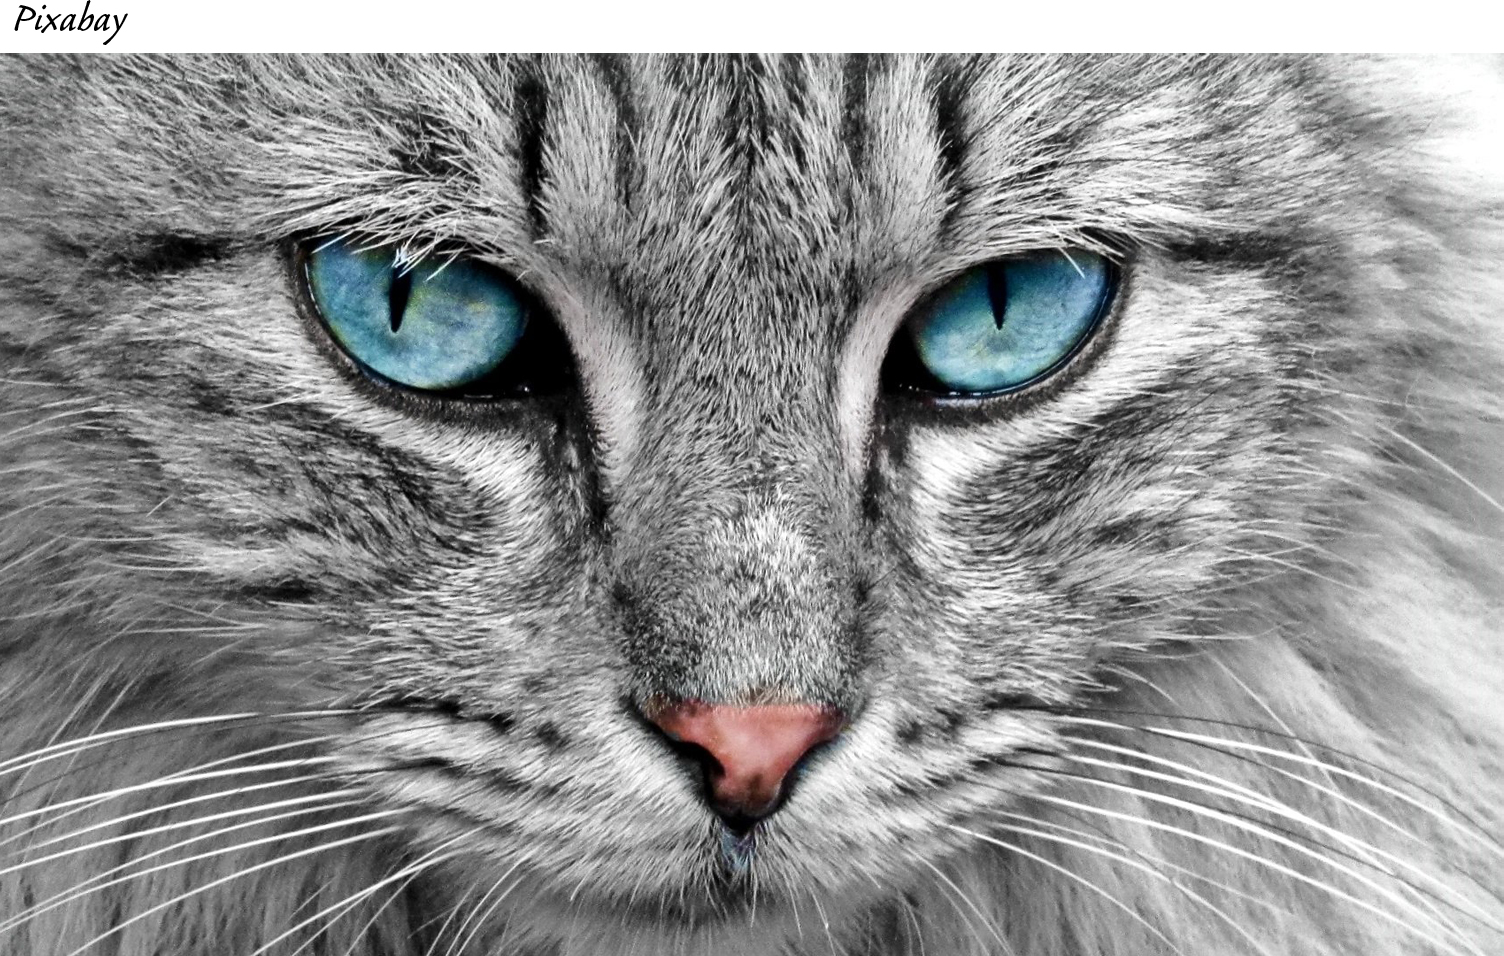
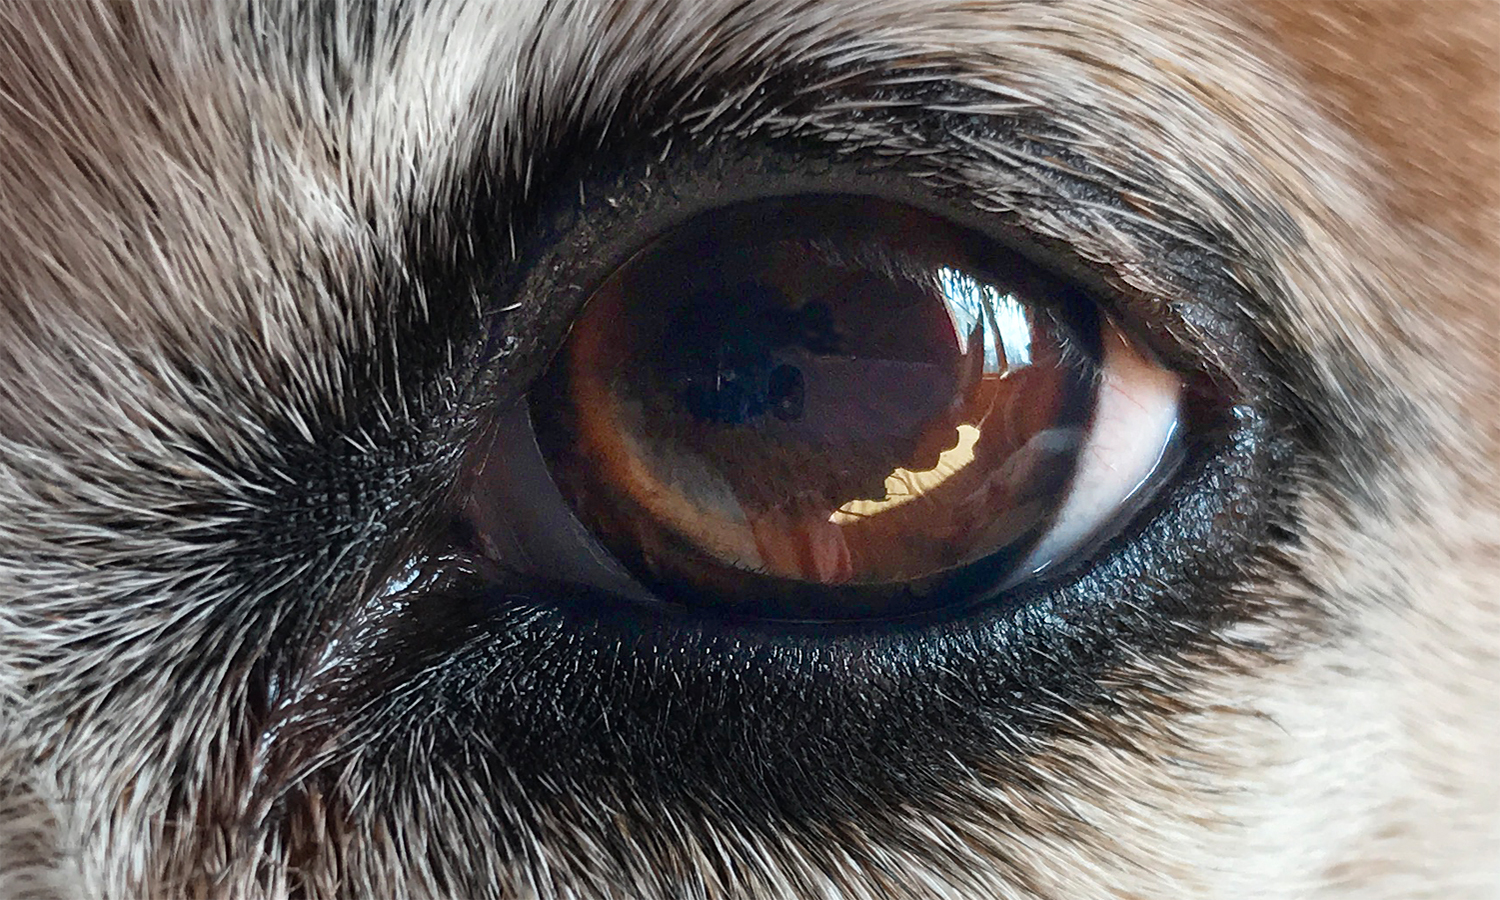
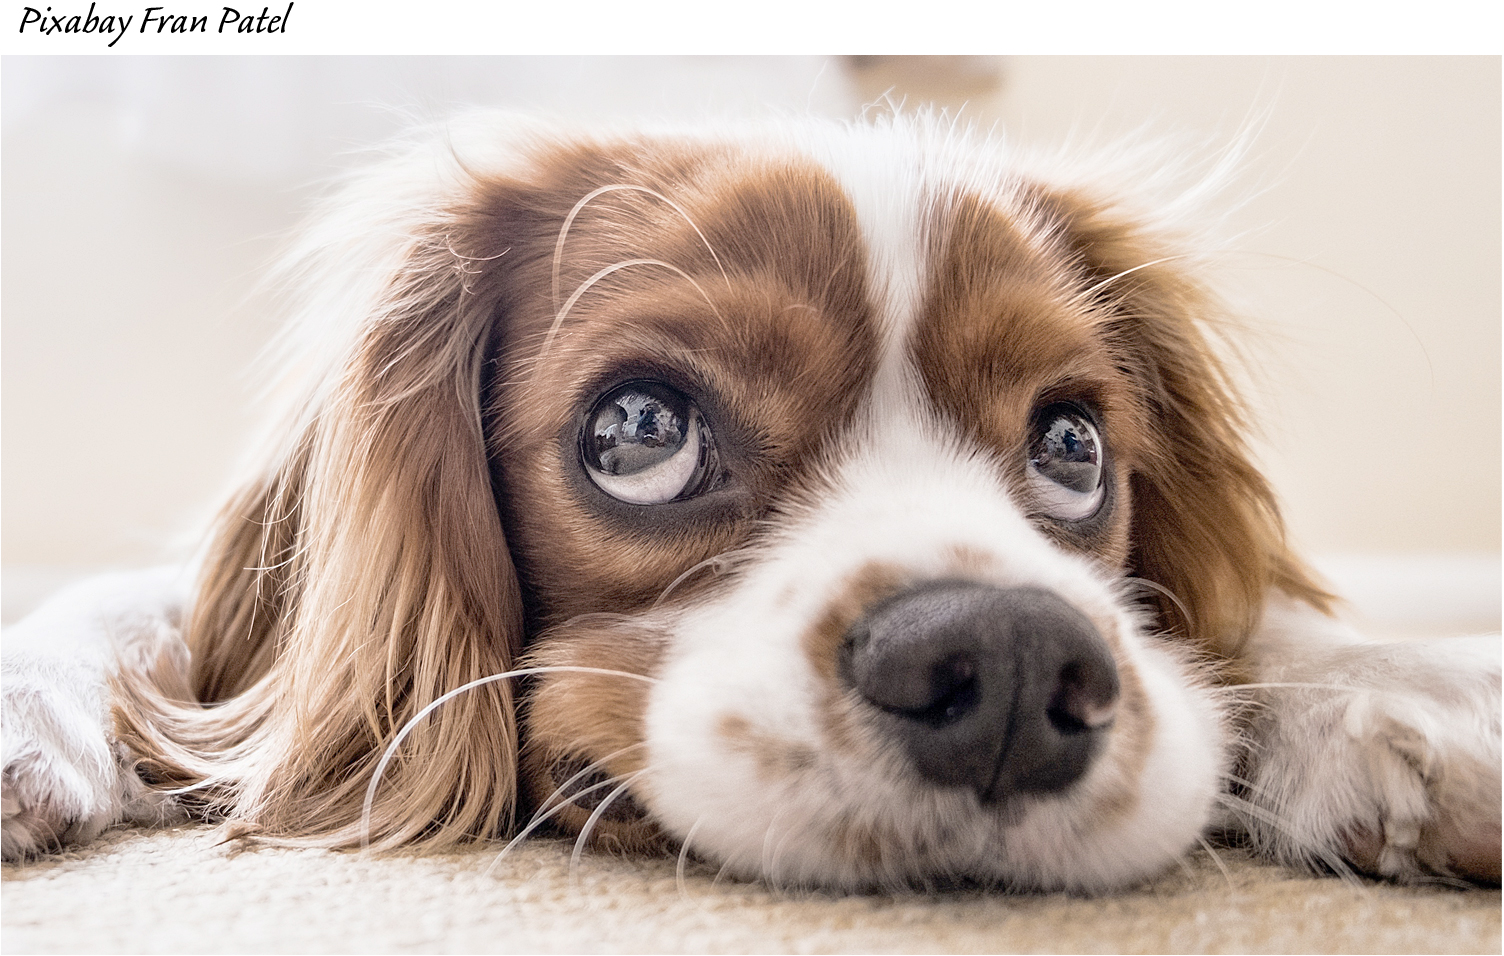
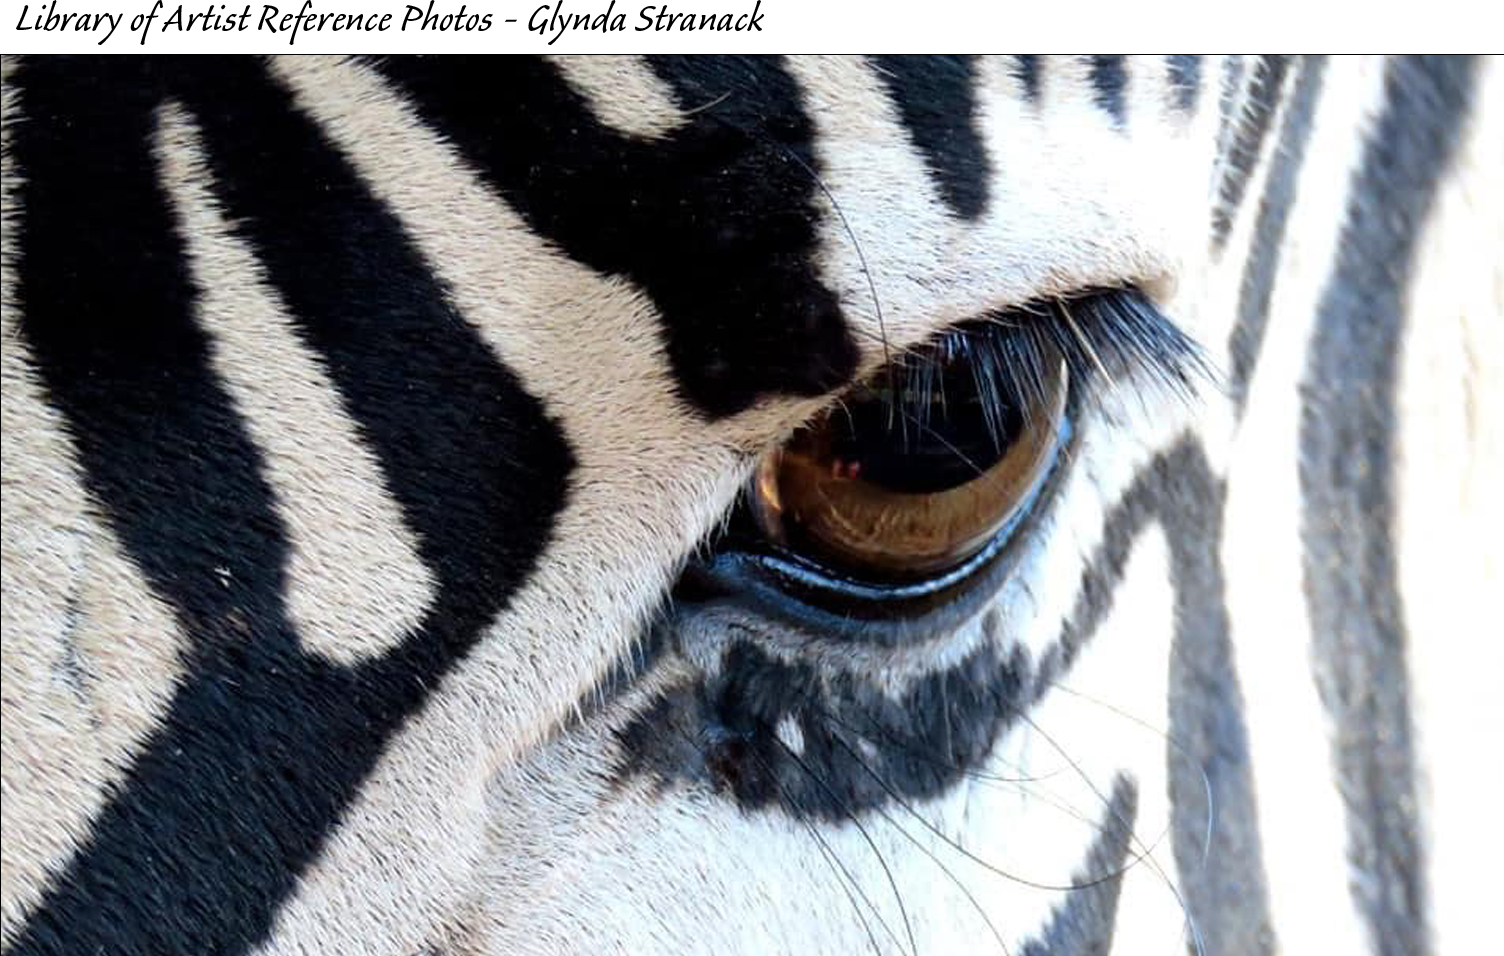
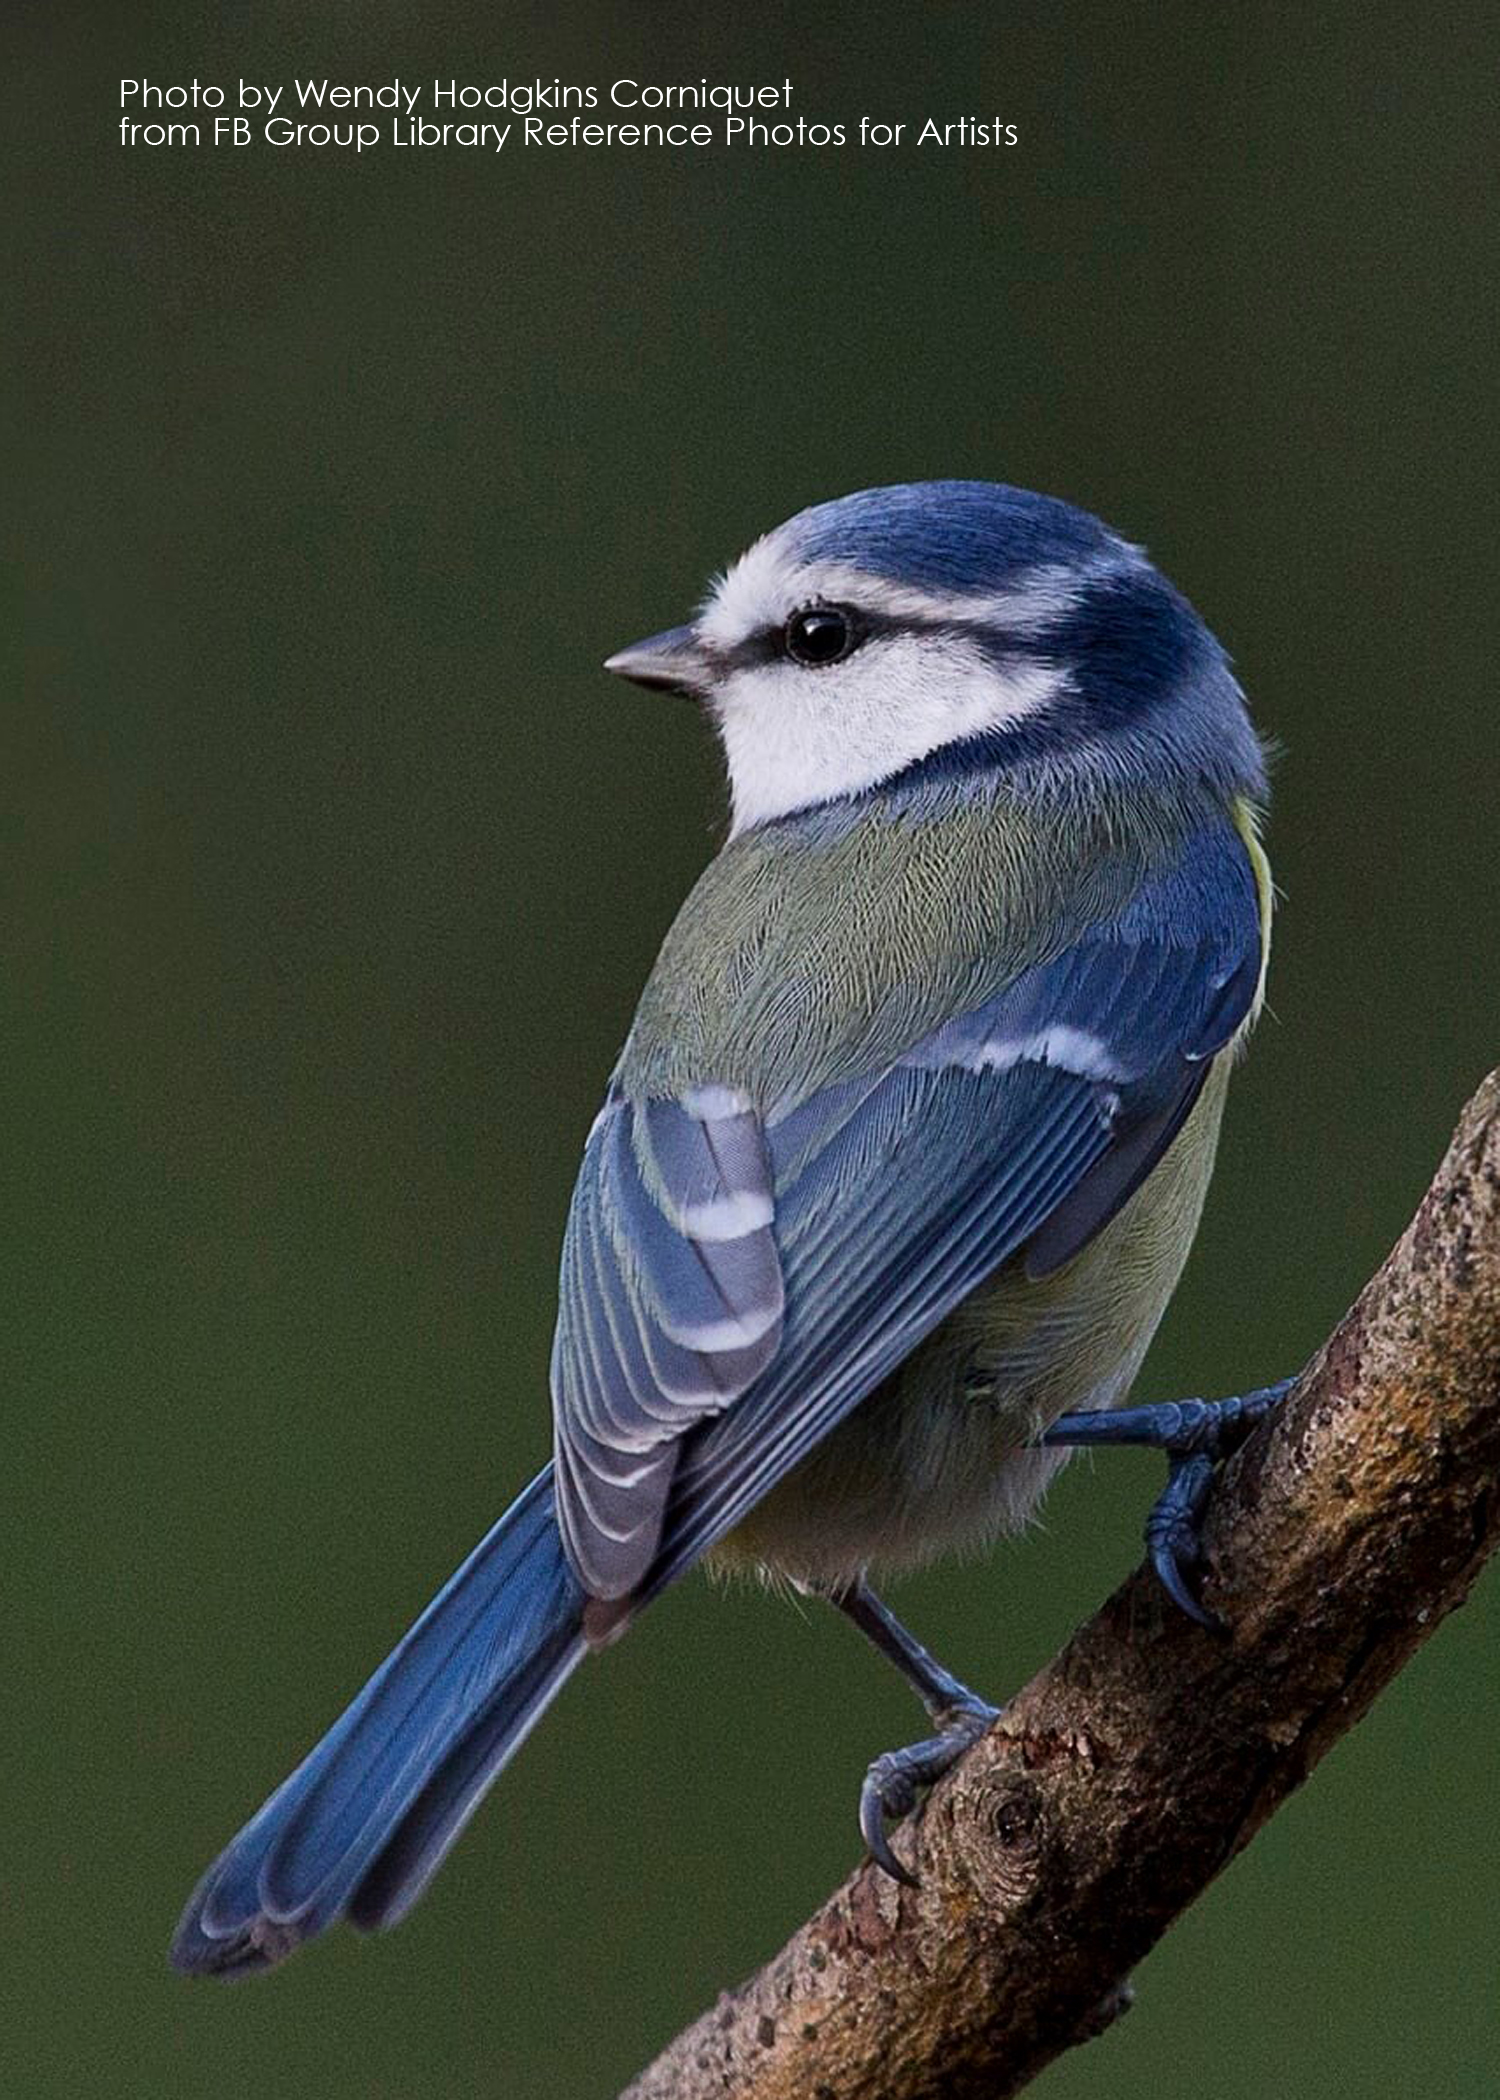
Below are color photos to use as reference for the animal eyes Class Project.
TIPS FOR APPLYING A CLEAR SPRAY
A clear spray coating protects your scratchboard surface from further scratching and other damage to the surface.
Spraying an even clear coat is considered by scratchboard artists to be one of the most difficult steps. Follow these steps:
- pay attention to the humidity and temperature levels listed on the spray
- be certain your artwork is free of all dust and particles (use Swiffer wipe, felt, soft brush, tack rag, etc.)
- spray in a dust-free area, away from any wind or vents
- spray light layers as indicated on the spray can, alternating horizontal and vertical strokes for each layer
- extend the spray beyond the edges of your artwork to be sure you get even coverage
- first coat(s) with gloss followed by satin or matte may help smooth any imperfections
- gloss shows the most imperfections
NOTE FROM JUDY: When I have had a problem (a blob of spray, a particle trapped in the spray coating, a drip, etc.), specifically using Krylon UV archival sprays, my best "fix" is to very very carefully use a small amount of mineral spirits on a lint-free rag (old t-shirt) and very gently wipe small areas at a time to dissolve and wipe off the spray coat. Then start over, following the steps above and praying you don't ruin your work.
Some artists say they have no problems with Lascaux spray, but it cost $50+ for the same size Krylon which costs about $15, so it depends on your budget and the value of your art I guess.
CAUTION:
Even 24 hours after your final coat, when the artwork seems perfectly dry, the underlayers may still be soft. So:
- Do Not frame the panel (where the frame overlaps the art it may press into the soft finish and leave a mark all the way around the panel
- Do Not package the art so plastic is in contact with the sprayed side until a very long time has passed since you sprayed (the amount of time varies depending on your drying conditions of temperature and humidity). Plastic - including a plastic bag, bubble wrap, etc - can adhere to the sprayed surface, especially when subject to hot temperature environments. I would not even trust archival clear bags.
Below are color photos to use as reference for the 5" x 7" panels Class Projects.

Helpful Links:
Cathy Sheeter, scratchbord and clayboard artist
https://www.cathysheeter.com/
See a great short video on her work on her home page.
Gordon Corrins, Scottish Scratchboard Artist
https://www.corrinsart.co.uk/
He only applies color beautifully, but with an airbrush, never with a brush.
Lonetta Avelar, Scratchboard Artist of Award-Winning Animal Miniatures
See her YouTube video, doing a 2” x 2” scratchboard using an acupuncture needle in a pin vise:
https://www.youtube.com/@lonettaavelarartist7737/videos
She also uses a 3RL eyebrow tattoo needle in a crosshair craft knife handle.
https://www.youtube.com/watch?v=nSnR-Pma7x8
- Beginner Time Lapse Scratchart by Cristina Duran on Essdee scraperboard, using scratch nibs, fiberglass tool, black ink for corrections
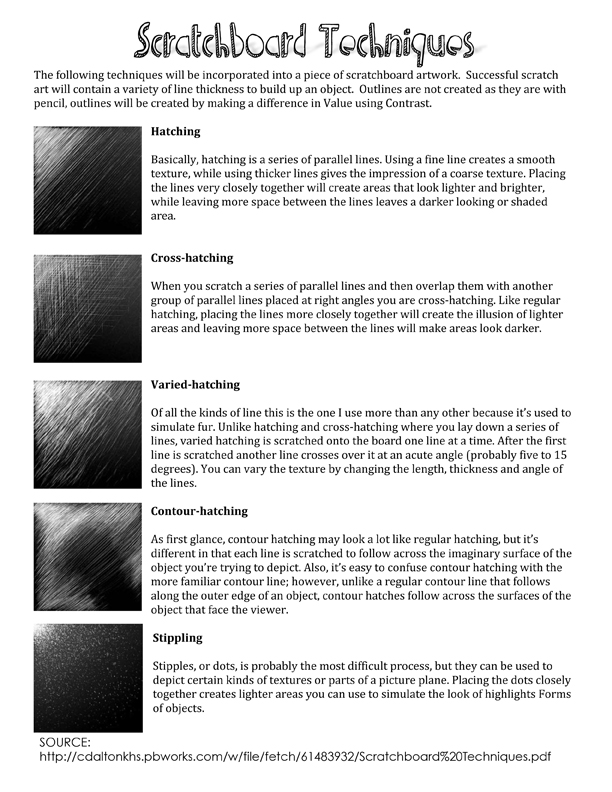
Downloadable .pdf file showing variety of “hatching” styles
http://cdaltonkhs.pbworks.com/w/file/fetch/61483932/Scratchboard%20Techniques.pdf
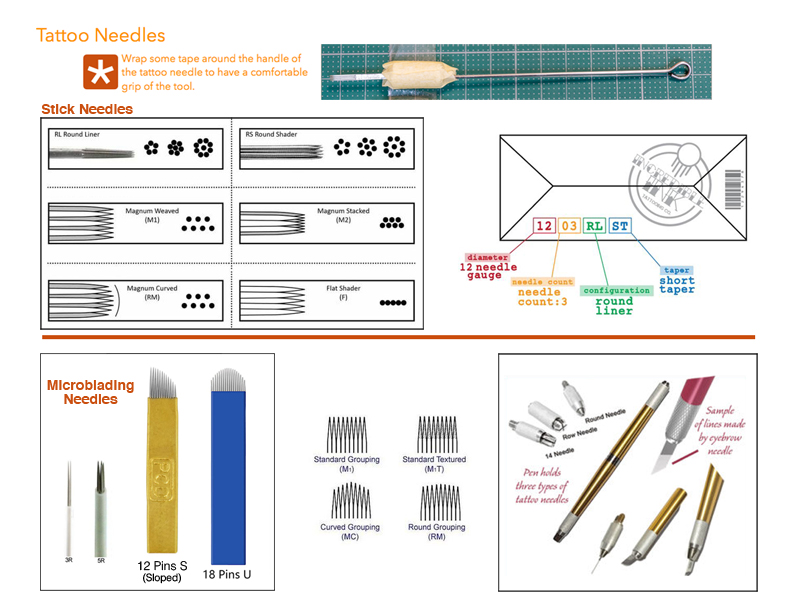
Everything you wanted to know about tattoo needles!