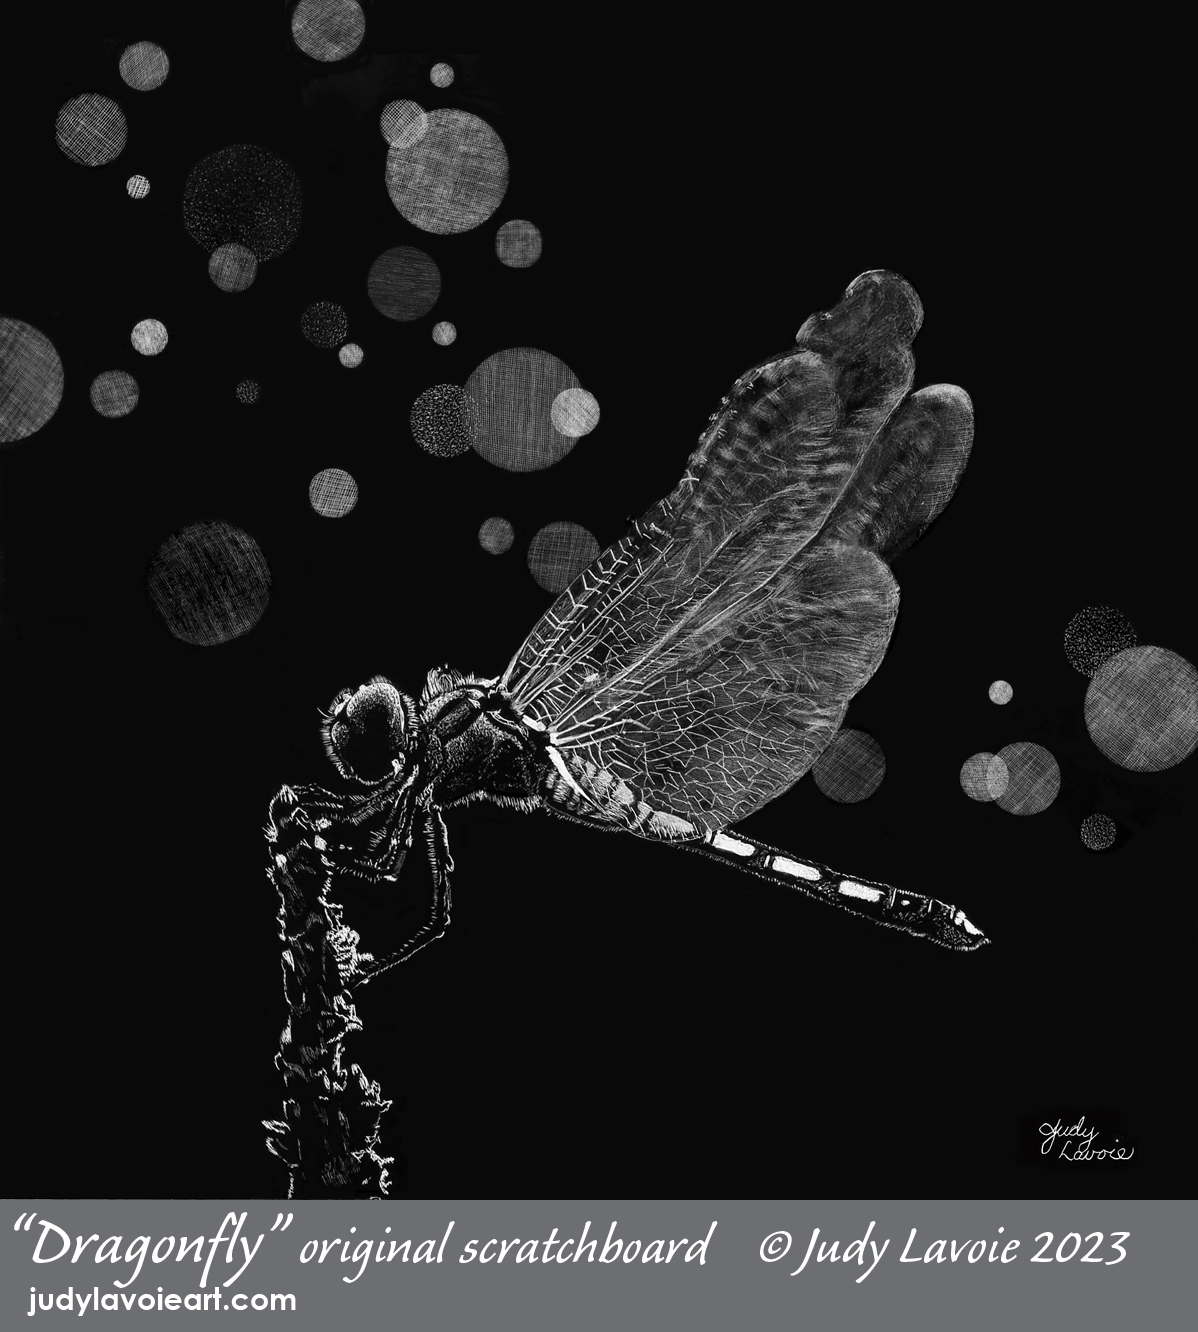
Have you ever noticed a background in a photograph which has blurry circles of light against darker areas? This is a “Bokeh” effect, and is comes from a Japanese word meaning “blur quality.” Evidently it means than just the blur, it’s the overall effect of the soft out-of-focus background, from an aesthetic viewpoint.
I have used this effect in watercolor paintings in the past, and recently saw other scratchboard artists apply bokeh nicely to their backgrounds. So I decided to do some reverse engineering, studying those artists’ works to see if I could figure a technique to use on my own scratchboards. I knew it would be much more difficult on scratchboard than on a watercolor painting, but I am always eager to learn new ways to bring my scratchboards to a higher level.
My goal was to create different size small circles and scratch an even grey value within the circle shapes. Drawing circle guidelines and trying to scratch just within the border was not precise enough for me. Scratching lines within a plastic circle template wasn’t working well either. With much experimenting, I finally found a method which worked pretty well…. this post will get technical, so some of you might just enjoy the artwork, not the technique!
I began by punching holes out of tape and using the tape with the empty hole as a mask on the unscratched scratchboard surface. I already owned various hole punch sizes, those sold for scrapbooking and other crafts as well as a standard paper punch and a “Crop-A-Dile” for the smallest circles. Initially I used ‘removable’ clear tape. The tape alone was too thin to punch through so I lightly attached the tape to a glossy stiff paper, like a postcard, and then I was able to punch out sharp circles and easily peel off the tape. While experimenting I happened to notice a product I had not seen before at the store, a purple masking tape by Scotch made for ‘delicate surfaces.’ Figuring this would adhere and remove easily, I bought a roll and found it worked great with the hole punching and removed cleanly from the scratchboard.
Next I needed to find see what scratching technique and what scratching tool would make the best marks to create solid shades of grey within the circles. I tried stippling, hatching and cross-hatching. Stippling was a good effect but don’t really enjoy the process of making lots of little dots. Hatching and cross-hatching gave me results I liked. (Continues below)
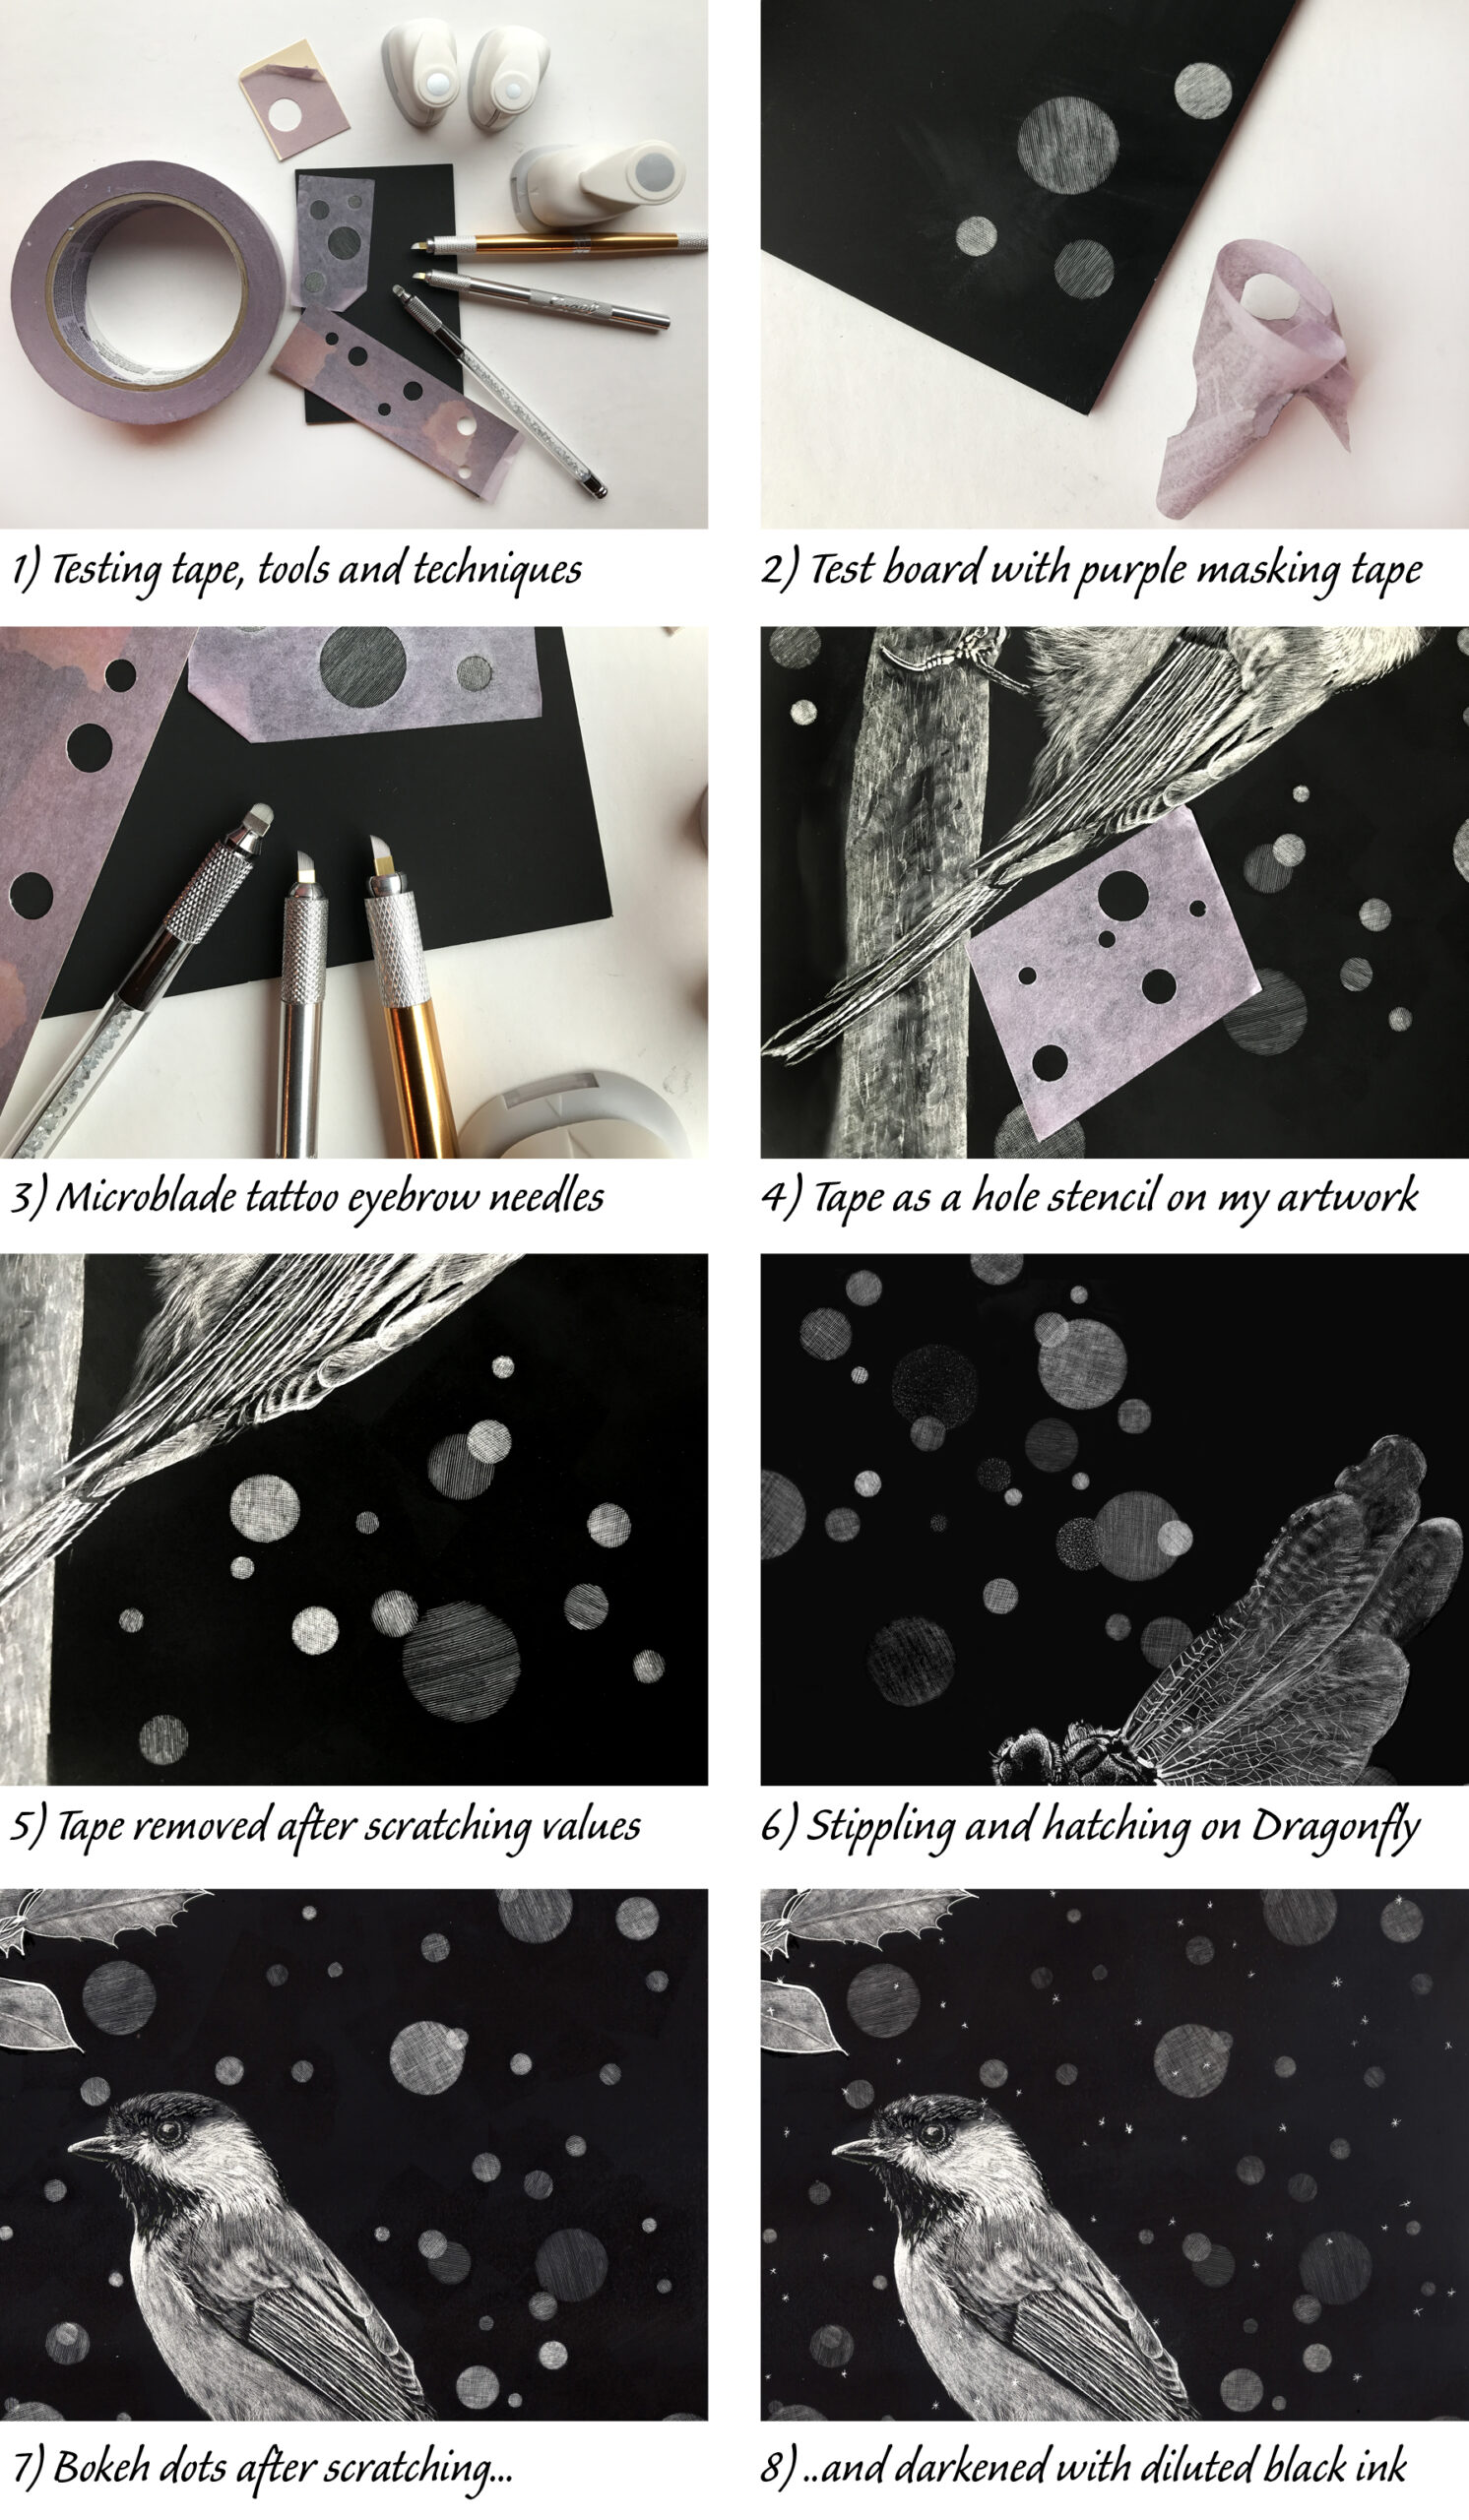
Experimenting with scratch tools, I tried making these marks with a single blade x-acto, a pointed scriber, and different tattoo needles. The single points were fine for stippling, if I decided to do some circles that way, but it was a bit difficult to keep the freehanded lines parallel. Tattoo needles are a wonderful scratching tool, with a series of tiny needles very close together, sometimes in a straight row, other times in a circle. Scratching with them makes it easy to make evenly spaced parallel lines in each stroke. Microblade eyebrow tattoo needles worked best for hatching lines in my experimenting than other tattoo needle configurations. I used several micro blades with different end shapes, as Photo #3 shows. The number of layers of hatching and cross hatching, as well as the pressure on the scratching tool, helped me make a range of gray values.
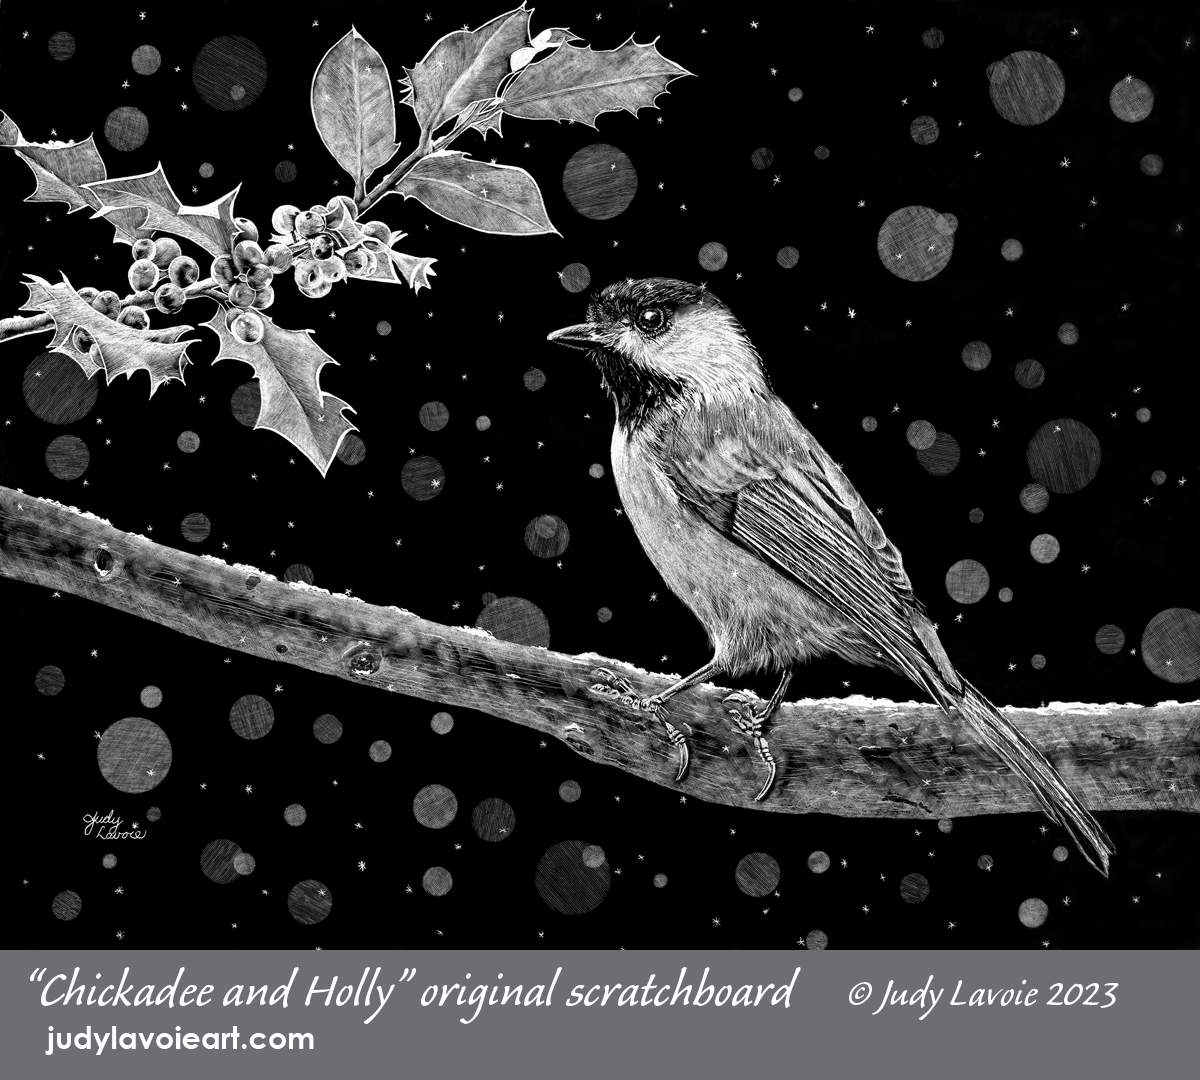
Now I was ready to apply these results on a new scratchboard artwork, “Dragonfly.” In the background I tried to vary the distance between circles, with a few overlapping. I liked the effect except for one thing… the bokeh circles ended up light and too bold, competing for attention with my center of interest, the Dragonfly. So as a final step I diluted Ampersand “Repair Black” ink, painting several light coats over the circles (drying between each) until this darkened the values enough so the circles didn’t attract my eye. I was very happy with the results, even if the bokeh dots ended up with sharp edges rather than a blurry effect as in a photo. So I applied these techniques to my next scratchboard as well, “Chickadee and Holly,” and made little star shapes also to make the background look snowy. Mission accomplished!
Dragonfly reference photo from Pixabay by Budhaditya Mukherjee. Chickadee reference photo from Unsplash by Jack Bulmer.
