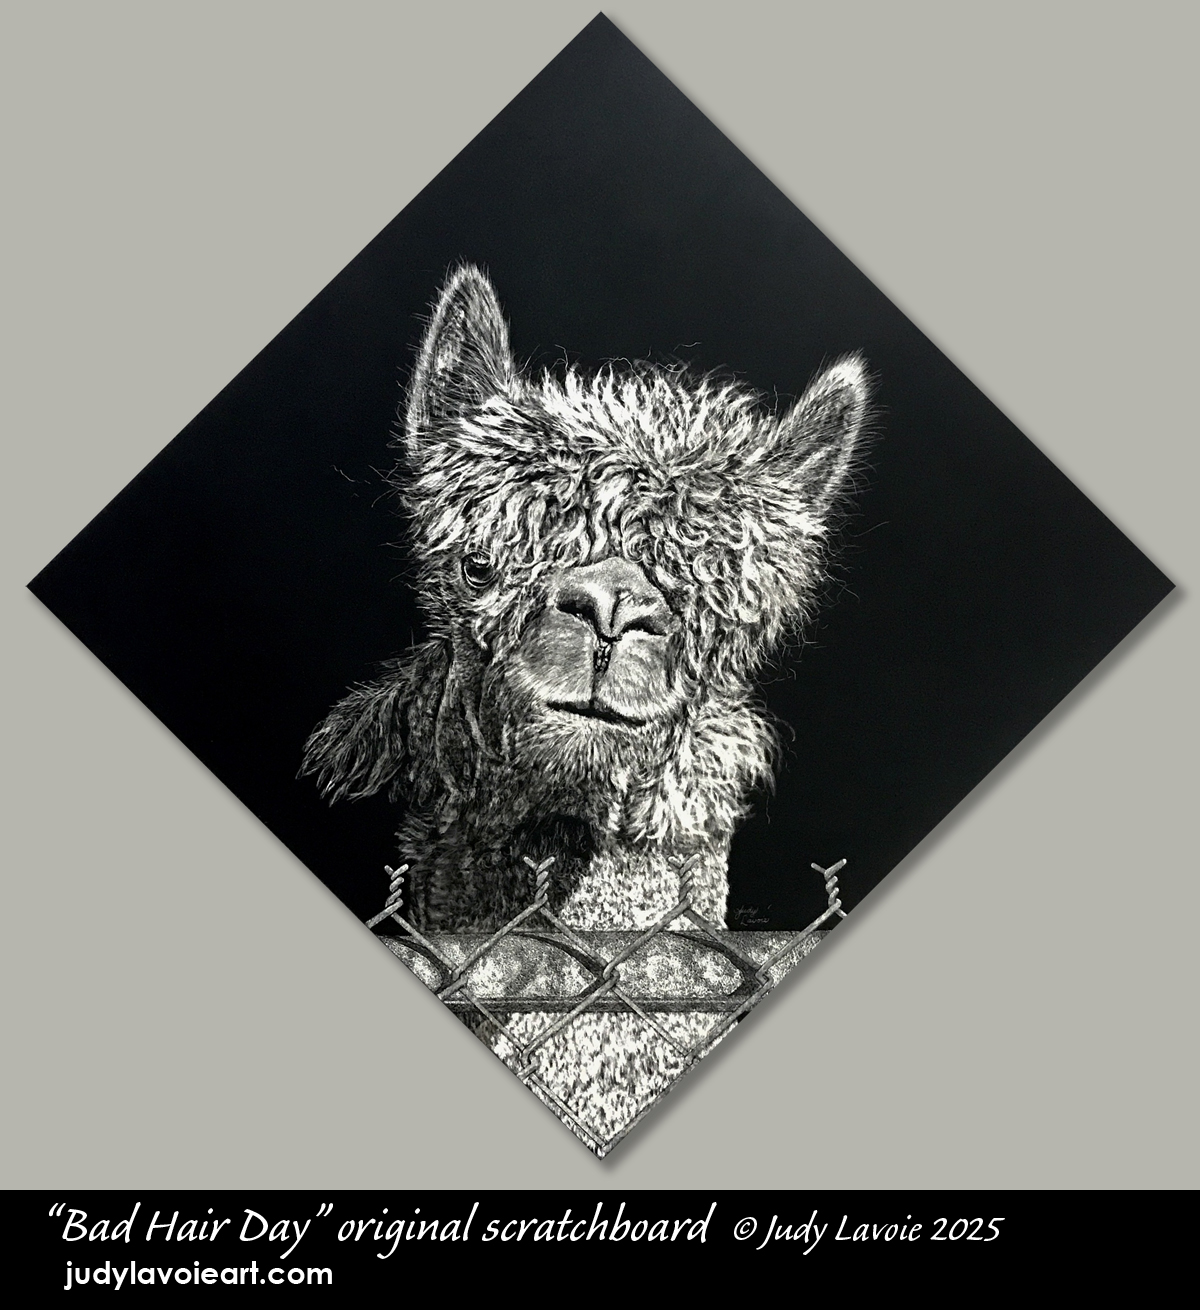
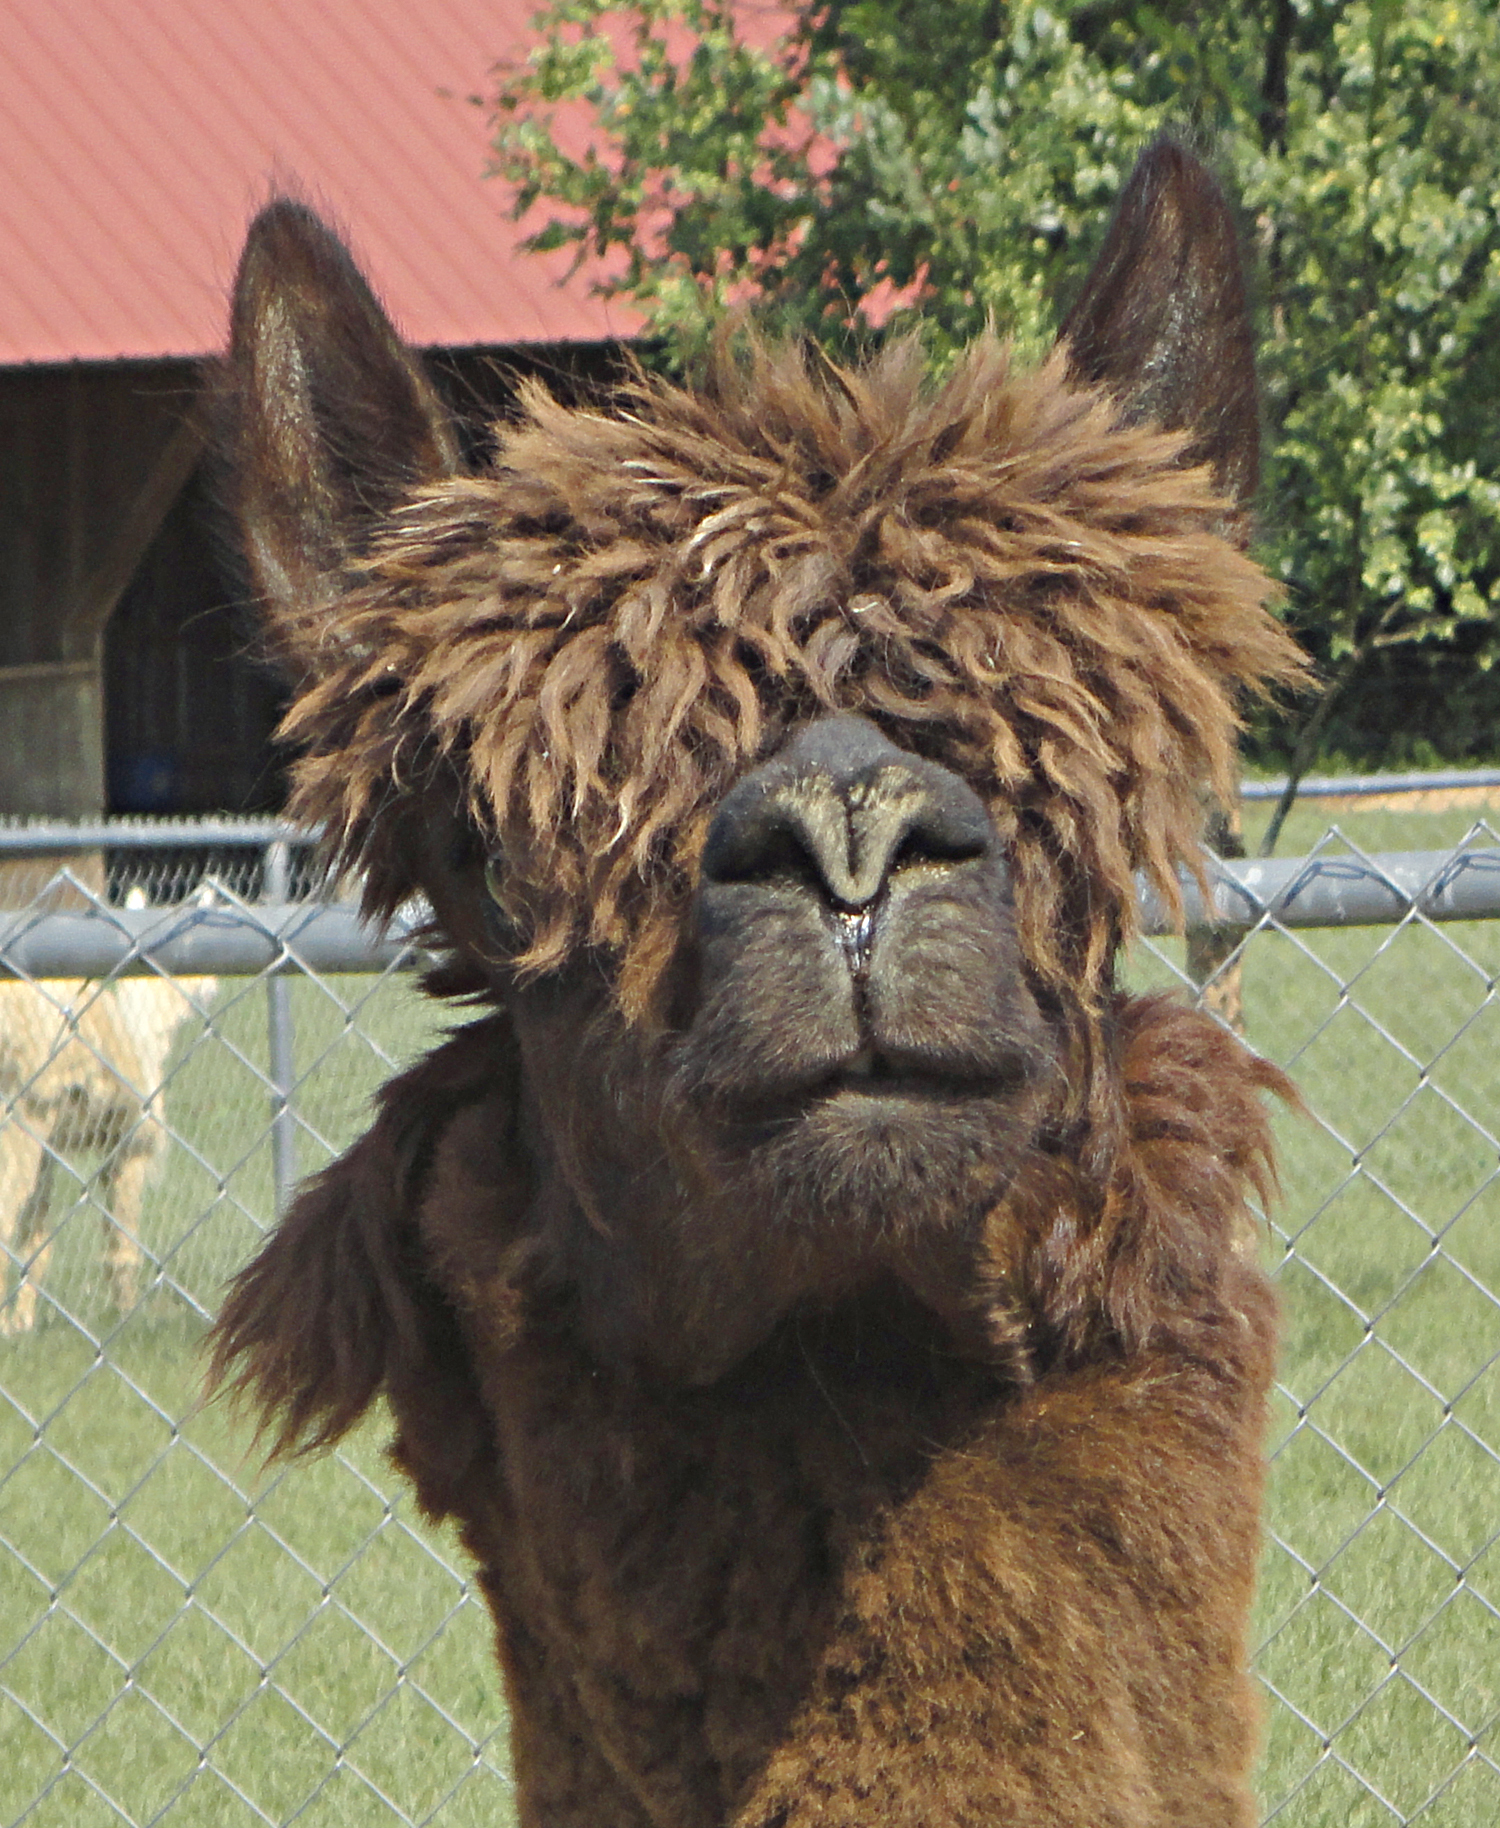
My newest scratchboard is an alpaca, from photos I took several years ago of the three alpaca pets a friend was raising. Not long after my photo shoot I did my first alpaca painting, a colorful watercolor on Aquabord™ titled “Happy Harley.” For this newest art, I selected one of the alpacas named Charlie - I was inspired to create a scratchboard painting of him. The hair kept grabbing my attention!
I chose a pose with Charlie looking straight at me, his chin slightly raised. By eliminating the background, I would keep all the focus on his face. As I did with Happy Harley, I tilted his head slightly, since that sends a body language message which is appealing. Originally I set out to do this as a vertical painting, on an 11” x 14” Scratchbord™ panel. When I cropped my reference image to that size, it struck me that his long neck was not very interesting. Years back I had bought a terrific wood frame which was square. I painted a big sunflower on a square canvas to fit, but I added a little twist by rotating the canvas 45 degrees, to a diamond shape, and positioning the image to hang that way. It made for an eye-catching and unusual painting I titled "Sunshine on My Shoulder." Its unusual shape has often been complimented. Since then I have done several square paintings, in acrylics, watercolors and scratchboards. I felt that my image of Charlie would benefit by switching to this shape, so I chose a 12” x 12” panel, turning it on the diagonal.
I like to start scratchboards in a non-critical part of the image, not at my focal point. This gets me into the groove of scratching. So I began with Charlie’s mass of thick curly hair, using an extra thin fiberglass scratch brush tool. This retractable-stick pen makes soft marks about 1/16” wide when drawn across the black scratchboard surface. The strokes perfectly mimic the texture of the matted clumps of fur. Charlie was chocolatey brown, but I intended to lighten his fur in my painting, since my entire background would be solid black. This would create more contrast and a wider range of light-to-dark values. I think his nose was muddy in my photo, but I intended to make it look clean!
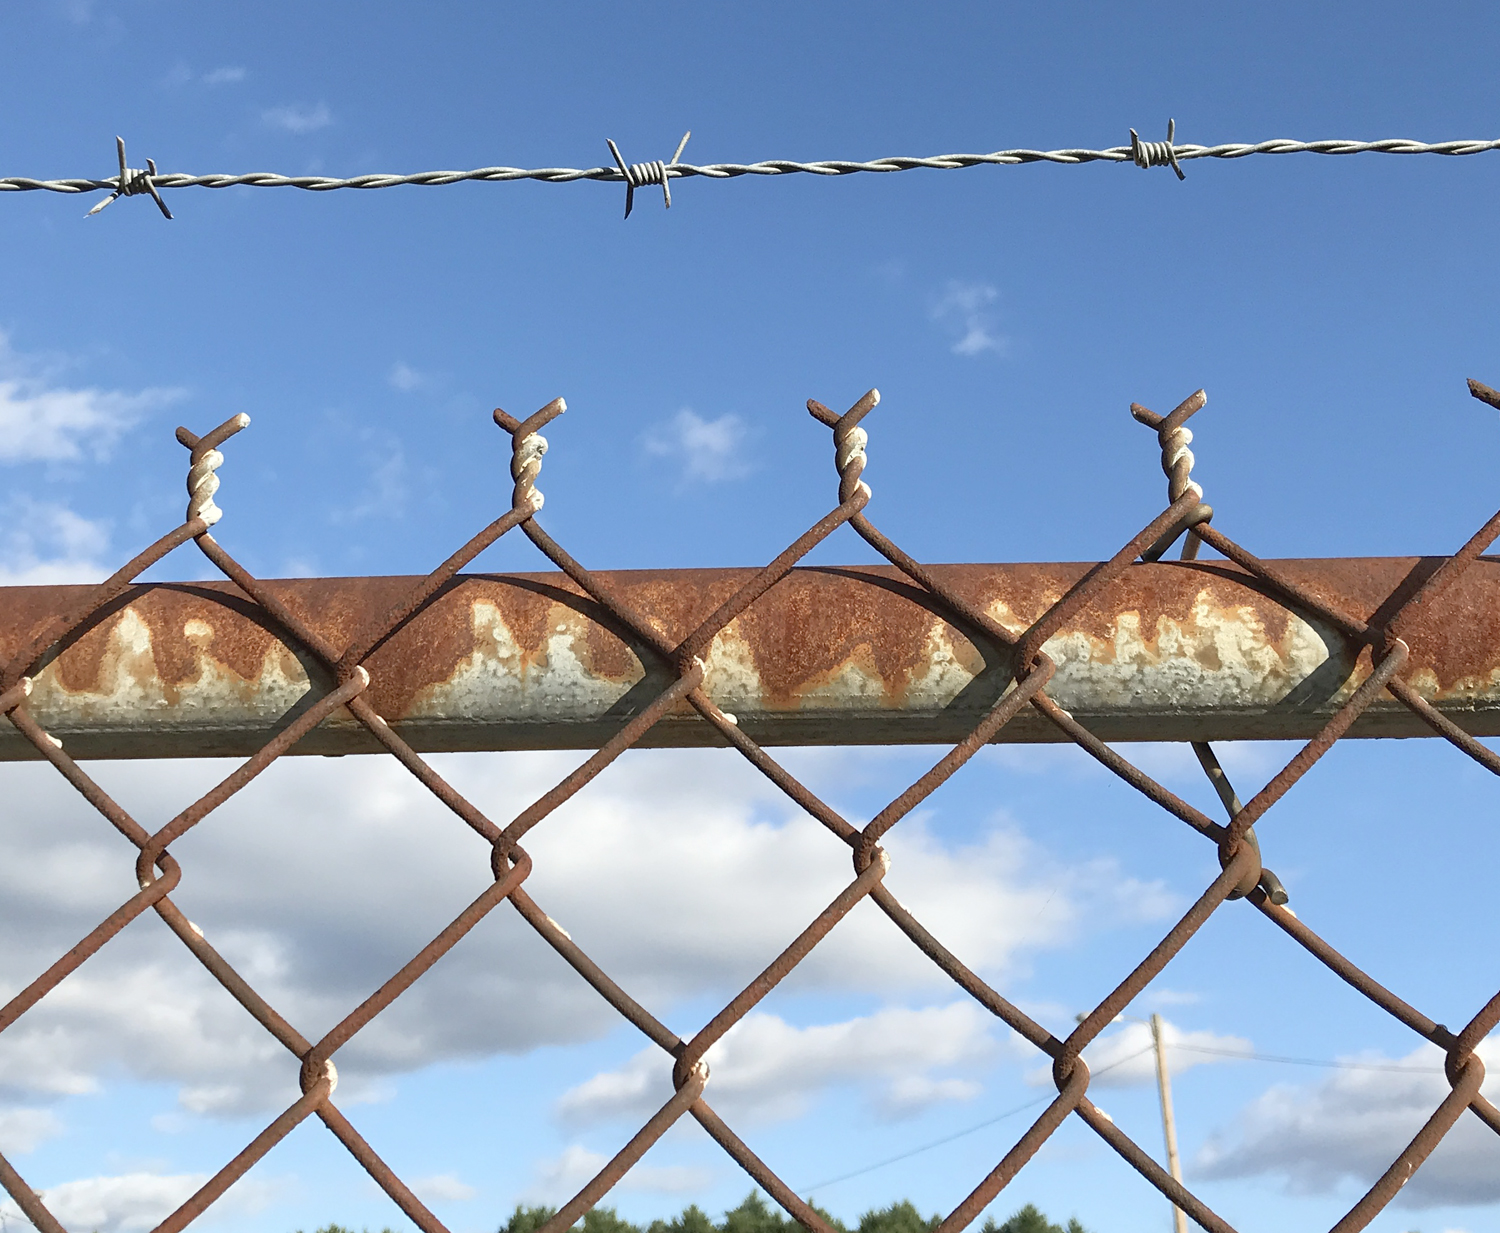
In between sessions of working on Charlie’s hair, my brain evidently kept working on it…. I had a new vision about the bottom part of the painting. In my huge stash of digital photos, I had some images of a chain link fencing, with a close up of the top of the fence. Charlie’s pasture had chain link fencing, as you can see in my original reference photo. If I added this to my painting, in front of Charlie, it could serve several purposes:
- add interest to the lower part of the painting, breaking up the boring furry neck without too much distraction from the face
- introduce some additional textures which could be scratched differently
- indicate strong overhead lighting with its cast shadows
- the horizontal bar would reinforce the tilt of Charlie’s head while giving a bit of visual weight and stability at the image at the bottom
So I scouted out my photos of chain link fencing, sizing one to the same proportion as it would appear if at a short distance in front of Charlie, then deciding how to position it in my painting. I was careful to sketch in the guidelines so they would be perfectly level in the artworks’ diamond shape too, otherwise it would have looked awkward when hanging. Luckily, the lighting of Charlie matched with the lighting of the chain link fence in both reference photos. I was glad I had started my painting at the top so I could make this detour from my original composition.
I experimented with which scratching tools and techniques would work best for the wide metal support bar and for the “chains.” I’ve done barbed wire in scratchboard and love how the twisted metal makes it look so real! In this case, I opted to use a multi-needle tool made for doing tattoos, specifically called a microblading eyebrow tattoo needle (see the closeup photo). Tattoo needles are great for scratchboarding since each stroke with the tool will scratch multiple fine close parallel lines. The needles come in different configurations (side by side in a flat line, two rows of offset needles, a circle of needles, etc.) and with different numbers of needles (3, 5, 9, 14, etc.). Some come with the needles on the end of a rigid stick and some come just as tips which you can insert into an x-acto type pen holder. The microblading tips have even more variations, with the flat row of needles ending in a U-shape, in a slant, rounded on the ends or straight across in an even row. How confusing! I used a microblading tip with 12 fine needles on a slant to scratch the fencing “chains” - making 12 fine marks with each stroke. I stroked diagonally across each bar, masking the edges to keep them straight with an easy-to-remove purple tape called Scotch Delicate Surface Masking Tape.
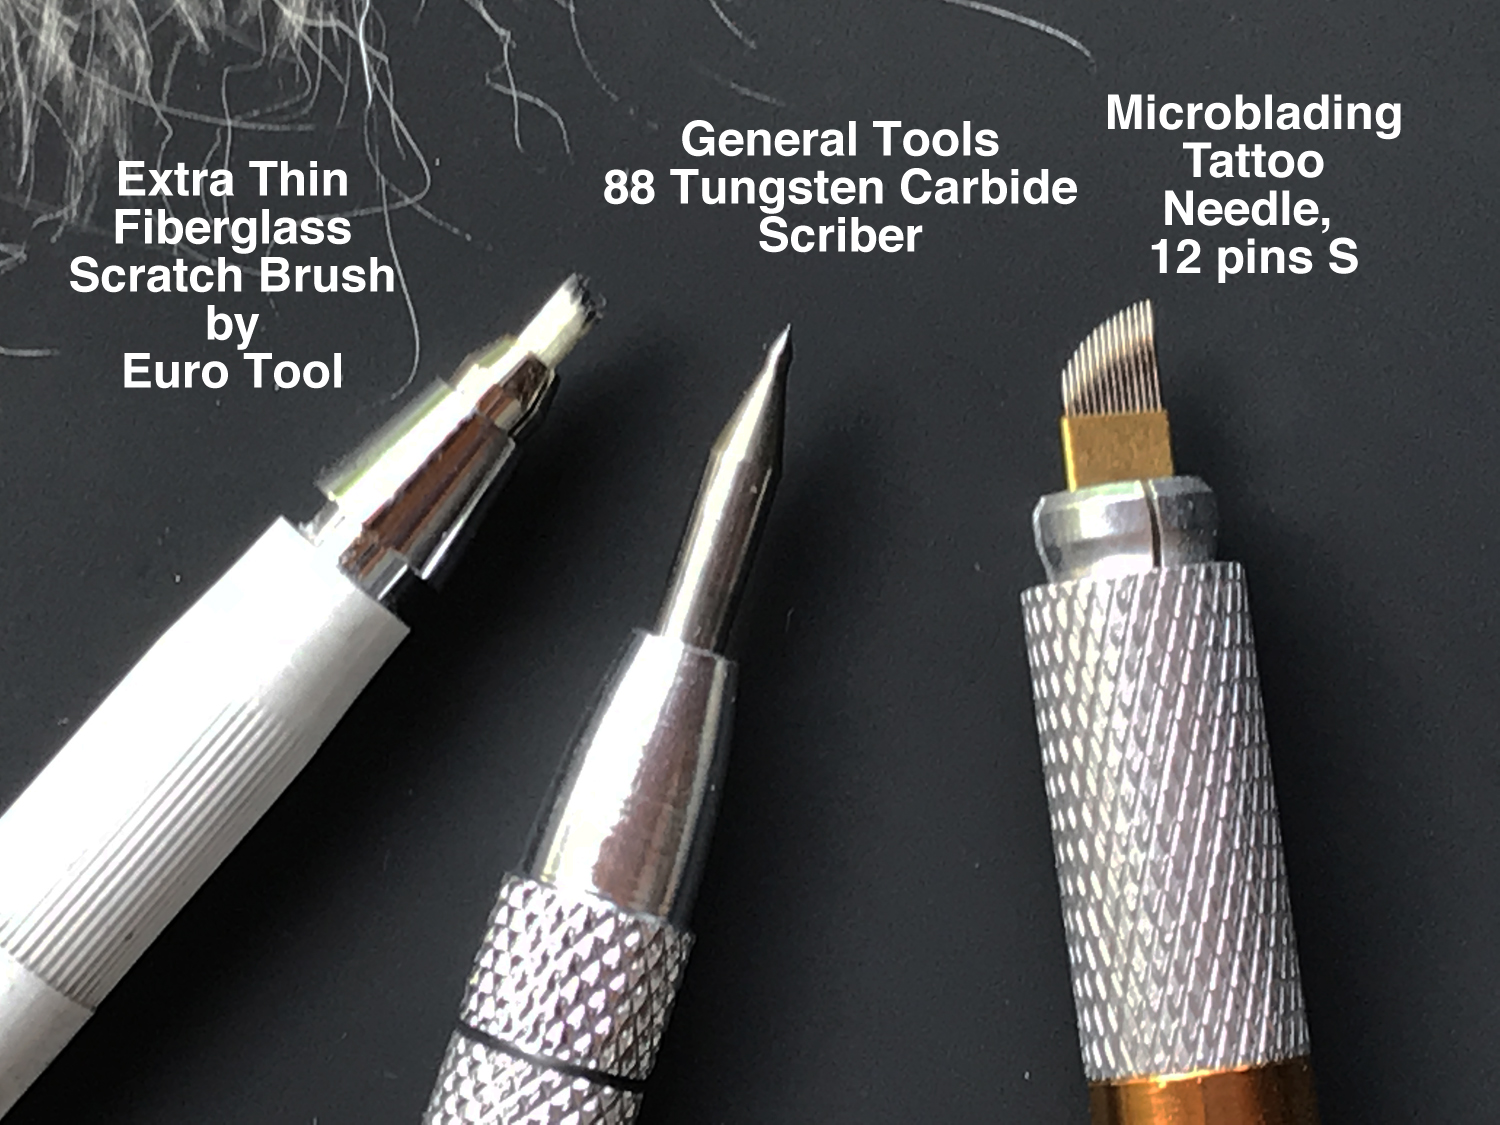

The curved wide bar at the top of the fencing had a rough texture. I decided to use a “scumbling” scratch. I do this technique with one of my two favorite tools, each with a sharp metal tip pointed like a sharpened pencil. One such tool is the Jack Richeson Twisted Etching Tool, with a point at each end and a twist on the shaft to make it comfortable to use. It is sold by art supply stores. A second similar tool is a glass etcher. I have seen these sold in hardware stores and online. The pointed tip of the etcher fits into a pen holder, making it natural to draw with, scratching clean lines to reveal the white layer. This time I chose the glass etcher, making random doodle marks on one of my test panels by scratching continuous strands of little circle shapes. For lighter areas, I repeated with another layer of the same marks; for darker areas like the cast shadows I spread the marks apart more. I liked the results so that’s how I scratched the bar on my painting, holding an index card along the straight edge so I could work my marks evenly without freehanding an even edge. Since the metal surfaces were rusty and irregular, I didn’t have to struggle to make the values smooth.
As I have written many times, the eyes are of utmost importance in my animal paintings, bringing the character to life. Charlie had one eye covered completely by his fur and the other was a bit obscured in the shadows. I used artistic license, referring to one of my other alpaca photos for a more clear and pronounce eyeball, and that’s how I depicted Charlie’s eye. The simple white circular highlights around the black area and the reflection from his distant view were enough to give the eye more emphasis and realism. For his nose I used the glass etching tool to do stippling - continuous close tiny lines (sort of like stippling dots with pen and ink on white paper). I decided to alter his mouth to look more like a grin, since Rick’s critique of my work in progress was that he looked scary. I was aiming for a humorous and friendly look! I used the glass etching tool to make fine irregular strands of hair, sticking out and growing among the more bunched up clumps - to further emphasize my title “Bad Hair Day.” A series of clear coats of Lascaux UV Protectant Spray #3 Satin was my final step.
This was a time consuming product, but I enjoyed every minute. Sweet Charlie came together as I had envisioned. I hope "Bad Hair Day" will bring a smile to those who see him!