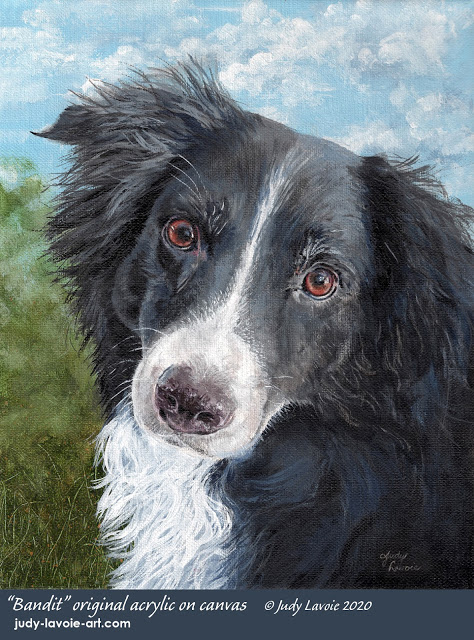
Dog portraits are one of my favorite subjects, so when I was commissioned to paint beautiful Bandit it was a delight. We decided on an acrylic painting on an 8x10 canvas.
My customer Erin sent me a few reference photos and I was immediately drawn to the one with the tilted head (#1 in my photo collage shown below). But on closer inspection, I didn't particularly like the glare on Bandit's nose and the reflections in his eyes, caused either by a flash or strong side lighting. I preferred his face in photo #2 and I could reveal lots of variation in the black fur on his face by manipulating that photo in Photoshop. When painting solid black or white fur you have to push the highlights and shadows to create realism and dimension.
For many of my painting compositions I combine the best reference photos in Photoshop. So photo #3 is my combination of Bandit's head from photo #2 (rotated for a bit more tilt) placed on his body and lovely blue/white neck fur from photo #1, and sized to matching proportion. I also played around with whether the portrait would work best as a vertical or horizontal format, and decided on the former. Ready to get hit the canvas!
My pencil sketch defined the contours of different values in the dog and I painted him in an imaginary outdoor setting. I knew the white fur of Bandit's neck would look best contrasted against dark tones, so the greens in the lower left became the darkest and most detailed part of the background. The blue sky and scattered white clouds were a good backdrop for his dark head and also would accent the blue tones in both his black and white fur.
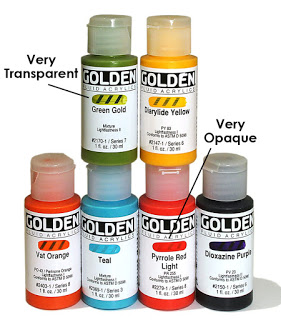
Notice that I didn't paint the background colors over the whole canvas - it actually just went over the edges of my outline of the dog. This way I have a clean white area on which to paint my main subject. Acrylic paints can be used opaquely, but I use Golden Fluid Acrylics and colors vary from highly transparent (like Green Gold) to very opaque (like Pyrrole Red Light), as shown in the photo. As a helpful aid to artists, Golden has each color hand-painted over an area of slanted black stripes on its label, displaying the degree of opacity. My colors seem more brilliant and true when painted over white than if I try to make them opaque and cover over other colors. I don't apply my paint very thickly either, so this works best for me.
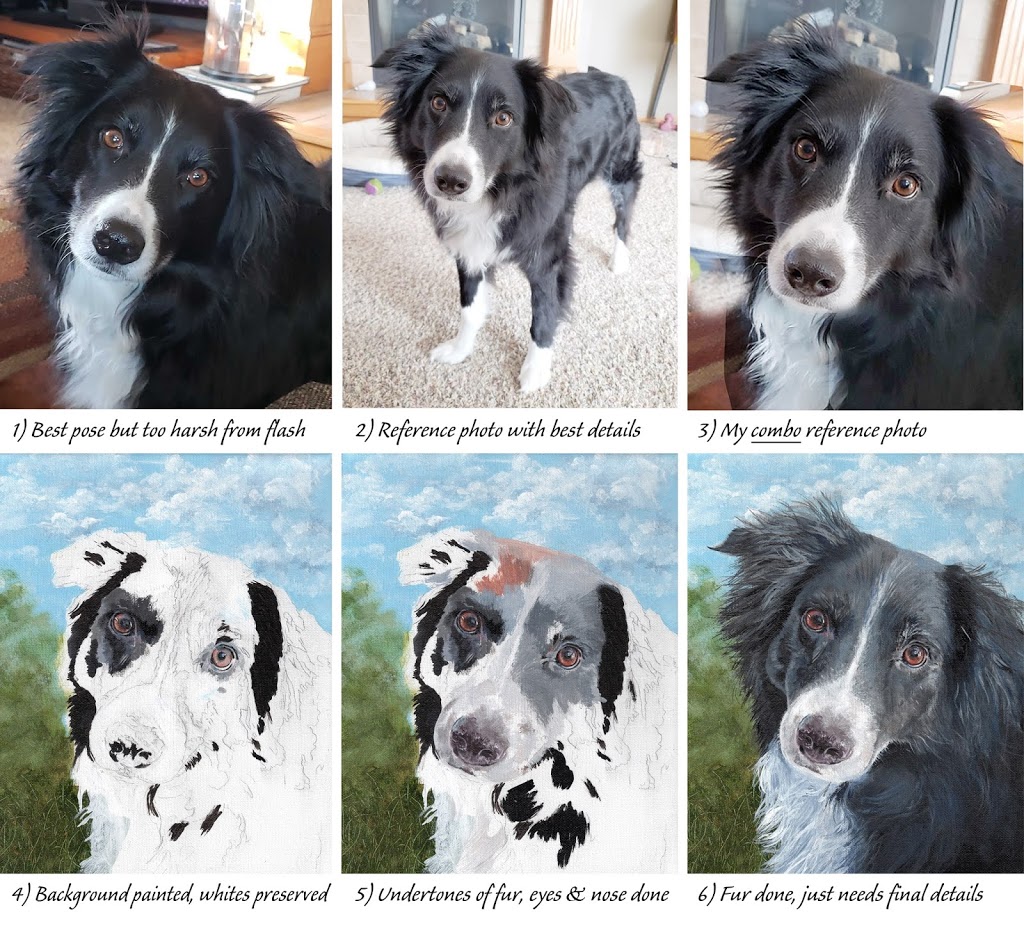
The eyes are one of my favorite parts of a portrait, since they make it come alive. This was even more true with Bandit, since the colors within his brown eyes where so different from the rest of the colors. Photo #4 got them established, photo #5 shows them done.
On many portraits, animal and human, I use a valuable technique I learned years ago…. turn the painting surface and the reference photo upside down and just concentrate on the shapes. It works! This technique blocks the brain from thinking "eyes" or "nose" and really helps you to get the features accurate. I struggled a bit with his nose until I used this trick; my first attempt had it looking very weirdly twisted! That's why I always do commissions in acrylics on canvas, since with that combination it is much easier to make corrections than with watercolor on paper.
From Photo #6 to the finished painting, shown at the top of this post, I primarily intensified the contrasts to add depth and definition, such as painting pure black on areas of his dark fur. I painted wisps of white fur on his neck, layering over my foundation coloring of mostly blue tones. For this I painted with white gesso, which I routinely use as a more opaque choice than even titanium white paint. Whiskers on Bandit's muzzle and above his eyes added the finishing touches.
P.S. I just heard this from my friend Erin, who had me do this painting as a gift for her sister in Texas, the mother of Bandit: "My sister received her painting of Bandy yesterday. She cried she loves it so much! Thank you again!"
