I’m relatively new to black scratchboard, having done my first one just 2 years ago. The lesson which follows does not adher to the purist’s guideline for scratchboard, as reflected in this definition by the International Society of Scratchboard Artists: “…Sharp tools are used to remove, or “scratch”, through the black ink, revealing the white clay underneath.” In this border I have not used any abrasive tools to remove the black layer (although I went on to do the artwork within the border conventionally.) All my art incorporates 40+ years of experimenting and learning, no matter what media I’m working with. Most of my art years have concentrated on watercolor on paper and acrylics on paper or canvas, and now I’m enjoying incorporating discoveries and techniques I’ve used with those media into my scratchboard art. Rules are made to be broken, right?!?!?
On a new painting on black Ampersand Arts Scratchbord™ I decided to add a french-mat style border, for an affect similar to what I recently did on Ampersand’s white Aquabord™ in “Rainbow Iris.” The steps below detail my method, as illustrated in the photo collage. (I promise to share the finished painting in my next post.)
The photos show my steps using a package of 3M Scotch Paint Striping Tape I’ve had for years. The roll is 40 feet long, so I’ll have it for many more! I don’t think the exact product still sold, but 3M manufactures another, improved, striping tape with options for how many or how wide you mask off fine lines, which would likely work in the same way as the one I used.
Here are details of my step-by-step photos:
1-2) My tape fit in a 1-1/16″ wide area. The black surface of Scratchbord is india ink, not soluble with water but removable with rubbing alcohol. I carefully masked around the area where I wanted my color border to appear, measuring in 5/8″ from the outer edges of the Scratchbord so my effect wouldn’t be covered by framing. To remove the black I used an alcohol wipe, sold for first aid. These small fiber squares are just slightly damp with alcohol, not so wet that it might seep below the masking tape. Wiping it carefully over the black surface dissolves and lifts off the ink, down to the pure white clay layer below. Removing the black surface this way results in a perfectly smooth white area, as Photo 2 shows.
3-4) I covered the big black area in the center of my panel with paper, to protect it while I applied paint to the border. Scratchbord takes many different media for adding color, and I chose watercolor in this sample – knowing I could wash if off if I didn’t like it! I mixed colors which would accent those in my painting, then applied them somewhat randomly with a coarse ‘elephant-ear’ artist sponge. I spattered color on with a toothbrush, and I left some of the white surface visible.
5) My striping tape has 3 parallel blue vinyl tapes held equidistant from each other by a clear top carrier tape. (NOTE: my tape is not symmetrical – the center blue tape is very slightly closer to one side than to the other, so I had to be consistent with how I laid down the tape.) I cut a strip slightly longer than each side of the border and carefully laid this over my dry colored border. I rubbed with a burnishing tool for maximum adhesion. On the corners, I laid a straight edge at a 45-degree angle exactly where the tapes met and used a sharp x-acto blade to cut through the two layers of striping tape. As a graphic artist from the pre-digital days, I honed my x-acto precision, constantly cutting and positioning type, tapes and films.
6) For the pinstripes I chose Ampersand’s Scratchbord/Claybord Ink, using one of six in the set which is called “Repair Black.” This ink matches that used by the factory on the black Scratchbord surface and provides excellent opaque black coverage. After pulling off the clear carrier tape, I applied the black ink over the striping tape with a small foam cosmetic wedge sold for makeup application, completely covering the two open stripe areas.
7-8) The ink dries quickly. Touch up is easy with a little brush and the black repair ink or a Pigma Micron black pen. It’s fun to pull off the masking tapes and discover the dramatic results!
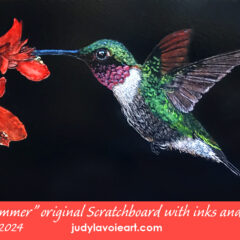
Watch this blog for my next post, my new scratchboard painting “Ruby Throated Hummer,” using this border method.


