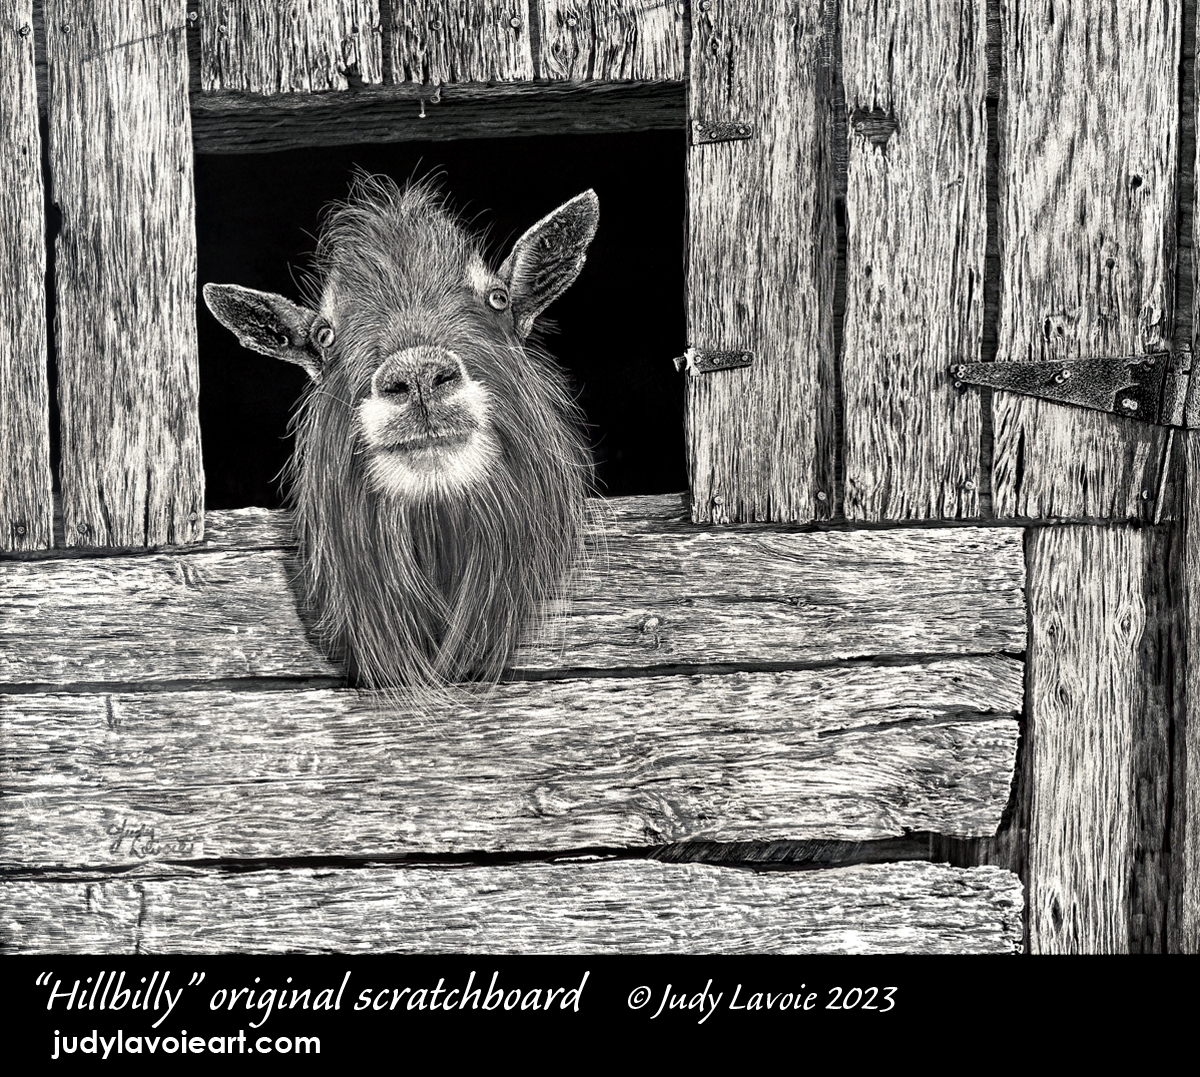
One of my newest scratchboards has been accepted into the 2023 Exhibition of the International Society of Scratchboard Artists. Members from all over the world will be featured at this 12th annual International Exhibition at the Arizona Sonoran Desert Museum in Tucson Arizona from October 14 - December 10, 2023. The scratchboard art in this show would take your breath away, it is so amazing. I am proud to have my "Hillbilly" among such great company.
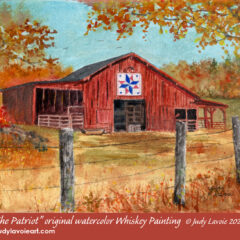
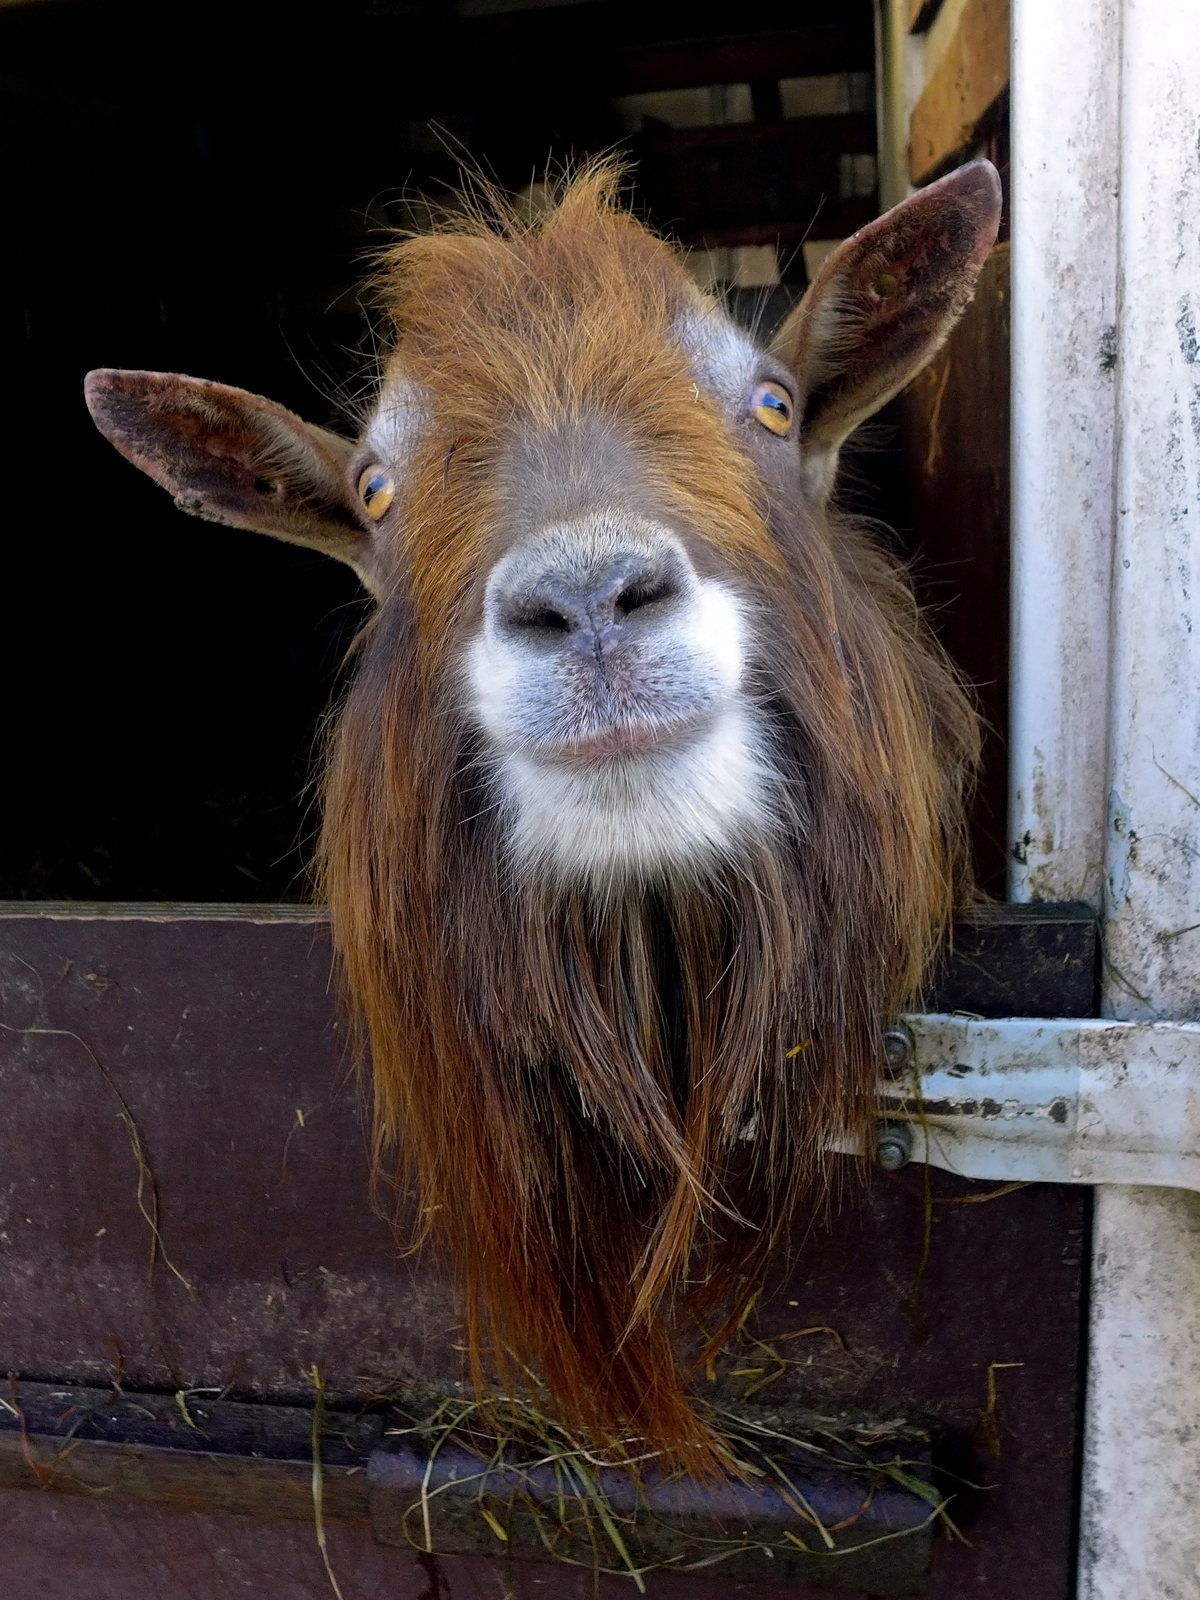
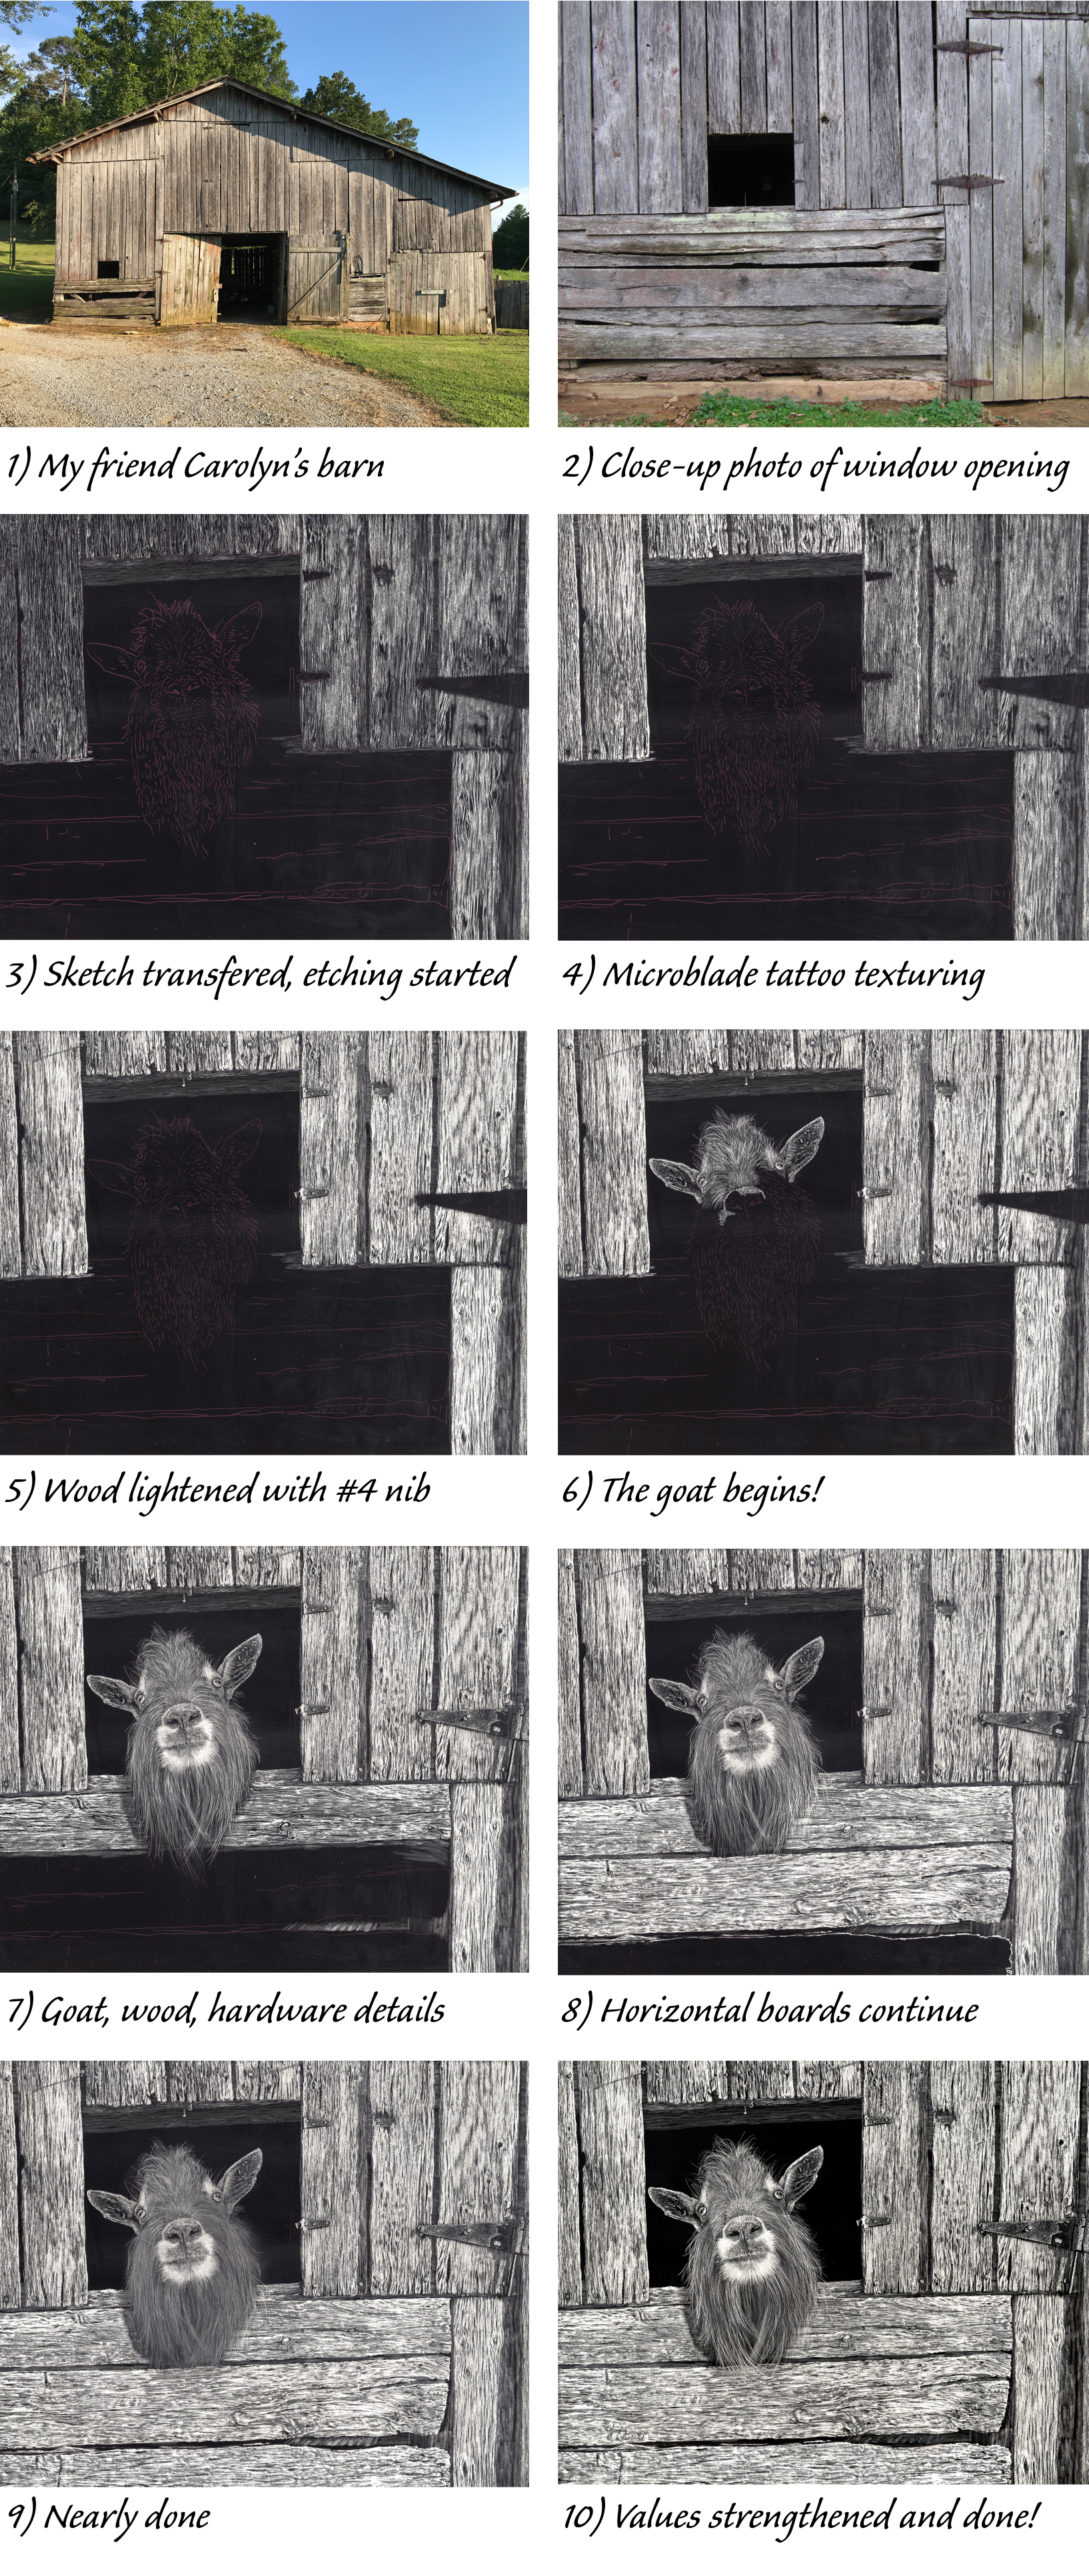
A fabulous goat photo planted the seed for this composition when I first saw it online in the work of photographer Edwin Butter. I used one of his other photos as reference for my earlier scratchboard painting “Wise Eyes.” I’ll never tire of depicting the old worn textures of aging barns, and a search through my own photo files gave me the perfect setting. I’ve taken numerous photos over the years of my friend Carolyn’s barn. The photo collage shows the interesting characteristics at one end, with doors, a window, broken wood, and rusty hardware. I altered the photo a bit in Photoshop to set the open window off-center while moving the interesting door hinge a few boards closer. The nails casting long shadows above the window were just the type of little detail I love to include in my work.
This art is created on a horizontal 8”x10” Scratchbord™ panel, which comes with a solid black surface into which I scratch with various sharp or abrasive tools to reveal the white clay layer below. In Photo #3 you can see I used red Saral transfer paper to mark my guidelines on the black board.
The barn is a medium shade of grey but I planned to lighten the value of the wood in order to emphasize the black window opening better. This would anchor the goat as the focal point of the painting. The barn boards went through layers of scratching, with each tool making a lighter value. Scratching in the direction of the irregular wood grain, I started with a pointed etching tool (aka scriber), which is like a sharpened pencil made of metal. I favor this tool, because the motion of using it is so natural. Photo #4 below shows the second pass, which was done with the multiple needle tip of a microblading pen used by tattoo artists, often for eyebrows. To reveal even more of the white under layer I scratched the boards again, this time using a curved #4 Essdee scraper blade. This layering brought me to the light grey value I had envisioned and allowed me to create the irregular patterns, voids, and wonderful jagged ends on the weathered wood boards. The texture on the hinges was primarily scratched with a stippling pattern (tiny dashes with any sharp point), and I payed close attention to capturing the screws and shadows, adding to the realism.
The goat himself was so fun to scratch, with light and dark fur, long and short. To make the fur look like it has thickness and dimension, I scratched in the direction of the hair growth, then darkened the white scratches with diluted black ink, then scratched again. This layering process developed a variety of values within the fur and creates great volume. I especially liked the front-on view, since the pupil in the eyes of goats is a weird horizontal slot rather than a circle as in other mammals’ eyes. The little tilt of his head adds more interest, as if he is curious of what he is staring at.
I tried a different clear spray coating on “Hillbilly” - Swiss-made Lascaux UV Protectant Spray. I chose they one labelled #3 (2074) which has a semi-matte or satin finish. This brand was recommended by other scratchboard artists and I liked its appearance on the finished art (see my technical notes below). I’ve framed my goat in a stacked frame, with a textured solid black outer frame and a slightly rustic white narrow inner frame. He is ready to premier in Arizona!
My Technical Notes on using Lascaux Spray:
- One aerosol can costs about $40, more than double the cost of Krylon UV Archival Spray
- Can says to spray 20-30cm from the art surface, which is 8-12”, and to apply thin coats, avoiding wet patches
- This has a strong odor, so use adequate ventilation
- The mist is very fine
- I applied 2 thin layers, letting it dry between, then 2 slightly heavier coats
- I couldn’t clean the nozzle by turning upside down (it kept spraying) as with other brands
Conclusions:
- I sprayed in my basement after 2 days of low humidity outdoors. A dehumidifier runs continually in the space
- I meticulously cleaned the scratchboard surface of all tiny specs and dust
- On a table covered with plastic, I lay the panel flat, elevating it on two sponges
- With each pass of spraying I alternate the direction and spray slightly beyond the edges of the panel
- The spray successfully blended areas of repair black ink and other spots which had looked irregular before spraying
- The unscratched black in the window opening looked even and perfect after spraying.
- The appearance after 4 coats, compared with scratchboards sprayed with Krylon UV Archival (2 gloss coats + 2 satin coats): the surface did not look as coated with Lascaux - I could still see scratched areas looking different than unscratched black.
- I finished with two more thin coats, for a total of 6
- I am happy with this product and plan to use it on future scratchboards