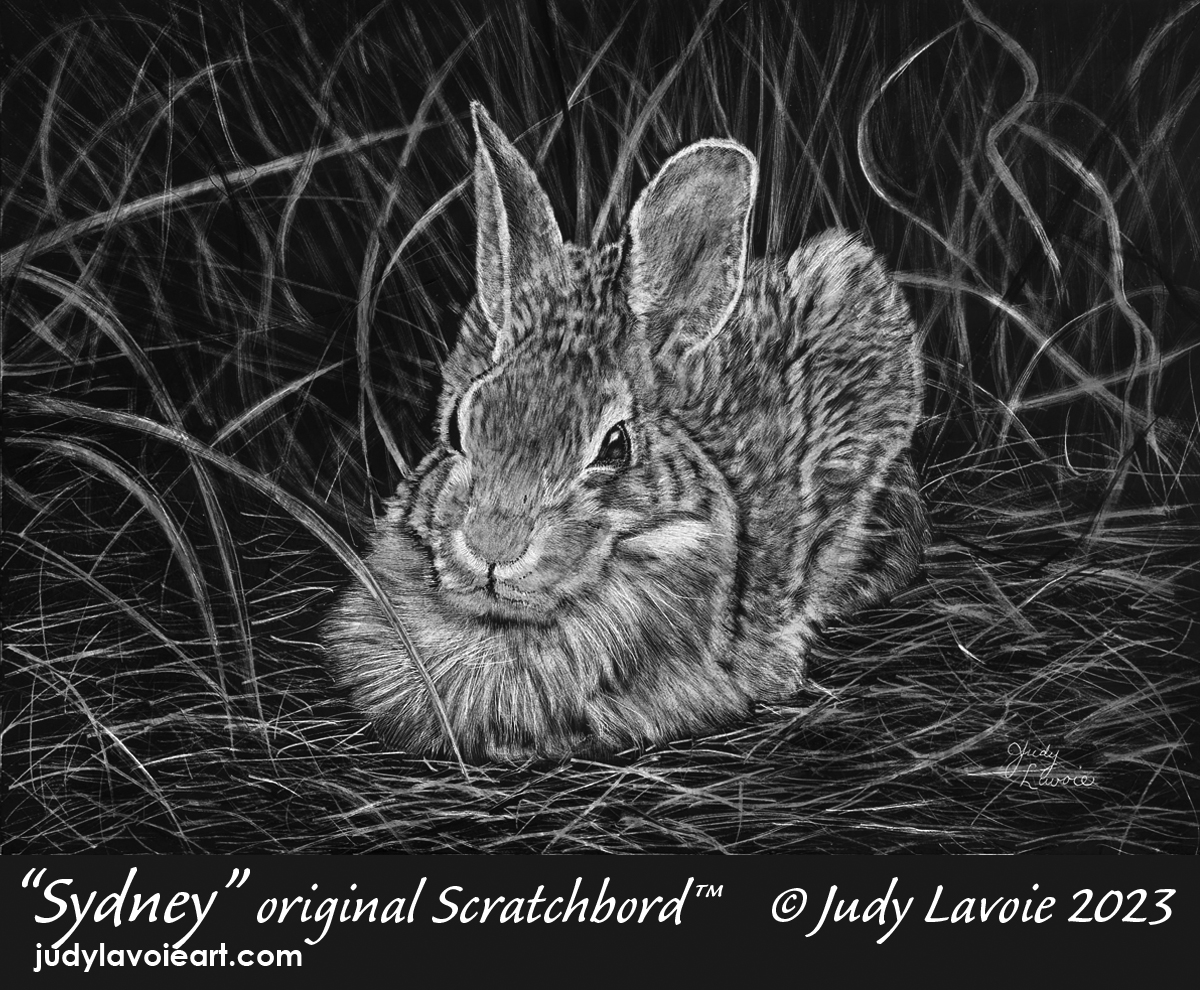
I’ve just added a rabbit to my list of scratchboard subjects. The soft and mottled fur screamed to be scratched and creating this 7” x 5” panel was great fun. Ampersand Art's Scratchbord™ is an ideal surface for realistic artwork of animals and birds, allowing textures and details to be beautifully rendered.
My very talented artist friend Laurie asked me to create a scratchboard painting for her from a photo she took while visiting Australia. Laurie is an award-winning painter, most recently concentrating her skills on trompe l'oeil paintings in oil.
From the original photo I cropped and composed a horizontal layout, a vertical layout, and an asymmetrical placement of the focal point, the rabbit. Laurie chose the horizontal layout with the bunny centered, snuggled in the tall grass. We were off and running (or should I say hopping?!)
I transferred the image onto my Scratchbord™ panel with blue Saral transfer paper. My initial scratches were fine and short, made in the direction the fur grows. For this I used a metal pointed tool called a scriber, made by General. This is sold as a machining tool or engraving pen. I enjoy using it because the replacable pointed tip and pen-style holder make scratching feel as natural as writing with a sharpened pencil.
Much of the rabbit’s body was scratched with another of my favorite tools, an extra thin fiberglass scratch brush. This tool also comes in a comfortable pen holder, with replaceable fiber sticks like leads in a mechanical pencil. Scratching my black surface with this tool creates a fuzzy white mark, about 1/8” wide. It is ideal for soft and blurry effects, vs. the hard edges of sharper scratching tools.
For the background grasses I used the two tools described above and two pointed nibs, as shown in photo 5. The red handles allow interchangeable nibs with different scratching effects, sold by a British company called Essdee. I used the #2 nib which is in a “v” point but slightly rounded at the very tip, and the #4 which is rounded on one side of the blade allowing a wider area to be scratched. I used the original photo as a guide for the direction of the blades of grass, but simplified it so there is enough suggestion of grass texture. It is best to save your most detailed sections of a painting for the main subject.
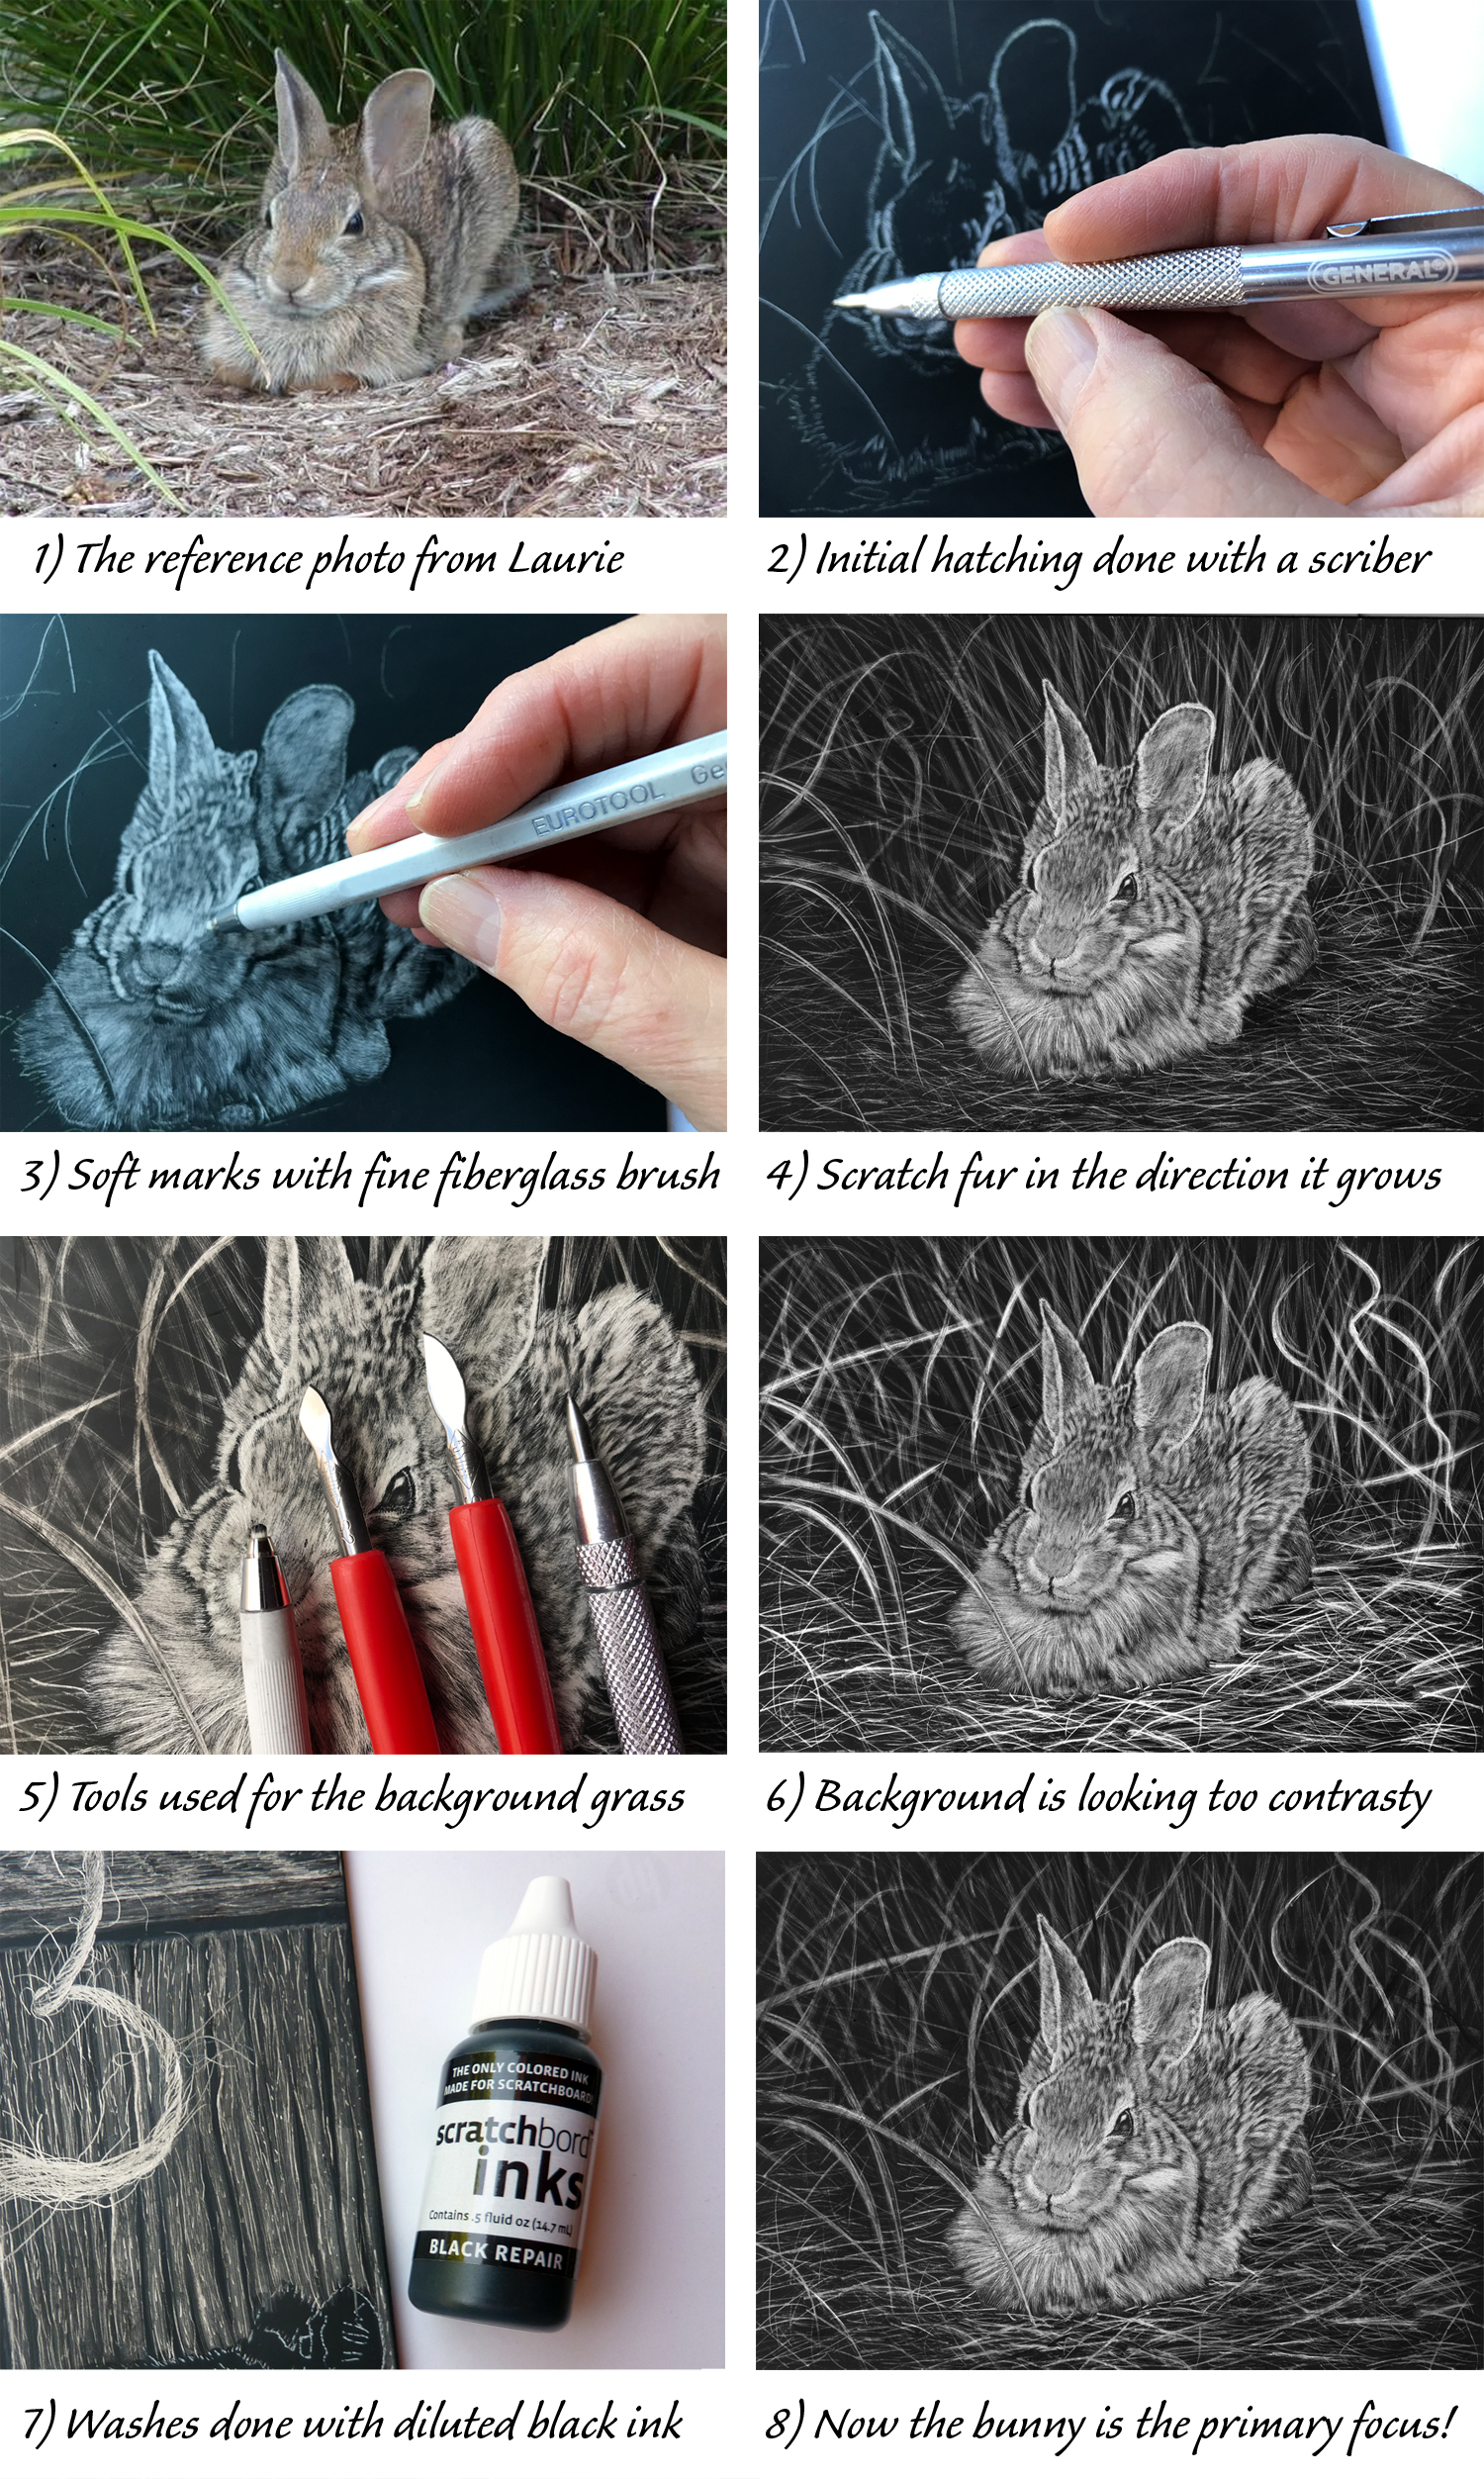
When I finished the background, it looked distracting and competed with my main subject, the rabbit. I knew that decreasing the contrasts of the dark and light values would “dull” the background by visually creating grey tones more toward the middle of the value scale. To do this I used Ampersand Art's “Repair Black” Scratchbord Ink, which comes in a set of 6 transparent water-soluble colors. I thinned the black ink with water and painted over the entire background, just as I would a glaze with watercolors. The effect is subtle, but it was enough to return the focus to the bunny. I declared "Sydney" finished and sealed the scratchboard surface with Krylon UV Resistent clear acrylic coating, doing two coats of gloss followed by two coats of satin finish.
Laurie is a special friend, very supportive of fellow artists, and I am proud to have “Sydney” in her fine art collection.